There are many jewelry that can be made from beads. Today, harnesses are especially popular. This is a dense cord of openwork or dense weaving. Its thickness depends on the number of loops in a row: the product is thicker if there are more loops. The number of loops depends on the number of beads in the first row of the future jewelry. Experts recommend using the required amount of beads in the base provided for each type of equipment. Are you going to weave a harness from beads? The circuit is the first thing you need.
Harnesses. History
In the old days, tows were woven with the help of several threads, getting a flat ribbon. After that, a cord was made by connecting the two edges of the previously obtained tape in length. Another way to create a tourniquet is to weave jewelry with beads strung on it. A crochet of beads was crocheted or tightly wound round to round with a cord, each adjacent round was sewn through one bead. Over time, the knitting of the tourniquet began to be carried out on one thread.
Today there are many options for harnesses:
- spiral;
- square;
- mosaic;
- openwork, etc.
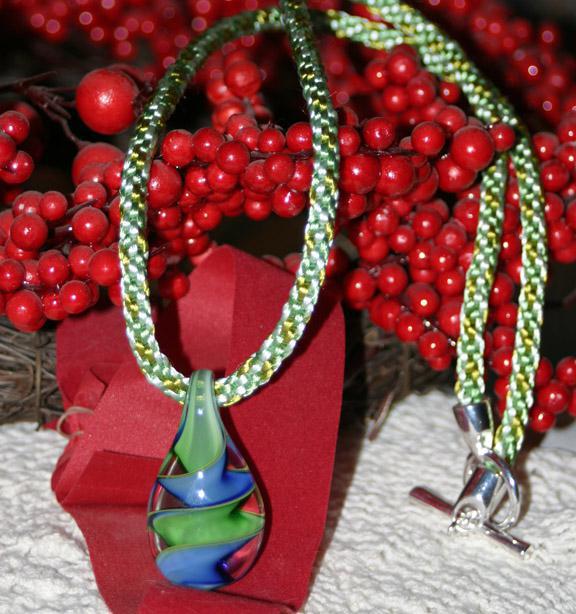
Crocheted beaded cord, patterns for which will help you make a real masterpiece, used as a separate decoration or used in the manufacture of others: ties, chains, pendants, double braids, etc. These products can also be used as additional elements in jewelry: rims , collars, pendants, earrings, etc.
Features of the manufacture of harnesses
Most types of tows are braided with a rod. An exception is mosaic weaving. A pencil or ballpoint pen of a suitable diameter can act as a rod. The shaft should not enter the inner space of the tourniquet very tightly. First, weaving without a rod is performed, after the 5th row, knitting is carried out along the rod. Remember that all beads must always fit snugly against each other, and the thread should not be visible. The voltage of the thread should also be monitored. It should be uniform. Otherwise, the surface of the decoration will be loose. Often weave a crochet of beads, patterns for which you can take not only ready-made, but also create your own.
The product must be in the left hand during operation. You need to hold it with your index finger and thumb. The string with beads should be on top of the index finger, slightly pressed with the middle. The remaining fingers should be pressed against the palm of the hand, pulling it in this way. Knitting a tourniquet is done clockwise. In this case, the tension will be uniform.
Making a mosaic tourniquet
Weaving a bundle of beads in a mosaic way involves the collection of the first row and its closure in the ring. Experts advise recruiting an odd amount of beads. Consider the weaving of the tow using a conditional example.
On a thread of 120-150 cm we collect 7 beads, for example, black, and pass the needle through the first bead. Remember that you should leave the initial end of the thread for further termination. Approximately 15 cm are left.
We stretch the thread, we get a ring. This is the first row of weaving.
To make a tourniquet, dial the second row. We take white bead and pass the needle through the third bead of the first row. After we collect another white bead and pass the needle through the fifth bead of the first row. Again we collect white bead and pass the needle through the seventh bead of the first row. A total of 10 beads. Woven already 2 glad.
We weave the third row, gaining 4 black beads. Remember that after each bead being worn, the needle should be passed through the protruding beads of the previous row.
Features of weaving
Continue weaving. In this case, you need to monitor the thread - it must be attracted. The bead cord, the pattern of which was taken into account during weaving, should not be too rigid. Bending should be free, so you should first make a sample on which weaving will be worked out. So you can easily weave a bead cord. A master class on this technique will clearly demonstrate an example of making a modern decoration.
Having trained on simple harnesses, you can move on to multi-colored schemes, creating patterns.
When weave a tourniquet of the required length, you should again return to its beginning. The first 5 rows of the product must be braided, because in this area weaving is loose. After that, the tourniquet is braided with a working thread to the desired length, given the rows removed. After weaving, you can begin to thread the thread.
If you want to make a harness from beads, the scheme of which involves a small length, for example, around the neck, then you should make a fastener. It can be woven, like a harness, or you can purchase ready-made fasteners, which are often sold in hardware departments. If you intend to make a long tourniquet that will be worn over the head, then you can connect its ends end-to-end or with a chain.
Characteristics of the mosaic tow
1. It is not required to collect beads in advance.
2. Used to make bracelets or beads.
3. The flatness of the surface of the beads is medium.
4. It is bent by kinks, flexibility - average.
5. Weaving is carried out with a needle and thread or beads sequentially clockwise.
6. Inside is hollow.
7. You can easily create a drawing by first drawing a diagram.
Thread closing
The weaving of a string of beads should suggest the presence of a strand 15 cm long first. This thread must be inserted into the needle and carefully passed through some beads in a spiral of the product. After the thread has passed through 4-5 beads, you should gently hook the thread between adjacent beads with a needle and make a loop knot. After that, pass the needle through the next spiral bead and again, using the adjacent thread, create a looped knot. This should be done 2 more times.
After the needle, you can skip over two beads and cut it, leaving a tip of 5 mm. It should be fused with the back of the match flame. Thus, a small ball is formed at the end of the thread, which will fix the thread and will not be visible. The second end of the thread should be sealed in the same way. Thread extension is the same. This method completes the bead harness. The master class presented in the article will help each person quickly understand all the intricacies of weaving this jewelry.
Remember: if the beads are light in color, then it is impossible to melt the thread in any case, because a yellow spot will remain. In this case, you just need to make more knots, and cut the thread under the root.
Butt joint
If you are going to close the ends of the bundle end-to-end, then you do not have to close the working thread. It can be used to connect the ends. The initial segment should definitely be repaired by the above method.
To connect, you should fold back and forth on the table both ends of the harness. The picture must match! The needle should be threaded into the protruding beads alternately from one end, then from the other. The thread should pass this way twice. After the needle should be passed through the beads in a spiral, using looped nodules, as in the previous method of termination.
Remember that no knots or threads should be visible. Knitting a bead cord at this stage should be done very carefully. The basic rule in beadwork is the purity of the product.
Having learned how to correctly connect the bundle end-to-end, you can make a decoration in the form of a chain. It is enough to connect each subsequent link made using the harness technique in this way.
Conclusion
A harness made of beads, the scheme of which was fully observed during operation, can be decorated at the end with balls, pendants, loops. Or as an option - to braid a product with a chain. Often used and a necklace of two bundles of different colors. You can complete your image by making an additional bracelet or earrings in the same way. So you get an elegant kit.