Our ancestors bequeathed to us a lot of wisdom. But we do not always take it seriously, considering ancient proverbs and sayings only funny phrases. But many of them, including an instructive expression about the sleigh, which is the most reasonable to cook in the summer, remain relevant to this day.
That is why in this article we offer the reader to study master classes in knitting mittens with knitting needles. Thanks to step-by-step instructions, even beginner needlewomen will be able to cope with the work.
Measurement Technology
One of the first steps preceding the direct execution of mittens is very important. And in many ways it is he who determines the further outcome of the case. Therefore, it is highly discouraged to treat him negligently or carelessly.
At the preparatory stage, you should take measurements from the palms on which it is planned to make mittens. In order not to make a mistake and determine the correct parameters, it is necessary to prepare an elastic centimeter, a leaf and a pen. For convenience, it’s best to place your palm on the paper and outline it. And then, on a sketch, paint the values of interest, so as not to get confused later.
So, before you start knitting mittens, you must perform the following steps:
- First, measure the girth of the wrist. This parameter is necessary so that the elastic band or cuff of the mittens does not press and dangles.
- Then determine the length of the brush from the tip of the middle finger to the wrist. Without this value, it will be difficult for us to complete the final part of the product.
- Then find out the girth of the hand - the girth of the palm directly above the thumb.
- Finally, we only need to measure the distance from the wrist to the base of the thumb and the length of this finger.
After all the important parameters are determined, we proceed to knitting mittens.
A few words about the preparatory phase
Perhaps some readers have a question “why do we take the previous measurements?” After all, we will knit, not sew. Therefore, various values in centimeters will not help us much.
However, this is not quite true. Indeed, thanks to the main parameters that we took earlier, we will be able to determine the desired number of loops for the set. This will allow us to pre-calculate the size of the mittens. That's just not simple, but one that is measured in loops and rows.
So, in order to carry out an important task, you must clearly follow these steps:
- First you need to choose the pattern that you plan to use for knitting mittens. Best of all on products of this type look various braids and plaits. Or a mixture of both.
- Then purchase the right yarn from the store. It is important to consider what season you need mittens for. Winter options are more popular. For them, knitting threads should be selected from wool, angora, alpaca and merino yarn. But they also have a place in the wardrobe of many fashionistas and autumn-spring products. For them, it is wiser to pick up lighter threads. For example, plush or acrylic.
- It is also worth paying attention to the tool. In our case, we are talking about knitting needles. Out of the abundance of varieties, one should dwell on hosiery. The material from which they will be made, you can choose yourself. However, according to the masters of knitting, it is more convenient to perform mittens on metal. The thread slides on them, which allows not to tighten the loops too much. And with this problem, beginners are most often tormented.
How to calculate the correct number of loops and rows
After the necessary tools and material are prepared, the measurements are taken, and the pattern is selected, it is necessary to link a small fragment of the pattern. Depending on the picture, it can be a size of five centimeters in length and height. Closing loops is optional.
When the previous step is successful, you should again pick up the centimeter. And then measure the length and width of the resulting fragment. Write the values on the sheet and next indicate the number of loops and rows.
Important: if you plan to use two patterns in the knitting of mittens with knitting needles (cuff and main part), two fragments with the corresponding pattern should be made. And for each count the number of loops and rows.
After the above steps are completed, you should go to the calculations and divide: the number of loops per length; number of rows per height. As a result, we find out how many, according to the selected figure, loops and rows in one centimeter.
Next, we need to multiply these values by the parameters taken earlier. The main thing is not to get confused when to multiply the loops - A, when the rows - B: the girth of the wrist, the circumference of the hand by the amount of A; distance from the wrist to the base of the thumb, thumb length, brush length by B.
How to tie a cuff
There are many models where the main pattern - the pattern - starts right from the wrist. However, in this case, the product under study can slide. Because the cuff is not only a beautiful finish, but also a kind of mittens holder. Nevertheless, if you still really want to do without it, you should buy two sets of hosiery knitting needles. Additional should be one size smaller than the main ones. And it is on them that knitting mittens should be carried out with a pattern starting directly from the cuff.
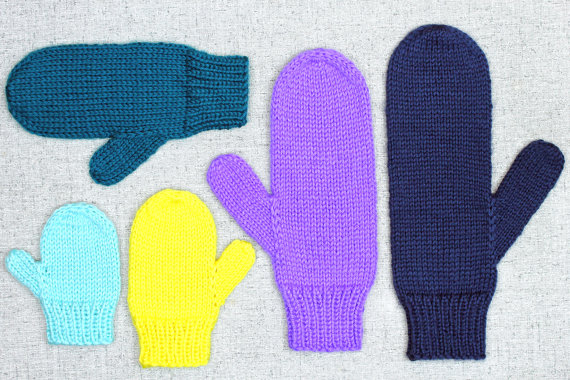
If the reader wants to please himself or his loved ones with products similar to those shown in the next photo, he can not do without performing the cuff.
In fact, it is very simple to do. You only need to dial the number of loops that you get when multiplying parameter A by the circumference of the wrist. Then distribute them on four knitting needles and with the help of the fifth knit an elastic band, alternating purl and facial loops. And the best option is gum 1x1 and 2x2. They look very gentle and perfect for mittens.
How to tie the bulk of the mittens
After we have completed the cuff of the desired height, we should again turn to the calculations. After all, the girth of the palm is much greater than the circumference of the wrist. Therefore, further when knitting mittens with needles, you will need to add several loops. Their number is very easy to find. You just need to multiply the parameter A (for the main pattern, it should be your own) by the girth of the brush. Subtract the number of loops in the current part of the product from the resulting number. The final figure is the required number of loops for dialing.
However, they should be distributed evenly. To do this, divide by the final number the number of loops that we calculated for the wrist. As a result, we will find out after approximately how many loops we should add air or crochets.
After we introduce additional loops, we can proceed to the implementation of the main pattern and the main part of the mittens. Master classes in knitting various patterns, which we will give a little later, will tell you all the subtleties. So that even inexperienced knitters coped with the task.
In addition, it is very important not to forget to make a hole for the thumb. In more detail about this stage we will tell further.
Thumb Knitting Options
There are two ways to complete this piece of mittens. The simplest is to knit as many rows as we determined by performing the following calculation: multiply parameter B by the distance to the base of the thumb. After that, we lift the larger canvas into four rows. But we are not moving in a circle, but back and forth. To snap a thumb hole.
It is also important to pay attention that on the inner side the front loops will become seamy, and the facial ones - vice versa. Therefore, the pattern should be performed accordingly.
Then close the ring again and finish the product. And we knit the thumb mittens separately. To do this, we need a hook that needs to be dialed around the edge of the loop. After transferring them to three knitting needles and using the additional one raise to the desired length - multiply parameter B by the length of the finger.
The second way is a bit more complicated. But in this case, the mittens are more interesting. And according to many knitters, it is much more convenient than with the previous version. And all because the product is not made with a canvas of the same width. We knit mittens with a wedge for the thumb. In any case, the reader can try both methods and determine the most suitable for themselves.
The instruction on how to make a wedge is a bit more complicated, so we present it in the form of the next video.
Mittens closing technology
In addition to all of the above, it should be noted that, having knitted ¾ of the entire product, not counting the cuff, it is necessary to start gradually reducing the loops. But in order to make the tip of the mittens beautiful, it is important to reduce the loops correctly. And here we again have to turn to calculations:
- To begin with, we again take a centimeter and determine the length of the already connected part of the product.
- Subtract the found parameter from the brush length.
- Multiply the resulting number by B.
- As a result, we find out how many rows separate us from the end point of the mittens.
- Now subtract three loops from the total number of loops.
- And divide the final value by the number of rows.
- Thus, we find out how many loops in each row we should reduce. However, it is important to note that they must be distributed evenly.
Having determined for ourselves the knitting pattern of mittens, we proceed to its execution. When at the end there are three treasured loops, we break off the thread, again grab the hook in our hands and carefully pull it through the loops. Tie and hide from the wrong side of the product.
Elegant lace mittens
If you want to acquire the studied wardrobe item, which is suitable for the spring-autumn period, you should execute the following pattern.
It is performed quite simply. But it looks spectacular and expensive. Suitable for knitting mittens and beginner craftswomen, and professional needlewomen. However, when studying the illustrated pattern, it is important to remember that we will knit the product in a circle. And this means that there will be no edge loops in mittens.
Mittens with "locks"
The following pattern is interesting in that it is based on the most ordinary gum. However, it looks very interesting. It is perfect for mittens. And for both light and warm. But for the latter, you still need to sew an additional fleece or other lining so that the handles are not blown.
You can view the progress of the drawing in the video below.
Mittens with plaits
Another interesting workshop will tell the reader how to make fashionable mittens with plaits. After all, it’s they who for several consecutive seasons have not lost ground in the ranking of all fashionistas and women of fashion.
The scheme of knitting mittens for this technology is quite simple. But to make it clearer, we suggest taking a look at the detailed video. In this case, a wonderful product will turn out even for beginners.
Mittens on two knitting pattern with braids with shadow
If you wish, you can try to perform a more complex pattern, which consists of braids. It looks interesting, but detailed and step-by-step instructions are needed for execution.
After studying the video, where it is described in detail and shown how to make the specified pattern for knitting mittens, you will be able to please yourself and your loved ones with an original new thing.