Before winter comes, it's time to think about whether the child has warm clothes in the cold season. This applies not only to mittens, socks, but also to hats. Of course, you can easily buy what you need in the store, but it can happen that several children will put on exactly the same things. Every mother dreams that her baby has something original, nothing is easier! The article will tell you how to tie a Bear cap for a boy (although such a model is also quite suitable for a girl).
Before you take on the knitting needles ...
First of all, you need to take care of the correct taking measurements from the child. This is pretty easy to do. The basis is the girth of the head, or its circumference. Here, a centimeter tape comes to the rescue, it surrounds the head above the superciliary arches and passes over the baby’s ears.
In some cases, you will need to calculate the girth of the face. You need to measure the distance from the earlobe on the right side to the left earlobe. It is worth noting that such measurements are mainly required when making a hat-scarf or cap.
Next, you need to determine what height will be the headdress or children's hat with ears (knitting needles). By the way, some craftswomen reduce the bottom of the product several rows before the end of knitting.
What patterns will be involved in the work?
In this example, there are two types of knitting, represented by pearl patterns and facial smoothness. First of all, loops are calculated specifically for the pattern, which is associated with its density, and besides, it practically does not stretch. But if you take the facial surface for calculation, then, most likely, you can eventually get a smaller cap.
Knitting technology
The loops on the Bear cap at the initial stage are double-stitched to avoid pulling wool around the edges. For a simpler understanding of the work, you should know a little subtlety. Each headpiece can be divided into several components:
- the first part is tightly wrapped around the head;
- the second may lie on the head, but it can also be made somewhat wider than the first, but not by any means;
- on the third part, loop reduction begins.
Step-by-step instruction
For simplicity of explanation of the work on the “Bear” hat, certain specific values will be given, and each craftswoman will have individual values.
- 86 pieces of loops are gathered, and a pearl pattern is knitted to a length of 7 cm.
- At the next stage of the children's hat with ears, knitting needles, you already need a facial surface, with an approximate length of 5 cm, and if you count in rows, then there will be ten.
- Here you need to start reducing loops. Every second row is counted, and there the first two loops are knitted, as well as the last pair together. In the middle of work, each 9 and 10 loops are knitted together, the next second row should be with 8 and 9 loops knitted, the third with 7 and 8. The work is performed until all loops are knitted in pairs. Those loops that remain are transferred to the needle with the thread inserted into it and pulled together.
- Thus, the main part of the cap is connected. Now you need to try on the blank for the child and determine where she will have ears.
- Loops in the amount of 18 pieces are drawn from the edge, and the next 10 rows should consist of a pearl pattern. Here you do not need to reduce the loops, this is done from the next row. Decrease comes from each side of the ear (one loop is removed, the next two are knitted, then there is just knitting). As soon as three loops remain until the end of the row, two of them need to be knitted, and the last is processed in the usual way.
- You need to reduce the loops until the moment when two pieces remain on the spoke.
- Then you need to do knitting lace ties. There is nothing complicated, the work can be done in any convenient way.
- The second eye needs to be done in the same way as it was already described above, and also to finish with a drawstring.
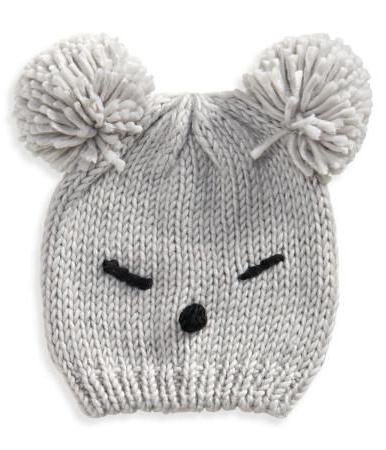
How to make bear ears?
To achieve the goal and get the Bear cap, you have to work a little more.
Each ear will consist of 14 loops, which are made using the pearl pattern technique. You need to reduce the loops at that moment until 8 pieces remain on the spoke. They need to be pulled together, and the element itself is stitched along the seam located on the side.
At the end of knitting, it will remain to sew them on a hat. So, the “Bear” hat, made by yourself, is almost ready.
What else is missing?
To make the hat look exactly like a teddy bear, you need to make a muzzle on this cute animal. Here you already need a hook and black wool.
To make the bear’s nose, you need to collect air loops in the amount of six pieces. The chain is tied with columns around the circumference, no need to do yarn. At the ends the loops will be knitted into one loop in a chain. There should be four such rows.
To complete the work, knitting goes to the central part of the part, then one column is made with a cape. Then you need to knit to the other side. Here the thread breaks, and the tip is hidden.
Making eyes is also quite simple. Two circles of white and black are knitted, and the second should have smaller sizes. Then the black part is sewn on top of the white, and together they are fixed on the cap in front.
Little tip
You can decorate the hat with a pair of pompons that will be attached to the laces-ties. Here we need wool "grass". And the work is done as follows:
- you need to dial air loops in the amount of 5 pieces;
- connect the resulting chain into a ring;
- knit around the circumference with single crochet, adding to each row a pair of loops;
- such rows will need 4 pieces;
- loop reduction of 2 pieces in a row, until the work is completed with one loop;
- break the thread, stretch through the loop and fasten.
The resulting pompons are sewn to the hat.