More and more often in houses and apartments you can find a southern beauty - an orchid. Many believe that it is very difficult to care for her, but in fact, creating the right conditions for her to grow and bloom is not so difficult. True, it is better for beginning flower growers to opt for the most unpretentious option - phalaenopsis. The main thing is to provide him with a sufficient amount of light, not to flood with water and to protect from drafts.
But it is equally important to know how to transplant an orchid at home. Many decide to do this as soon as they bring a flowering plant home, but this is not worth it. Set aside these chores until the plant has completely faded. After that, cut the flower stalks and start studying the next material, which details how to transplant an orchid after flowering.
First of all, you need to choose the right pot. In no case should you take the most popular clay or plastic opaque options from us! This plant needs light access to the roots, so it is important to know where to transplant the orchid. It is only necessary to choose plastic or glass flowerpots, it is advisable to dwell on completely transparent or light options, because dark walls let in sunlight less well. At the same time, pay attention to whether there are drainage holes below. Without them, water cannot drain, and the roots begin to rot.
If you want to know all the intricacies of how to transplant an orchid at home, then keep in mind that there are many of them. Pay special attention to the ground. Ordinary land is not suitable for this epiphyte, therefore it is better to purchase a special mixture for it, which consists of tree bark and sphagnum.
Before starting the transplant process, water the orchid abundantly with settled water, making the roots easier to separate from the walls of the pot. Prepare everything you need in advance: a new pot and soil, drainage (expanded clay is ideal for these purposes), a sharp knife or scissors, it is advisable to prepare still crushed activated carbon.
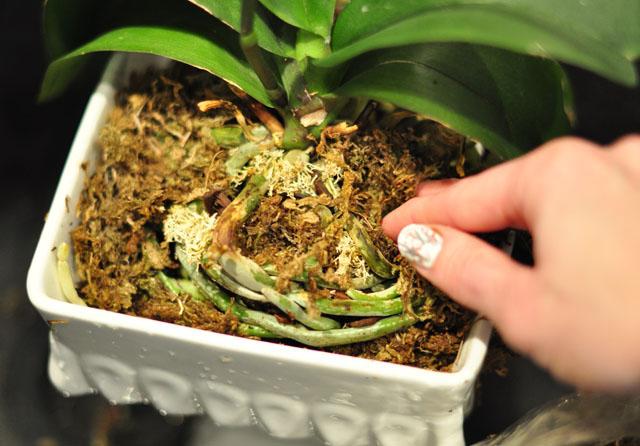
After removing the flower from the old pot, remove the remaining substrate. You can rinse the roots with slightly warm water. But you can leave a small part of the old soil. Many gardeners say that this will help the orchid adapt faster in a new flowerpot. Before planting, carefully inspect the roots, remove all the hollow pieces, you need to trim and soft rotted parts of the roots. Sprinkle all wounds resulting from the treatment with prepared coal powder. This is an important condition for how to transplant an orchid at home correctly. Do not skip this step. After all, just such a treatment allows you to disinfect root sections from various types of spoilage and bacteria. After that, carefully place your epiphyte in a new pot, by the way, it should be slightly larger than the previous one. Do transshipment carefully, take care not to crush or break the roots of the flower.
If you know how to transplant an orchid at home, then starting this process will not be so scary. The main thing is to try not to damage it, then you will have a good chance that after this procedure she will very soon please you with new peduncles.