For beginners, the papier-mâché technique is considered affordable and easy to use. The work consists in the manufacture of various figurines, dishes, home decor items from layers of paper. There are several different options for performing such creative crafts, each of which we will describe in detail in our article.
The word papier-mâché is of French origin and is translated as “crumpled paper”. Now it is a whole art, teaching the basics of which begins even from the senior preschool age in kindergarten and continues in elementary school. Young children work with junk material. This may be an old newspaper or magazine, unnecessary brochures or toilet paper. For children to connect the layers, the teacher brews a paste of ordinary wheat flour.
Adult masters most often use paper clay when creating crafts, which is created independently according to the recipe described below. Thus, any sculptural form can be made using both the drawn contours and the base of cardboard, wire, plastic bottles and other convenient material.
The papier-mache technique for beginners is also good because it is a budget option for translating creative ideas. After all, there is old paper in any apartment, and paste can be cooked in just a few minutes, having only 1 tablespoon of white flour. Experienced craftsmen use PVA glue with several additives. Finished work, after final drying, is colorfully decorated and serves as a decoration of the room.
The first stage of learning technology
Crafts from papier-mâché do it yourself are best learned to do on simple grounds. For example, using a flat small plate or a glass with rounded edges. Such work can be done by children in the older groups of the kindergarten. Preparatory work will be required for both children and the educator. Preschoolers are given sheets of newspaper or tissue paper and deep bowls. Following the model of the tutor, the guys tear the paper into small pieces or thin strips and put small parts into a container.
The teacher pre-brews a paste from flour for papier-mâché, since it is used only in chilled form. Then it is poured into small bowls for each child separately.
To prevent paper from sticking to the base, such as a plate or glass, its surface is lubricated with vegetable oil or wrapped with cling film. Still need to cook a saucer with plain water. The first layer of paper does not stick to the base, but simply wet pieces of paper are applied. To do this, the child takes a strip, dips it completely in water, gently lifts it above the plate so that the glass is excess moisture, and puts on the surface of the base greased with vegetable oil. Pieces need to completely fill it. Further work is already done with a paste. Consider how to properly brew it.
Papier mache flour paste
For a little work, it will be enough to brew 1 liter of paste. In a small pot, draw ¾ liter of water and put it on fire. At the bottom of the glass, place 1-2 tablespoons of wheat white flour and fill with a thin stream to the top with warm water. To prevent lumps, constantly stir the liquid with a spoon. Mix the contents of the glass with the rest of the water in the pan and continue to cook the paste, remembering to stir occasionally.
When the consistency of the solution has reached a jelly state, turn off the fire and continue stirring for a while. It must be borne in mind that the paste immediately after brewing seems more liquid than we need to work on crafts, but as it cools, it thickens. If you accidentally digested a paste and it turned out to be too thick, then it can always be diluted with water to the desired consistency. To cool, put the pan in a cool place, for example, it can be taken out to the open balcony. When the paste has cooled, it can be poured into a bowl that is convenient for work.
How are the layers laid out?
Do-it-yourself papier-mâché crafts are made in several layers. The more of them, the stronger and stronger the figure will be made. If you glue the surface of the base in just 2-3 layers, then the figure will be easily deformed. Therefore, it is minimally recommended to apply 5-6 layers of paper. When pasting is carried out only with a newspaper, it is hard to understand when the layer is completely filled. It is advisable, especially for children, to lay out layers of paper of different colors. For example, the first is a newspaper, the second is a white sheet of A-4, torn into pieces.
As already noted, the first layer is applied from wet paper. For the second and all subsequent pieces, instead of water, they are lowered into the paste. You can use a brush or spread the surface of the craft with a powdery mixture, and then put dry pieces of paper on freshly applied paste. However, the brush can be useful in this option. In the event that the strip overlaps another, and there is no glue at the junction, then you need to add it with a brush, smearing the desired part. In order for the work to dry faster, it is best to apply a paste on a thin layer. The top surface of the craft remains intact. The finished figure, along with the base or frame, is set to dry. The room should be well ventilated. In the summer, work will dry faster on the windowsill, and in winter - not far from central heating batteries or a working fireplace. Do not rush to remove the crafts from the basics. Work can be dried from several days to a week, depending on the thickness of the layers and the amount of paste. Only a completely dry craft can easily be removed from the base, and it can be decorated further.
Using toilet paper
There is a papier-mâché technique for beginners using toilet paper. Only single-layer and unpainted paper is suitable for work, without any dyes or embossed pattern. It is soft and supple at work, swells well, quickly gets wet, and the craft looks smoother and more even.
Sometimes masters use thin white napkins instead of toilet paper. The work is carried out on the same principle as the papier-mâché technique described above for beginners, namely: the first layer is applied on water, and the rest with paste or PVA glue.
Paper Clay Recipe
Experienced craftsmen make complex sculptures of any configuration and size using paper clay. They also make it from toilet paper without dyes and fragrances.
To prepare the material for sculpting, you need the following ingredients:
- 1 roll of single layer paper.
- ¾ cups PVA glue.
- 2 tbsp. l any mineral oil, such as petroleum jelly.
- Half a glass of wheat flour.
- For mixing use a mixer or blender.
- Water for soaking toilet paper.
- Capacity.
Cooking material
To start making papier-mâché from toilet paper, a mixture is prepared for work. In a large bowl, put the whole roll without a cardboard sleeve. It can be carefully removed with a crumple or work hard and unwind the entire tape manually. Then the paper is poured with water so that it covers it to the very top. Do not spare water, as all layers should be saturated. Leave the workpiece until completely wet.
When the paper swells, directly squeeze out all the liquid with your hands, and transfer the resulting pulp to another container. Add the remaining ingredients and mix thoroughly using a mixer or blender. You can not replace components with similar ones, as this will affect the properties of paper clay. The material should have a uniform consistency and resemble sour cream.
If the craft requires a denser structure, then add another half a glass of white flour and mix further.
Making flat figures
Using technology, papier-mâché can be done on a plane and on any volumetric basis. If you want to make a planar image, then draw its contours on a sheet of cardboard. Prepare the required amount of paper clay of the desired consistency. For the main work, you need thicker clay so that the edges of the craft do not blur until the mold solidifies.
Spread it in layers and allow each layer to dry well. If you immediately lay out paper clay of the selected thickness, then the craft will dry for a very long time. And layering material will speed up the process significantly. When the base is ready and dried, work on leveling the surface.
How to align papier-mâché
In order for the surface to become even and smooth, it is necessary to use grout from the liquid composition. She filled all the cracks, recesses and bumps in the figure. Since the alignment is carried out in a thin layer, drying does not take much time. After that, additional sanding with fine sandpaper, for example No. 100 or 180, will be required. Wipe the surface with a dry cloth to get rid of the paper dust that has formed.
How to align a craft from pieces of paper
We considered the option of rubbing surface roughness with liquid paper clay. If the work is done by gluing the base with pieces of paper, then after complete drying, the outer part of the craft must be coated with a rather plentiful layer of PVA glue. If the angularities are too visible, then first pick up small, small pieces of tissue paper and fill in all the recesses and slots. Then act with a brush and glue.
Easter crafts: master class
One of the most popular crafts among craftsmen is an Easter egg made of papier-mâché. Do not be surprised, but take a small balloon as the basis. It is inflated and knotted over the edge. The egg-shaped form is wrapped with cling film and pasted over with either pieces of paper or with thin toilet paper or napkins. The space around the knotted edge remains unused. To make the paper dry on all sides evenly, the glued ball is placed with the narrow side in any glass or cup. In a vertical position, withstand the workpiece until completely dry.
When the layers have hardened, the rubber of the ball is cut with scissors and through the hole left unused during gluing, the remaining rubber and cling film are removed. If you need a whole papier-mâché Easter egg, the hole is sealed with pieces of paper and put in the back of the glass for drying.
Often, on Easter, in this technique whole compositions are made by cutting a large hole in the front of the egg. Green sisal threads imitating spring grass are laid out inside, and painted or painted eggs are laid out on them already. It turns out very impressive and original. You can seat a chicken or a bunny, place flowers or insects.
Volumetric figures
Crafts from papier-mâché at home are often performed on some basis. It can be dishes or a vase of any shape with smooth walls. If you glue a voluminous object, then you can remove dried papier-mâché only by cutting the workpiece on one side. After removing the base, the incision must be carefully sealed both inside and out.
You need to act carefully so that the edges of both halves match exactly. If the trace of your actions is still visible, then fill the slot with liquid paper clay. Coating with a mixture is carried out with smoothing movements of the fingers.
Waste material or wire base
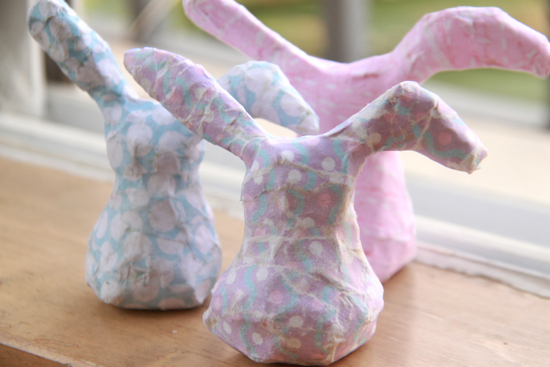
In the manufacture of the figures of a bird or animal as a frame, you can use several bases, interconnected by tape or masking tape. So, for example, a vase can be made from a balloon and a paper cup attached to its top.
Use cardboard sleeves from toilet paper or kitchen napkins, parts cut from corrugated packaging cardboard or wire frame structures. So that they are voluminous, several turns of fabric, bandage or masking tape are wound on top of the wire and wrapped with cling film.
Then the entire surface of the frame is glued with pieces of paper or paper clay, and in layers. When the figure has turned out to be of the desired shape, its outer shell is overwritten, leveled by the methods described above and prepared for painting.
DIY decoration
We have already learned the basics of papier-mâché technique. The beginning of crafts is sticking layers of paper on the frame. The end of the work is the decoration of the finished structure. Use gouache paints for children's work. The first layer can be filled with the background color, and then draw an ornament or small details of the figure with a thin brush. When the paint dries, the craft can be coated with acrylic varnish so that during the game the paint does not stain the child’s hands, and the figure will be brighter, with a glossy surface.
If you are seriously fond of papier-mâché, then the figure is made strong and covered with acrylic paints. This craft can be used as a home decoration or as a garden figure.
Now you know how to make do-it-yourself crafts from papier-mâché. Master classes are given in the article. This work is painstaking, but interesting and creative. Try yourself in a new art form! Have a good start!