Geysers are considered one of the cheapest ways to solve problems of hot water supply. This equipment is installed in most private homes. If the house is old, most likely, an old-style column is installed here, which can be not only ineffective, but also dangerous. Replacing a geyser with a new one will allow you to prepare hot water as cheaply as possible. With the new device, you don’t have to worry about security, but it’s very convenient to use them.
Norms and requirements that govern the installation of gas water heaters in apartments
Having decided on a replacement, the first step is to familiarize yourself with the rules for installing gas columns in apartments and houses. Questions on the installation and connection of these units are covered in SNiP. The document is called "Gas Distribution Systems" and its number is 42-01-2002. If distribution systems or internal wiring was made on the basis of polymer pipes, then in addition to this document there is another one - SP 42-101-2003. These are “general provisions for the design and construction of gas distribution systems from metal and polyethylene pipes”.
The main requirement for the replacement of gas columns in the apartment, which is described in SNiPs, suggests that any work related to the organization of gas supply can only be performed by specially trained people from gas facilities or private organizations. The latter must be licensed for this work. According to the law, any independent changes can lead to explosions. Independent work is also punishable by serious fines.
If the installation of a geyser will be carried out for the first time, then it should be located in the kitchen. However, when replacing this unit in the bathroom (and such an installation was previously allowed by the standards), then there is no need to transfer the device to the kitchen.
The room in which the installation will be carried out must be equipped with a vertical chimney. Each apartment has exhaust ventilation channels.
If the gas column is replaced in an apartment where the chimney is not provided for by the project, the installation of special turbocharged units is allowed. They remove all fuel combustion products by force. This equipment can be connected to horizontal chimneys with an output to the street through a hole in the wall.
There is a requirement for the area. So, the minimum area should be at least seven square meters, the minimum allowable ceiling height is two meters. The room must have a good flow of air. It can be a window, forced - air ventilation system, forced-air valves.
The pressure in the water supply system should be no less than 0.1 atmospheres. The column should be mounted on a wall that is finished with non-combustible materials. It can not be closer than ten centimeters to the stove or above it. This is strictly prohibited.
Do I need to draw up?
Replacing a gas column with a new one is not specially made out. But if a new one were installed where previously there was no water heater, then official projects need to be developed. They are ordered from gas facilities or companies licensed for such work. Prior to approval of the project, any installation work is prohibited.
If the column has already been installed before
When replacing a gas water heater due to a malfunction, it is necessary to change not only the unit itself, but also its passport. When performing the installation yourself, the passport of the new column will not be entered on the mark on putting the device into operation and inspections.
According to fire safety requirements in residential buildings, gas equipment is inspected annually. It will not be possible to hide independent replacement of the gas column from specialists. In this case, the equipment will be disconnected forcibly, and the pipe will be sealed.
After the comment is received, you will have to reinstall the water heater. But this is being done with the involvement of certified companies and specialists. They will conduct a study of ventilation ducts. In old buildings, canals are often clogged with various debris. Exploiting such moves can be dangerous.
What is the threat of self-assembly?
Even if replacing the old gas column with a new one, this is not a guarantee that everything will be fine. If during installation an insert was made at the gas pipe past the meter, then this falls under the article of the administrative code. A penalty is provided for this.
In addition to the fact that an administrative penalty is provided, there is also an article from the law “On Fire Safety”. According to it, the owner of the property may even incur criminal liability (depending on the severity of the consequences).
Materials and Tools
To replace the gas column, you need a hammer drill with a drill for concrete. You should also prepare a set of open-end wrenches for 27/30 and 32/36, a gas pipe wrench, sealant, FUM tape.
In addition to the column, an outlet should be purchased. This is a decorative element with which they draw up the entrance to the chimney on the wall. Need oblique water filter. Alternatively, you can buy a system for softening water. To connect the water heater to the water supply system, various bends, tees, hoses, taps are purchased. Experts advise you to purchase flexible wiring. It is easier to work with due to the absence of the need to seal joints.
To connect to the gas line, you need a gas hose. It must be of sufficient length and have a thread for connection to a gas unit. Make sure that the thread on the hose resembles the one on the column. To connect the latter to the chimney, they buy a galvanized pipe with a wall thickness of at least one millimeter. Such requirements are due to high gas temperatures. Thin-walled pipes quickly burn out.
Dismantling the old heater
First of all, they shut off the gas supply valve to the column. Next, a nut is loosened with a key, which holds the gas hose on the column pipe. The hose should be carefully inspected. If it is worn or damaged, it is best to replace it.
Before disconnecting the device from the water supply system, it is recommended to wrap the rack-mounted faucet. In the absence of the latter, close the valve at the entrance to the apartment. Pipes and flexible wiring are disconnected using wrenches. It remains only to disconnect the pipe connected to the chimney. After that, the device can be safely removed from the wall.
On some columns, the gas supply may be in the form of a steel pipe. The coupling that connects the pipe to the pipe is difficult to unscrew. If you put a lot of effort, you can ruin the pipe. The coupling does not spin well due to paint. First remove the paint layer, and then unscrew the sleeve.
Installing a new heater
Do-it-yourself gas column replacement should begin with the installation of fasteners. They are screwed with standard dowels. The place for the column is selected based on the requirements of SNiPs.
When a suitable place is found, holes are made on the wall. They must be strictly horizontal. This can be verified by the building level. Further on the markings make holes. If there is a tile on the wall, then a separate drill should be purchased for it.
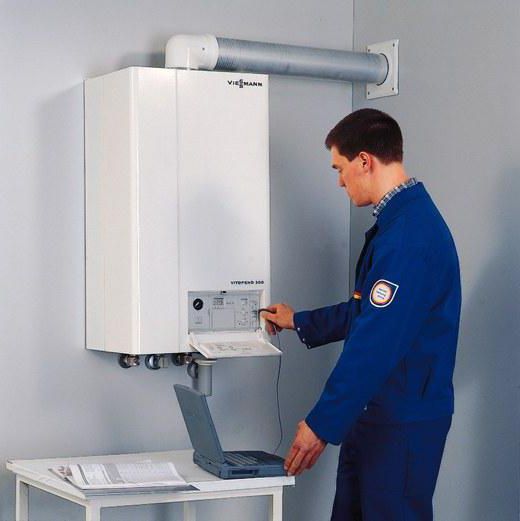
When the tile is passed, install a conventional drill bit for concrete. You can enable shock mode on a drill or punch. After the holes are ready, screw in the dowels. The entire mounting kit is hung on the latter. Connection is the most important step when replacing a gas water heater. Mistakes are not allowed here. We will consider how to connect the unit to water and gas.
Water connection
To do this, a tee crashes into a pipe with cold water. A filter, a shut-off valve and other devices are screwed to the latter. This is important for installing the column for the first time - when replacing the tee in the pipe is already available. Then a hose is attached to it, which is connected by its second end to the inlet pipe on the heater. It is worth doing this carefully so as not to confuse the inlet and outlet pipes.
The output is marked in blue and the output in red. The outlet element is usually connected to the tee and tap through a hose that is connected to the hot pipe.
Final stage: connection to gas
When independently connecting to gas, the nuts should not be tightened too much. So you can easily crush the gaskets inside the hoses. After installing and tightening all the nuts, both ends of the hose are covered with soapy foam and the gas valve is opened. If the bubbles begin to grow, then there are leaks. Nuts tighten. This is repeated until all leaks have been eliminated.