Making a box for sewing accessories yourself is very simple. It is enough to choose the basis, materials for decoration and mounting options for structural elements. In accordance with personal preferences, you can organize the internal space. With a little patience and imagination, you can get a reliable and safe device for storing dangerous sewing items.
Key features of the special box
The fixture should be neat, safe and comfortable. Size is determined by the number of tools, materials and the placement of fixtures. A box for sewing supplies can be made from the following materials:
- Plastic containers of various designs.
- Small wicker baskets.
- Carton boxes.
- Metal crates.
- Wooden blanks.
- Glass aquariums.
Each option has its advantages and disadvantages, determined by practicality, strength, relevance, convenience and affordability. The most common, reliable and cheap basis is a cardboard box.
Necessary tools and materials for making a sewing box
First you need to prepare the workplace. To make a beautiful and practical box for storing tools, you need to prepare certain tools and materials:
- Do-it-yourself organizer for sewing accessories from a cardboard box. It is worth choosing a strong, whole tank.
- Glue gun, PVA glue.
- Scissors, a simple pencil, a ruler.
- A cut of fabric or wallpaper.
- Wide tape.
Additionally, you need to take rags to remove glue residue, old newspapers. To simplify the process of gluing the box, you can use a special roller or plastic plate. It is advisable to take clothespins that will press the fabric to the base in the gluing process.
Features of the manufacture of the organizer
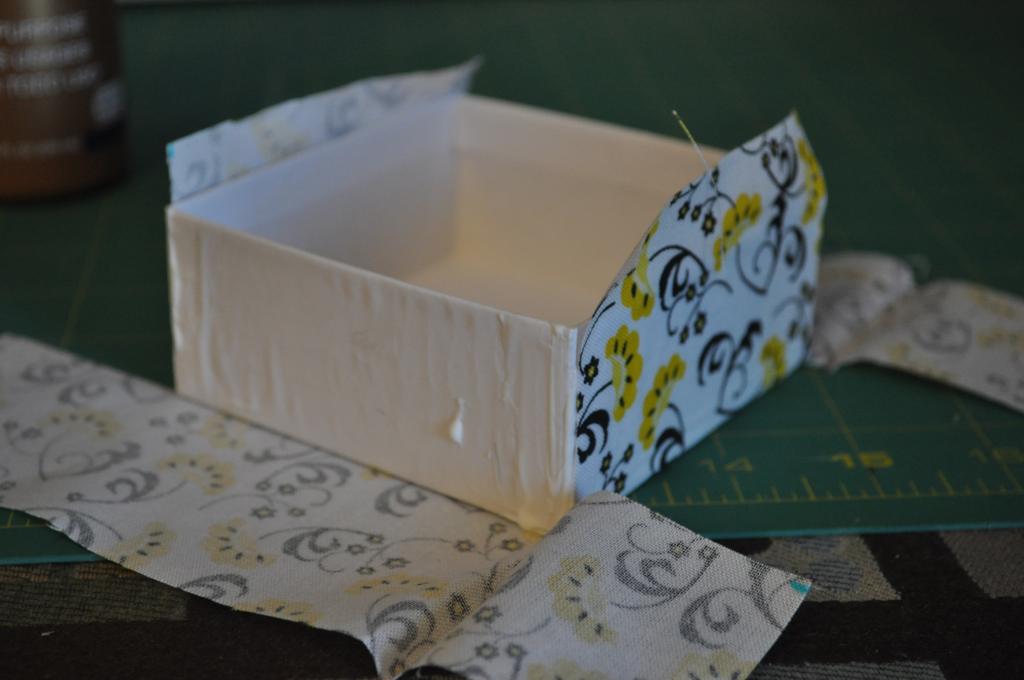
First you need to process the body of the future product. The best option will be gluing the box with a cloth or wallpaper. Additionally, other decorative elements can be used. The box for sewing accessories needs to be well trimmed from the outside:
- It is necessary to prepare a pattern on a fabric cloth or wallpaper. Measure the length and height of the walls, take measurements from the bottom of the box. Transfer measurements to the canvas. It is worth making an allowance of several centimeters.
- If the box is glossy, you need to peel off the slippery coating. This can be done with a knife and a damp cloth. Make tears, soak and continue to remove the coating.
- When the box dries, it is good to lubricate the surface with PVA glue. Glue the pattern, smoothing the air bubbles and wrinkles. Remove glue residue. Wrap the upper tabs inside the box and glue with a glue gun.
- Cut strips from the base material so wide that they cover the corners of the box. Coat elements with glue gun and gently stick on corners. So the joints will hide, which in the future can be disheveled.
If desired, you can glue the entire surface with tape. Get a kind of lamination, which will allow for a long time to maintain the color and integrity of the decorative coating.
How can I organize the interior space inside the casket
The principle of organizing the internal space depends on which tools will be stored in the box. But there are universal elements that should be present in the box for sewing accessories:
- Compartment for storing needles, which is then equipped with a more durable and lockable container.
- You can make room for vertical fixation of the coils. It is necessary to glue several wooden skewers perpendicularly to the bottom with a glue gun.
- Make compartments for saving buttons, ribbons, scissors and other devices. The size of each depends on the number of items to store.
As separators, you can use plastic lining, cardboard sheets. Additionally, plastic yogurt cups, food containers, small food boxes are used. Elements are glued to the bottom with a glue gun.
Secrets for arranging a casket
Sewing equipment is mainly represented by needles, pins and other dangerous metal devices. Therefore, it is important to equip the box not only conveniently, but also safely.
The box for sewing accessories from the inside is usually pasted over with a cloth. So, fallen needles, studs and pins are thrust into the textile, which reduces the possibility of objects falling out of the box during transportation. Safety can be enhanced by gluing magnets under the fabric. The more magnets mounted around the perimeter, the better.
The box must be tightly closed. It is advisable to stick the box cover on textile tapes to the body. You can choose an interesting decorative deadbolt or latch. On the inside lid you can form textile pockets with connectors and fasteners.
Why is it better to make organizers yourself
A self-made box for sewing accessories is more functional and practical than a purchased analog:
- A home-made copy can be equipped in accordance with its configuration.
- For finishing, quality materials can be used.
- You can think of a “security system” device.
- The decorative arrangement is thought out independently.
- You can make handy handles, hooks or compartments that will definitely not be available in store options.
- The cost of a homemade sewing box is much less, since the materials used are mostly used.
- Homemade organizers operate much longer than the purchased options.
In addition to all the advantages of a homemade organizer, there is also pleasure, which is associated with the process of manual work.
What materials can be used to make the internal structure
It is desirable to equip the boxes for storing sewing accessories so that each part remains in place during transportation. Inside you can mount:
- Glass jars for baby food that are covered with lids. Great button compartment.
- Children's plastic or wooden pencil cases for stationery. This option is suitable for storing gum, ribbons, zippers.
- If on a wooden board to form loops of rubber bands (they can be glued with a glue gun), then scissors, rulers, crayons, pencils can be inserted into the holes.
All elements should be fixed by gluing to the bottom of the box. Thus, the organizer can be transported in any conditions without risk.