No need to once again talk about why the compressor is needed, because this is already so clear. But not everyone can do a homemade compressor from the refrigerator with their own hands. Nevertheless, having been patient, a necessary tool and theoretical knowledge, this task can be dealt with quite quickly. Such equipment can be used together with an airbrush, spray gun, etc. tool. Its key features are that the work is almost silent, and the dimensions are small. But such a compressor creates a very good pressure.
Why homemade and not professional?
You probably already know the answer to this question. Often it's the price. Professional compressors have a high price. And if you have an old refrigerator that is idle, then why not keep yourself busy for a few hours and make the compressor yourself. As for the design, it is different, but not very much. Purchased models have an electric motor that transfers work through a belt drive. In our case, the electric motor and the working chamber will be in one housing, but there is no belt drive.
Less in homemade products and automation. Although here you need to install protection against overheating. Such a relay will save your motor from high temperatures and prevent damage. As for lubrication, professional compressors can be dry, that is, do not have lubrication. Such models work due to graphite rings. In our case, there will be a lot of grease, which directly affects the durability of the equipment.
It is worth noting that making a homemade compressor from the refrigerator with your own hands is not so difficult. But you need to understand that attention to detail is required here. In any case, if you succeed, then at the exit you will have a functional station that can be adjusted as you want and arranged as you like. All this, unfortunately, cannot be done with purchased equipment.
Dismantling work
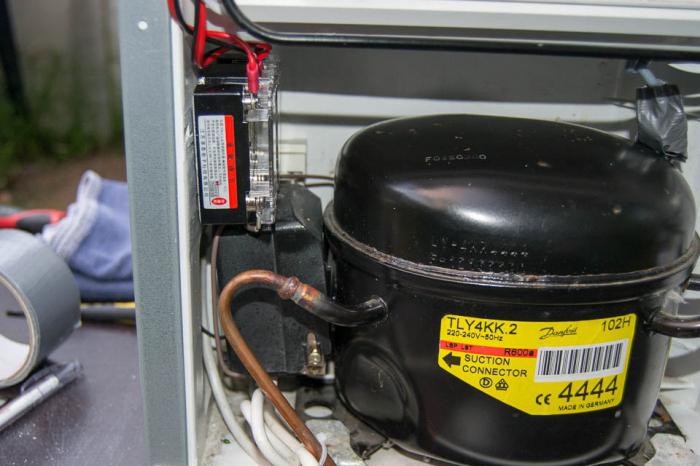
Before using the compressor, it must be removed from the refrigerator and properly equipped. But more on that later. Now actually about how to perform dismantling. There is nothing complicated here. You will need a small set of tools: pliers, two screwdrivers (flat and Phillips), a pair of ring spanners. Probably everyone knows where the compressor is located. This is usually the lower back of the refrigerator.
Now you can proceed with the removal. You will see copper tubes that lead to the cooling system. With the help of pliers they must be bitten off. Preferably with maximum vacation. In the future, you can use them for your own purposes. It is worth paying your attention to the fact that you need to bite off the tubes, and not try to saw them with a file. "Why?" - you ask. It's simple, when sawing, small chips are surely formed, which, in one size or another, gets into the compressor, which can lead to a deterioration in its technical condition up to breakage.
The work is not finished on this, we need to remove an equally important element - the start relay. Usually this is a white or black small box with incoming and outgoing wiring. Carefully unscrew the fasteners and bite off the wires leading to the plug. Mark in advance where the relay is up and where it is down. This may be indicated on the case, check. Ring wrenches are needed in order to remove the compressor carcass. So we removed the compressor from the refrigerator with our own hands. Another point, take all the fasteners with you, they will come in handy.
Checking equipment performance
The first thing after removal is to make sure that the compressor is not “dead” and that it can be used for your own purposes. To do this, flatten the copper tubes using pliers. This is done so that air freely leaves and enters through them. At the next stage, we need to put the start relay in the position in which it was before removal. This is extremely important. The fact is that the relay works on the principle of heating plates and gravity. Incorrect orientation will cause it to break. The compressor winding can even burn out, which is not good.
The relay has incoming wires. They need to fasten the wire with the plug. The connection point, in order to avoid electric shock, must be twisted with electrical tape. After that, you can plug the plug into a power outlet. If the compressor quietly rumbles to itself, and air comes out of the tube, it means that you did everything correctly and you can use the equipment. At this point, it is recommended that you mark the tubes to know which air is coming out and which one is in. If during operation there are problems, say, the compressor does not turn on or off after some time, then you will have to ring the relay and find the weak link. This procedure requires minimal knowledge of electrical circuits and electrical engineering in general.
Materials required for work
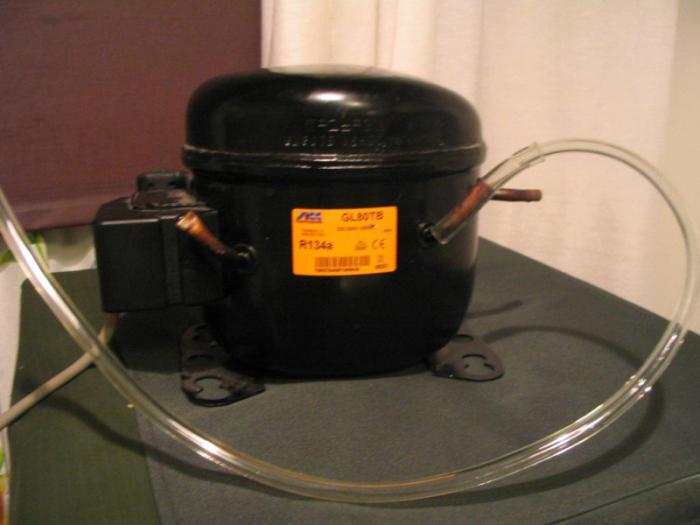
Before you make the compressor out of the refrigerator, you need to get everything you need to work. The first is a compressor. We have already figured out how to remove the engine (compressor) from the refrigerator, so it should be at your fingertips. By the way, different compressors are installed on different models of refrigeration equipment. Usually they are a cylindrical product or a so-called pot.
In order to make a high-quality compressor that would fulfill its purpose 100%, you need to get a receiver. In fact, this is the capacity into which the engine from the refrigerator will pump air. In principle, there are no specific requirements for the receiver. An old empty fire extinguisher, a truck receiver, will do. The volume can be different - from 3 liters or more. Also, before making a compressor from the refrigerator, you need to find the appropriate hoses. The length of two of them should be 10 cm or more, the last should be at least 50-60 cm. It is very convenient to take automobile hoses here. The fact is that they will be attached to the filters, and their size is great for these purposes.
As for consumables, these are two filters - gasoline and diesel, clamps, wire, epoxy resin, pressure gauge. As for the tool, then every master will find it in the workshop. Need a drill, knife, screwdriver and pliers. After you have collected all this in a heap, you can begin to perform work.
DIY compressor from the refrigerator: step by step instructions
Most compressors have three copper tubes at the outlet. Two of them are open, those that you bit off with pliers, and one is sealed. Usually it is the shortest. Accordingly, the tube from which air blows is the outlet, and the one that sucks is the inlet. We do not touch the third yet, but a little later we will figure out what it is for and what to do with it. So, after checking the output and input, make the appropriate marks and disconnect the compressor from the network. Next, take a pre-prepared board. She will be our foundation. Using screws, we fix the compressor to the board. The tubes must be further processed before connection. It is advisable not to use a file for metal, it is better to take pliers.
One important point: the compressor must be attached to the base exactly as it was installed on the refrigerator. Installation sideways or upside down is not permitted. This is due to the starting relay already familiar to us, which works due to gravitational forces. Our do-it-yourself compressor from the refrigerator has not yet been made. Now we need to make a receiver. A plastic container will do. In its upper part we drill two holes for tubes of the corresponding diameter. Then we insert them there and fill it all with epoxy for sealing. One of the tubes (input) should not reach a couple of centimeters to the bottom of the receiver. A short tube (outlet) starts about 10 cm. Such manipulations are needed for more convenient mixing of air.
Iron receiver
"How to make a compressor for painting from the refrigerator?" - you ask. Yes, it’s very simple, for this you need to use the instructions described above. But there is one thing but, for such purposes it is best to take an iron receiver. There is not much difference between plastic and metal, but only on an iron receiver can we install a pressure gauge. In addition, hoses are sealed or welded, and not filled with resin. This provides a better tightness of the container.
To install the pressure gauge, it is necessary to drill a hole of the appropriate diameter, install the device and solder this place. Although it would be more humane to go the next way. We drill a hole in a suitable place and we weld a nut in this place. All that remains is to tighten the pressure gauge, and the thing is done. In principle, there is not much difference, only the replacement of a failed gauge is much simpler. After everything is done, you can mount the receiver to the base. To do this, use steel tape or wire. In fact, we almost made a compressor from the refrigerator with our own hands. A few small details remain.
How to make a mini compressor: the last part of the installation
Most of the way we have already passed. Now there are a few touches. To get started, take a piece of hose (10 cm) and put on it a gasoline filter. If you use a car hose, then don’t have problems putting on. If the hoses are thin and do not fit on the fitting, then as an option they can be heated. The free end of the hose must be put on the compressor inlet. If the connections are strong, then the clamps can not be used, especially since there is practically no pressure here. It is easy to guess that the filter is necessary in order to prevent dust from entering the compressor. The second segment of the hose is connected to the outlet of the compressor and the inlet of the receiver. There will already be a lot of pressure, so we put the clamps. We put a diesel filter on the third hose, and insert the second end into the receiver's outlet. The outgoing filter fitting (diesel) is connected to the working hose of a spray gun, airbrush or other equipment. You will probably decide for yourself how to use the compressor from the refrigerator and for what purposes.
Technical specifications and equipment maintenance
As for the pressure created by the compressor, it is difficult to talk about specific numbers. Much depends on the model and age of the equipment. By the way, the “ancient” compressors are more powerful. They are capable of giving about 2-3 bar. Both imported and Soviet models work almost silently, however, there are exceptions.
As for maintenance, this is quite an important point, if you do not want the refrigerator compressor to be repaired soon. It’s not difficult to take care of such equipment with your own hands. The main rule is that you need to periodically change the gasoline and diesel filters. In addition, it is advisable to drain the accumulated oil in the receiver. The decisive role in the durability of the equipment is played by the high frequency of oil change in the compressor. This should be done not so much often, but on time. To drain mining, it is necessary to cut a piece of a sealed tube. Remember, we mentioned it at the very beginning of the article. Through it, the old oil is drained and new is poured.
Is the compressor worth repairing?
Often, the refrigerator engine fails. Oddly enough, but often there is no point in repairing. But when it comes to refrigerant, the issue is resolved by replacing it. As for other cases, for example, dust getting inside or burning a winding, it is better to ignore it. Really easier and cheaper to buy a new engine. But replacing the refrigerator compressor with your own hands makes sense. There is nothing complicated in this. Moreover, you already know how to remove the compressor from the refrigerator. It is installed in the reverse order. It matters that the installation is done correctly. That is, the joints of the tubes must be tight, and the wires must be reliable, that is, insulated. In general, the replacement process itself takes no more than 20 minutes. If you still decide to repair the refrigerator compressor yourself, then get ready for the difficulties. First, ring the relay, perhaps it is in it, and therefore the equipment does not start. Then replace the oil in the compressor. If this does not help, then the equipment can be thrown away, there is no particular sense in messing with it.
Conclusion
So we figured out how to make a compressor from the refrigerator with our own hands. In general, a variety of difficulties can arise during the execution of work. Starting with the fact that hoses do not fit on the filter, and ending with poor connections or lack of reaction from the compressor. But most problems can be fixed. In general, such a compressor is a very useful thing. With it, you can do painting and other useful things. What airbrush or spray gun you use is more important than a compressor. The main purpose of such equipment is to provide constant pressure. If there is a need for high pressure, say 3.5 bar and above, then finding a suitable compressor will not be difficult. Most likely, this is the Soviet model. This is due to the fact that modern refrigerator engines, although not powerful, are very productive. That's all on this topic, now you can get down to business.