Monkeys are very funny animals that not only children but also adults sympathize with. A small toy made by yourself will amuse the owner and bring a lot of positive emotions. In addition, it is the monkey that is the symbol of 2016, which adds to its relevance. Consider the theoretical part of how the Johnny amigurumi monkey is made. The description is divided into key points in the knitting technique.
A bit of history
Amigurumi arose a long time ago, you can’t say the exact date when the needlewomen became interested in them. They come from Japan. This is unlikely to surprise the knowledgeable reader, because the country is famous for its abundance of various objects of decor, which are often used in practice. Amigurumi toys are able to please anyone. These charming little animals are very fond of children and adults, which easily explains their popularity.
Items
Amigurumi monkeys - do-it-yourself craft that does not require titanic efforts. Even a beginner can make a small toy. The main thing is to make sure that the elements that will be used in the circuit are already worked out. Then, of course, you get a particularly beautiful crochet monkey Joni from Pepiki. Description consists of elements:
- head;
- muzzle;
- body;
- ears
- front and hind legs;
- tail.
Each of the parts of the toy is knitted according to the scheme, and then stuffed with filler. After completing the elements, they are combined into one.
Essential Skills
To assess how soon you can get to work and whether you need to train in the performance of individual loops, consider how the amigurumi monkey fits with a do-it-yourself crochet. The circuit contains loops:
- air;
- half crochet;
- single crochet;
- half crochet;
- additions;
- decrease
These crochet techniques are basic skills that are used in almost all works. If the technique is still unknown, practice using thicker yarn before starting the toy. In addition to the main loops, you will need the ability to knit an amigurumi ring.
Materials
Do not rush to choose yarn. With high-quality and color-saturated fibers, the johnny amigurumi monkey will look much more beautiful. The description contains information about the following tools and materials that will be needed during the work:
- metal hook with a diameter of 2.5–3 mm;
- syntepon filler;
- eyes for a monkey with a diameter of 6–8 mm;
- brown and milky yarn of medium thickness (skein length 250–350 m per 100 g);
- English pins
- wide-eye needle for stitching parts;
- loop marker.
After acquiring the necessary items, you can engage in the selection of the most suitable scheme for the toy. What will an amigurumi monkey look like a crochet and a detailed description of its manufacture we will consider in the next paragraph.
Before you begin, make sure that the hook-yarn alignment is correct. This is easy to check: fold the yarn four times and twist it slightly, then compare with the thickness of the hook.
How to crochet an amigurumi monkey: schemes, description, tips
Most often, when knitting toys, ordinary elements are used: columns with one crochet or without it at all. Therefore, schemes rarely differ in the types of loops, but may contain a different number of rows. Having decided on the most successful version of the toy monkey, let's get to work.
First you need to make the initial loop of the ring with amigurumi yarn of brown (main) color, which will fix all subsequent ones and prevent the knitting from blossoming. Then, do 6 single crochet so that the thread passes through the inner surface of the ring. Close the columns, and connect the extreme loops with a single crochet.
After performing one lifting air loop, it is necessary to knit 2 sbn into each base, i.e., to make increases. In the next row, 2 sbn to be performed in every second loop, then in the third, fourth, etc., until 10 circular rows (60 loops) are connected.
Having reached the required number, knit 6 rows without increments, and then perform decreases in each circular row until 6 loops remain. The row begins by knitting two single crochet together in one base every 8 loops. During operation, you need to gradually fill the resulting element, then cut the thread.
Monkey Amigurumi: face and body description
The principle of knitting the head is preserved for other parts of the toy, the main difference is the number of rows and loops. For the muzzle, perform a light thread ring amigurumi from 6 sc. Add columns until the total number of loops reaches 30 and knit 2 more rows without changes. In the next row add 3 more loops. Knit the 9th circle according to the scheme: 6 bn columns, double crochet, double crochet, double crochet, bn column. Repeat the rapport 2 times and end the circular row 21 with a column of bn. Row 10 do this: 7 bn columns, add 1 sbn, 2 bn columns, decrease 1 sbn, bn column, decrease 1 sbn, 2 bn columns, increase, 23 single crochet. The muzzle is connected.
The monkey’s body is performed starting from the amigurumi ring of 5 single crochet, gradually increasing their number to 35. Moreover, rows 4, 5, 7, and 11–16 are performed without changing the number of loops. Next, you need to gradually reduce the loops in each circular row, until the number of loops becomes equal to 5. During operation, you need to evenly fill the element with filler.
Remaining items
The amigurumi monkey Joni is almost ready. The description of the remaining parts is simpler, because the main and most voluminous details of the toy are already connected. In order to perform the ears, it is necessary to make an amigurumi ring from milk yarn from 5 sb. Increase the number of loops in each row to 20, then knit one circle without changes and sequentially reduce to 5 loops. You should get 7 circular rows. Similarly, you need to perform the second ear of the monkey.
The front legs are made of two colors: knitting starts with a light thread of 6 bn columns in an amigurumi ring, adding up to 15 loops. From 4 to 6, knit a row without changes, then reduce by 3 columns and change the thread to dark. Knit from the 8th to the 19th row without changing the number of loops, add the filler and finish knitting for 6 sc, performing a decrease in the last round.
For the back legs, dial 6 vp with light thread and knit in the following sequence:
- knit in the second loop from the hook sbn, 3 sbn, 3 sbn into one last loop;
- move to the other side of the chain and knit 3 sc, increase, the total number of loops will be equal to 12;
- in the next row, execute the columns as follows: add 1 sbn, 3 bn columns, add 3 sbn, 3 bn columns, add 2 bn columns = 18 loops;
- knit in 3 circles: sbn, increase, 4 bn columns, add 1 sbn, 3 bn columns, add 1 sbn, 5 bn columns, increase, sbn = 22 loops;
- 4 and 5 rows without changing the number of columns;
- in the 6th and 7th circles, reduce 4 columns;
- changing the thread to dark, continue to knit together two sbn to 14 stitches in the 8th row, from 9 to 19 knit without changes;
- in the last round, reduce up to 7 columns and fill the lower part of the paw with filler.
The tail is knitted quickly: an amigurumi ring from 6 sbn, increases in the second row to 12 loops, from 3 to 39 to perform columns without changes. Finish by reducing to 6 loops. Stuffing the part is necessary as you knit.
Assembly
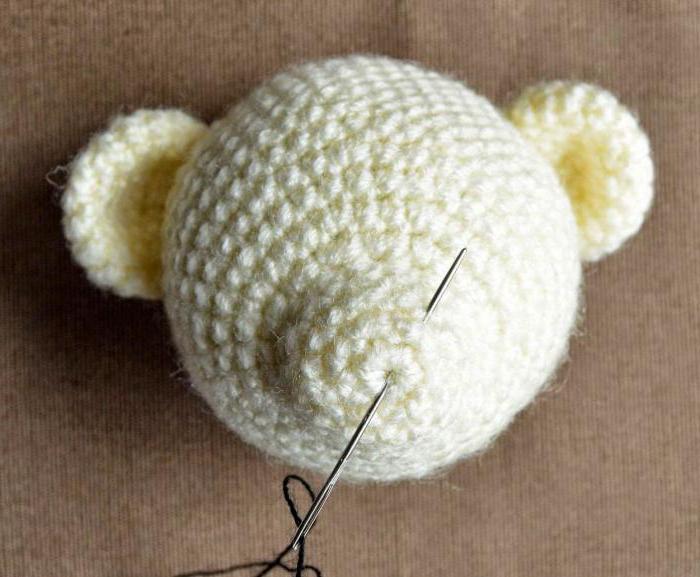
Before stitching the finished elements together, use pins: sequentially fasten all parts of the monkey and look at the result. If everything is done neatly in the finished work, start stitching the parts. The muzzle is attached to the head in about 7-8 circular rows and stuffed with filler. Embroider the outlines of the mouth with dark thread.
Connect the remaining parts gradually using the remaining threads on them. It is recommended to sew paws by means of hinge fastening. Finish the work by attaching the finished eyes or using buttons of the appropriate color and size. Amigurumi monkey is ready!