Knitted socks are a beautiful and necessary thing in the period of winter cold, and every needlewoman knows this. However, most of them have problems with knitting heels, especially if it is a boomerang heel. But if you have a little patience, it will soon become clear that all difficulties can be overcome, and as a result of efforts to get a beautiful sock with an unusual heel.
Nobody says that a sock with a boomerang heel is better or worse than a product with a regular heel, it just looks different. But in order to choose how you like more, you need to be able to knit all kinds.
A selection of yarn for knitting socks with a boomerang heel
So, the decision was made to make socks at home. The heel “boomerang” is chosen to give the sock the correct shape, it remains only to choose the right yarn. As for color, his choice is a personal matter for every needlewoman. But the composition of the yarn needs to be paid a little more attention. The product will be of the highest quality if fully woolen yarns are used, however they are quite expensive and sit very quickly, therefore it is preferable to knit from wool blend yarn. It will be useful to purchase dacron spools for heel tightening. They will need to be tied to the main yarn before knitting the heel and trimmed after completion.
Socks with a heel "boomerang" - knitting from the toe
To knit these socks, in addition to yarn of the required thickness and color, 2 pairs of ring knitting needles of the same size and preferably with a fishing line of the same length are required. Wanting to get more interesting socks, it is worth buying yarn of at least two colors. Then the boomerang heel and the elastic can be connected with different colors from the rest.
It is worth noting that not every needlewoman knows that you can start to knit a sock not only from the top side, but also from the toe, however, this manufacture of the product has its own characteristics. Although it cannot be said that knitting from the toe is more or less complicated than from the rim, it's just a little different.
Loop set
This is where any knitting begins. A boomerang heel will not be needed unless the rest of the toe is tied. Therefore, first you need to fold 2 knitting needles in parallel from different pairs and by alternately wrapping the threads around each of them, dial 6-8 loops. That is, on both knitting needles should get 12-16. The number of loops made depends on the size of the sock.
Next, the lower part of the loops should be transferred to the position on the fishing line, and the upper part should be knit with the front surface using a pair of knitting needles located in the upper part of the work. Then turn the product clockwise, transfer the already knitted loops to the fishing line and do the same work with the loops that used to be at the bottom of the product.
Knit toe and feet
Having knitted each row once, at the next stage, to form a toe and a smooth transition to the foot, it is necessary to start adding loops. To do this, the first loop of the upper row is knitted with the face, the next loop is also knitted with the face, but twice - first for the front and then for the back wall. As a result of this, an additional loop appears on the spoke. A similar operation should be done with the penultimate loop in the same row. In the same way, add 2 loops in the bottom row. It is necessary to add loops until the desired width of the future sock is reached. All subsequent rows need to be knitted in a circle with the front stitch, dragging one or the other pair of knitting needles to the place where the “boomerang” heel should begin.
Knitting the bottom of the heel "boomerang"
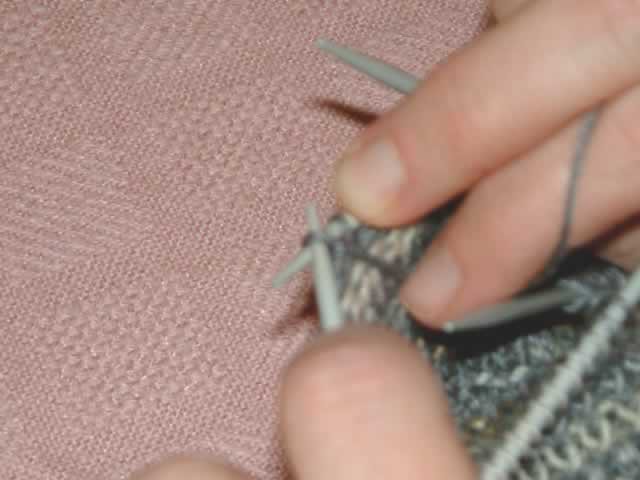
The heel will be knitted on one part of the product, one pair of knitting needles. After the last turn of work, you should knit a row with a “face”, without tying one loop at the end. Then you need to turn the product and knit the same row, but already the “wrong side”, making at the beginning a small crochet. At the end of the row, one loop must not be tied again. Then turn the work, double crochet and continue to knit socks with knitting needles. The heel "boomerang" will be obtained by itself in the course of work. At the end of the row, leave already three loops, that is, the first yarn made the previous time and one more after it. Turn the product, double crochet and crochet to the previous loop of the last crochet. Continuing work, alternating the front rows with the wrong ones and making the crochets, should be done until the third part in the middle remains of all the loops, not counting the crochets and left unbroken. This is how the boomerang heel will be formed. How to knit its second part, you also need to know, because this part of the work has its own characteristics.
The upper part of the heel "boomerang": how to knit?
After the third part of the loops is left without crochets, you should knit one circular row with the “face”. When knitting yarn made earlier, the yarn must be connected to the subsequent loop, then there will be no hole and as a result the initial number of loops will be obtained. At the end of the circle, it is necessary to knit the middle part of the loops with the “face” and, having returned, knit the middle third part of the loops with the “face”, first making a crochet, and then again going back, but already knitting the “wrong side”. At the beginning of the next row, it is necessary to make the next yarn, and close the previous one, knitting it with the next loop, and continue the work in the same way, alternating the front rows with the wrong ones, not forgetting about the yarn. The heel "boomerang" got its name precisely due to this feature of knitting. Each time after knitting the yarn with the next loop, the number of loops along the edges of the row will decrease. This stage of work will be considered completed after all the loops that were previously along the edges of the middle part will be transferred to one spoke by knitting them together with the crochet that was made in the previous row.

Knitting shafts and elastic
So, the heel of the boomerang is tied to you. How to knit a bootleg, most likely, every needlewoman knows. Moreover, this part of the sock is knitted similarly to the foot, that is, the usual stocking knit to the gum start point. Of course, you don’t have to make an elastic band, but with it the product will be more comfortable to wear and better keep on your foot.
The height of the gum depends on the size of the product itself, its height, as well as the personal preferences of each needlewoman. For a sock of size 38-42, 15-20 rows of gum are optimal, and for a children's product - 10-15. After the “boomerang” heel is knitted with needles, and the work on making the shaft is completed, you need to choose which gum will be - 1 x 1, 2 x 2 or 4 x 4. In the first case, you need to knit 1 loop with the “face”, and one “inside out”, in the second alternate in two, and in the fourth - in 4. The best option is to alternate 2 front, 2 inside loops, but it all depends on the wishes of the person who carries out the knitting. The boomerang heel is the hardest part of this product. Therefore, after it is ready, further difficulties should not arise.
Closing the upper "side"
At the final stage of knitting a sock, which is distinguished from other similar products by the heel “boomerang”, it is necessary to carefully close the upper “side”. At this stage, it is important not to tighten the thread too much, otherwise, as a result, it will be impossible to put the sock on the leg due to the too narrow top.
The upper part of the product closes as follows: two loops are knitted together, after which the resulting loop is returned to the previous knitting needle and knitted together with the next loop. Closing will be completed when only one loop remains. Next, you need to cut the end of the thread, pull it through the loop and use the hook to hide it inside the product so that it looks neat.