In the autumn months, schools and kindergartens make exhibitions of crafts made from dried flowers and vegetables. Very often, a pumpkin is used for this, which is transformed in various ways. From this vegetable you can make many different bizarre figures. In the article, we will consider step-by-step master classes of pumpkin snails. The process of creating such crafts will be an interesting pastime for both children and their parents.
Secrets of creating a good craft
- It must be borne in mind that crafts made from fruits, vegetables and berries have a short shelf life, and each culture has its own characteristics. For example, juice begins to stand out from juicy cucumbers and soft tomatoes. In this case, it is best to use more "long-term" root crops and vegetables. These are pumpkin, zucchini, potatoes, cabbage, carrots, onions and others.
- Before creating crafts, all vegetables and fruits must be thoroughly washed and dried. Only after that they can be used as material for creativity. The same goes for snail crafts.
- In the process of creativity, wooden skewers, toothpicks and floristic wire will greatly help . Various beads, satin ribbons and other decorative elements may come in handy.
- It is recommended to prepare any craft immediately before the exhibition, if opportunities and time allow.
- It is best to install the finished creation on a stand or some basis. So the composition will look completed and more beautiful.
How to prepare a pumpkin for crafts?
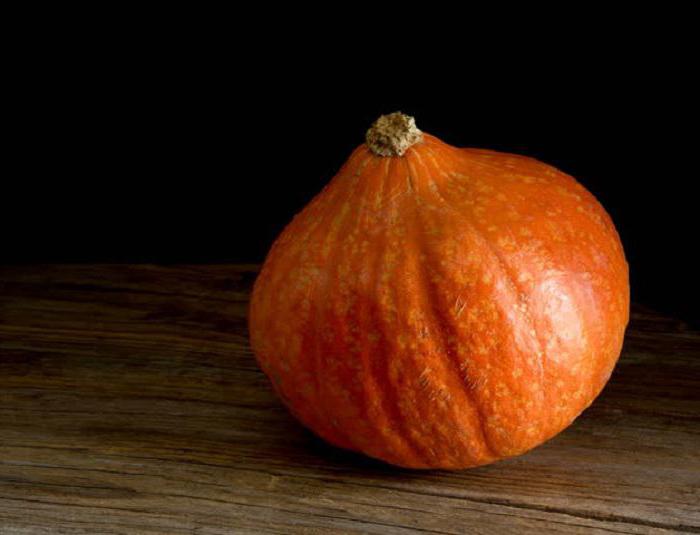
It should be borne in mind that not every pumpkin is suitable for creativity. For this purpose, special varieties are ideal, the fruits of which have a uniform brown color and more expressive forms. Too large representatives of the pumpkin family are not suitable for drying at home. It is better to choose a medium copy, holistic and firm to the touch. To craft a pumpkin snail, it is recommended to avoid even small fragments of mold or rot. A peduncle must also be present. Only under such conditions will the vegetable tolerate the drying process well. Consider how to prepare a pumpkin for creating crafts in different ways.
1. Dampen the vegetable with a rag and give it a warm shower. Make sure that the water jet is not too assertive, otherwise it will damage the skin. After that, gently pat the pumpkin with a dry towel. Leave it in a dark room with low humidity for one hour. Then again wipe the vegetable and clean it in the same room for the same period of time. If after that the peel is completely dry, then you can begin to work.
2. You can dry the pumpkin for snail crafts at room temperature. It is necessary to clean it of pulp, seeds and stuff it with newspapers. Within two to three weeks, it is necessary to periodically change the "stuffing". This has always been done before, but a similar method is not reliable. The fact is that there is a high probability of spoiling the vegetable in such conditions.
3. Today you can dry the crops in a short time using kitchen appliances. An oven, air grill or microwave is suitable. It is optimal to bake a pumpkin in the center of the cabinet at a temperature of eighty degrees. During the drying process, periodically turn the pumpkin clockwise to prevent burning.
Cut patterns can be on the skin of dried or raw pumpkin. But in the latter case, the vegetable will quickly deteriorate and subsequently lose shape. Dried pumpkin will please the eye for a long time. And they will tell you how to craft a pumpkin snail crafts, step-by-step instructions of our master classes.
What do you need for crafts?
To make a snail, you need to take two pumpkins: one round, the other oblong (halves are also suitable). You will also need a knife, marker, a pair of wooden skewers and white tennis balls. These materials can be replaced at your discretion.
How to make a craft?
In general, pumpkin is a very malleable material, so it is very easy to craft from it. However, working with sharp tools is not recommended for young children.
1. If you put a round pumpkin on its side, then it strongly resembles a snail shell, so it is perfect. With a knife, cut the bottom off the prepared vegetable, remove the inner pulp and seeds. Check for stability.
2. At the top, which will be the wall of the sink, cut a spiral. It should have a twist effect, like a snail's house.
3. Do the same on the opposite side of the pumpkin.
4. The second oblong vegetable will be used as the head of the slug. Cut one side so that the pumpkin becomes stable and looks like the head of a snail that crawls out of its house.
5. Both vegetables can be fastened with skewers so that they do not stand apart, but stick together. This item is optional for making a pumpkin snail, you can skip it.
6. Insert the wooden skewers into the top of the oblong vegetable. Instead, you can take metal knitting needles. They will be an excellent base for the eyes.
7. Put tennis balls on the skewers. If this is difficult to do, pre-drill holes with a hot needle or awl.
8. With a marker, draw a smile and eye pupils.
9. Add decor to your taste. For example, a candle can be placed inside the sink. In the dark, this craft will look very interesting.
If you use large pumpkins, then you will get a fairly large snail, which will look very impressive compared to other crafts.
Materials for crafts made from pumpkin and zucchini
To make a snail you will need:
- round pumpkin;
- oblong squash;
- knife;
- glue;
- artificial eyes;
- wire;
- various beads;
- marker.
You can also take other materials for decorating crafts. For example, fabric, plastic flowers, butterflies, sequins and rhinestones.
Making snails from pumpkin and zucchini
1. Place the prepared pumpkin on its side and cut off the bottom so that the sink is stable.
2. On the peel of the vegetable, make spiral cuts. They should resemble a pattern, like on a slug house.
3. At the zucchini with a knife, remove the top and place it next to the sink. A slice is best done oblique so that the head looks natural.
4. Insert the wire into the zucchini and put the beads on it. Fasten the ends.
5. Glue the eyes in place, draw a mouth with a marker.
6. Pumpkin and zucchini snail is ready! Add decorative elements. For example, a stand made of driftwood with autumn foliage, a hat or a bow.
Pumpkin and potato snail: preparing materials
For this work, a round pumpkin, large potatoes, several rowan berries, a small plank, toothpicks, glue, a knife, artificial eyes, different leaves (walnut, maple or any other) are needed. If desired, you can add decor, varying in color and shape.
Production of crafts in stages
1. Lay the leaves on the board and fix them on the surface with glue.
2. Cut the bottom off the pumpkin. It will be a snail shell. Install it on a stand.
3. Place the removed part of the vegetable near the body of the slug. On top of it lay the potato, which will be a muzzle.
4. In order for all parts of a snail made of pumpkin and potatoes to hold well on the plank, they need to be fastened together with toothpicks.
5. Glue the eyes to the potato.
6. Slightly above them stick two toothpicks and put on them rowan berries. It will be horns.
7. It remains to decorate the snail to your taste. For example, you can attach a bow from a satin ribbon and a beautiful skirt made of chiffon.
Recycling Spoiled Pumpkin
Although it is recommended to take only a good strong pumpkin for crafts, there is still a way to use spoiled vegetable. It is quite laborious, so it will not work for small children. It will take a mangled middle pumpkin itself and several small, two tails from this vegetable, a couple of chestnuts. Universal napkins, a thermogun, PVA glue, water, papier-mâché mass, sandpaper, acrylic paints, colors of various shades, brushes and sponges are also useful.
How to make a spoiled pumpkin snail?
1. At the spoiled pumpkin to break off weak sites.
2. Cover the entire interior with white paint, and the outer surface with green. Allow to dry.
3. Take the small curled pumpkins and form from them the body of the cochlea, head and tail. Some parts can be cut.
4. Glue all joints with a thermogun, close up with papier-mâché, and screw on top with napkins dipped in a mixture of water and PVA.
5. If there are any debris from a pumpkin, then they can be glued to the sink so that it looks more voluminous.
6. Make holes in the chestnuts and glue the pumpkin tails into them. These will be the eyes of the slug. Attach them to the head.
7. Add papier-mâché where you see fit so that the pumpkin snail is more textured.
8. Tinted crafts using paints with a sponge.
9. Draw eyes on chestnuts and mouth. Let the craft dry thoroughly.
10. Optionally, you can varnish the entire product for reliability and add some decor. But even without it, such a craft will look complete if everything is done diligently.
Whether you have a large snail or a very tiny one does not matter. In any case, it will turn out to be sweet and unusual. The only important thing is that you will do it yourself. If you follow the tips, then a pumpkin craft will delight you for many years.