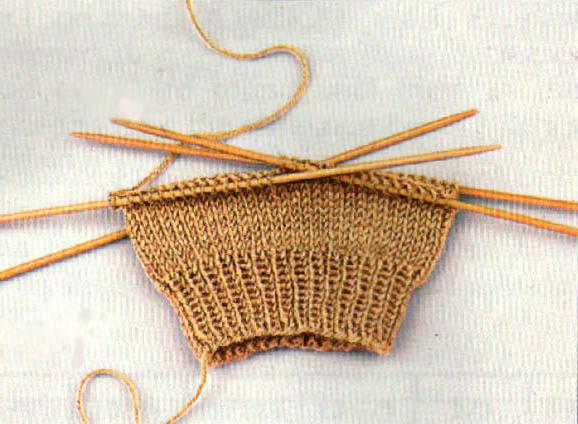
Footprints are a simplified version of socks that can easily replace home slippers. Followers can be purchased at the store, ordered from the master, or you can tie them on your own, especially since it is not so difficult and even the beginner needlewoman can do it. There are a lot of knitting variations: using two knitting needles, three, four, round and so on.
If you knit the stitches with knitting needles, the models with the description will be presented below, regardless of which option you choose, it is better to choose dense yarn, but at the same time not stiff, so that when worn the product can take the shape of your leg. Also focus on the season, for the winter season, woolen yarn is perfect, and for the spring-summer season, take natural light strings.
In order for the product to be warm, soft and serve for a long time, it is recommended to knit the sole in several threads, and a relief pattern will have a massage effect on the feet.
Abbreviations
For convenience, some abbreviations of words will be introduced:
- Row - p.
- Loops - p.
- Front loops - faces.
- Wrong hinges - out.
- Central loops are the center.
- Extreme loops - kr.
Instructions for creating the most common model
To work, you will need:
- Yarn.
- Knitting needles number 3, 5.
Consider the little spokes, models with a description. Knitting pattern of slippers :
- Type 5 stitches on the knitting needles.
- 1r. - cr. 2 persons., N., Center., 2 persons. cr. - 9 should be formed.
- The next row and all even ones fit out., And cent. n.
- 3 p. - cr., 2 persons., N., Center., N., 3 p., Cr. - 9 should be formed.
- 5 p. - cr., 3 persons., N., Center., N., 3 p., Cr. - 11 should be formed.
2. Next, you need to gain a length of up to 41 loops. During the increase in the number of loops, it is recommended to take a third knitting needle for convenience.
3. The formation of the foot. Divide 41 loops into 3 pieces: 15, 11, 15.
- 1 p. - 15 persons., Then transfer to another spoke 10 persons., 2 persons. in 1 p., coup.
- 2 p. - 10 persons., 2 persons. in 1 p., coup.
4. We continue the process as on the heel, knitting loops in the center and capturing one at a time from the edge. As a result, the center should remain 11.
5. We work on the side parts. Dial 15 p. On another spoke and follow the pattern:
- 1 p. - 9 out., 5 persons., 2 cr.
- 2 p. - all persons.
6. We knit the remaining 11 p. From the sole. On the other knitting needle to form the second side we dial 15 p:
- 1 p. - 11 p. From the sole and 5 persons., 9 out., 1 cr.
- 2 p. - coup and screed shawl method.
7. We try on the tracks along the length and proceed to create the heel.
- In each row, 11 p. Soles are central.
- We knit the last one with the grip of the loops from the side and do a uniform descent on the central ones, knitting twice - 2 p. In 1 p.
8. The final step. Close the rest of the loop.
Rectangular Footprints
You will need:
- Threads.
- Knitting needles number 4, 5.
Knitting pattern of slippers:
- We collect 50 loops.
- We knit with a shawl method 20 rows.
- The height of the product is selected individually, the final stage is the closing of all the loops.
- As a result, you should get a knitted fabric 37 centimeters long, the height is at your discretion. You can create footprints with knitting needles with patterns. To decorate the top row, knit openwork knitting using a hook according to the following pattern: form columns of 5 yarn over each 3 loops. As a result, the outer part of the tracks will be decorated with a beautiful openwork pattern.
- Next, the rectangular canvas needs to be bent at the base angle and sew the sole. After that, the remaining part of the sole is stitched, and two elements of the upper part of the product are carefully sewn under the columns.
- Tracks are ready!
Following this scheme, each craftswoman can easily connect the tracks.
Knitted footprints on soles with needles
So, we knit the heels with knitting needles. Models with a description are given in this material. Another option for slippers is footprints on the soles. An ideal sole material is a felt insole. Insoles can be made independently: circle both feet on paper, then transfer the resulting patterns to felt material. Please note that the insoles must be symmetrical! We put the finished sole aside and proceed to knitting trace elements:
- In order to tie slippers-footsteps to size 36, you need to dial 42 loops.
- Knit with a handkerchief or facial method 2 cm.
- Divide the loops into 4 parts:
- Leave the extreme on the knitting needles.
- Two central parts (20 p.) Continue to knit to the end of the little finger.
4. Next, along a rectangular canvas, dial 25 p.
5. We knit a toe. We knit unfinished rows until there are 4 sts on the spoke.
6. Continue knitting, gaining loops along the edge of the opposite side.
7. To form the height of the track we knit another 6-8 rows.
8. Try on the product on the leg, if all is well, close the hinges. If there is a lack of height, the rows should be tied up, then again try on and close the loops. Knitting is over.
9. Assembly of the product. Using a large needle, you need to sew a knitted fabric to the previously prepared sole.
10. Sew a seam on the heel.
11. Warm slippers are ready!
Embroidered Footprints
And these are one more little signs with knitting needles (models with a description will be useful for both beginners and experienced ones). In this pattern, a seamless knitting technique without elastic is used.
You will need:
- Yarn.
- Knitting needles - 4 pcs.
Step-by-step instruction
- Depending on the size of the foot, dial the required number of loops.
- Knit 3-4 rows with the smooth surface method and begin the formation of the heel on four knitting needles.
- Next, leave the marks on two knitting needles (put the rest aside) and continue knitting the heel height.
- To create a wedge of the heel, we begin to knit by connecting two loops into one.
- Close all side loops.
- We collect edge loops and continue to work around.
- To create the required size, we remove the loops in even rows on 1, 3 knitting needles.
- We tie the desired length until the canvas overlaps the little finger or half of the thumb.
- We begin to close two loops in even rows on 1, 3 knitting needles, until they become half as much. We decrease both in the even and odd rows.
- We tighten the last four loops with a thread.
We connect knitted slippers-footwear with embroidery. You can make it with both colorful yarn and floss thread. The easiest way to use an ordinary gypsy needle, and everyone can choose a drawing at their discretion.
Advice! Do not place the picture so that it is in contact with the floor when walking, that is, on the side parts with the transition to the sole.
Warm slippers
This technique is good for those who are familiar with knitting socks, but also for newly-made needlewomen will not cause special difficulties. Slippers are designed for 41, 42 size.
Step-by-step instruction
- We start the creation of the product from the top of the cuff. On the spoke, dial 60 p. Plus 2 cr.
- Knit 12 p. method "American gum" or 6 rapports in height.
- For the 1st rapport "American gum":
- 1 p. - cr., 2 persons., Out., 2 persons., Out., Cr.
- 2 p. - cr., Persons., Straight crochet, 2 persons., Throw the crochet through 2 cr. n., persons., Throw the yarn over 2 cr. n., cr.
4. Repeat the pattern of these rows.
5. Having tied the cuff, distribute all the loops on 3 knitting needles:
- 1 - kr. plus 24 p.
- 2 - 18 p. Central.
- 3 - 24 p. And cr.
6. Take a yarn of a different shade and continue the method of “American gum” on 2 knitting needles (central loops), this will be the length of the upper leg.
7. Having finished the pattern repeat, it is necessary to start knitting the side element of the trace. To do this, on the sides of the previously connected top, dial loops, 30 from each edge, just picking up the extreme loops on the spoke.
8. Then connect the thread to the beginning of knitting from the cuff, knit the side element using the “American gum” method - kr. plus 24 p., the upper side slice - 30 p., in the center - 18 p., the second upper side element - 30 p. and another section of the cuff 24 p. plus cr.
9. Turn the product over and continue knitting the second row of the pattern in the opposite direction.
10. Having created 3 rapports of a picture or 6 p. in height with a yarn of a different shade, change the color of the thread and tie another 3 rapports or 6 p. to the required height of the side element.
11. The sole of the track. Attach the thread to the central part of the base (18 p.), And continue knitting with the “facial surface” technique, while reducing the number of loops on the sides.
12. When working with individuals. R. discard 1 p. as individuals. without knitting, the remaining 16 p. knit individuals., and the last 18 p. knit individuals. with 1 p. side.
13. Turn the product inside out and remove 1 st. From inside, without knitting. The remaining 16 p. Knit out., 18 p. Knit out. with 1 p. side. When forming the sole of the track in each next row, it is necessary to reduce 1 p. Either from one or the other side, however, the number of central ones should invariably be 18 p.
14. As soon as there are 10 pips on each side, proceed to lowering the base to narrow the heel as follows:
- Take off on faces. ranks cr. n. without knitting them, then continue the faces.
- As soon as 3 p. Remain in the row, two of them are knit at the same time as the first person., And the extreme knit in one with cr. n. side element.
- The wrong rows fit in the same pattern.
15. Thus, in each next row, make reductions on the sides, as well as in the central region, as a result, 3 p.
16. Knit them with a single loop with a broach.
17. Cut the thread that was being worked on, and to fasten the outer loop, pull the end of the thread through it.
18. When finishing work on the trail, sew the product along the back element from the heel to the cuff.
19. Try on the product and you're done!
5 recommendations for creating slippers from sophisticated craftswomen
- Products can be knitted in different techniques, however, it is advisable for beginner needlewomen to start with simple models, where the knitting pattern is described in detail.
- Want to create beautiful little knitting needles? To give the product a twist, you can decorate it with various applications, pompons, buttons and other decor.
- Very popular now are home knitted boots, which are easy to shape by simply lengthening the tracks with an openwork bootleg. From the ankle is a high side - elastic.
- You can also create homemade loafers from knitted footprints. To do this, you need to sew a tight insole and knit the sides above the ankle.
- You can knit women's footprints with knitting needles. Some craftswomen perfect slippers-tracks with a knitted ribbon. It is created after the manufacture of side elements, grabs the ankle and is fixed on the rise. And also it is possible to tie a small braid across a product which will be clasped on a button.
Conclusion
Knitting slipper footprints is a very creative process that takes time and skill. Try to connect any model you like, delighting yourself or someone from home.