After the birth, the baby will need a lot of clothes: overalls, bodysuits, bonnets, socks, etc. Also, future mothers should buy such an accessory as scratches for newborns. They look like small mittens without a thumb and protect the child from his own pens. The most dear to the heart and beautiful things are made by yourself, so below we will talk about how to sew or knit this important accessory.
What are scratches for?
Very often, children are born with long fingernails, which are not always obtained in time to cut off. And when cutting, they are advised to leave them not too short. Because of this, the kids scratch themselves, because all their movements are absolutely chaotic. It is from this problem that special mittens for newborns will save. Someone believes that they are harmful, because they do not allow the skin of the pens to breathe and do not allow the baby to tactfully explore the world. Also, the accessory prevents him from holding a rattle or a bottle. However, it should be remembered that scratches are dangerous for the skin of a newborn: infection can develop due to weak immunity.
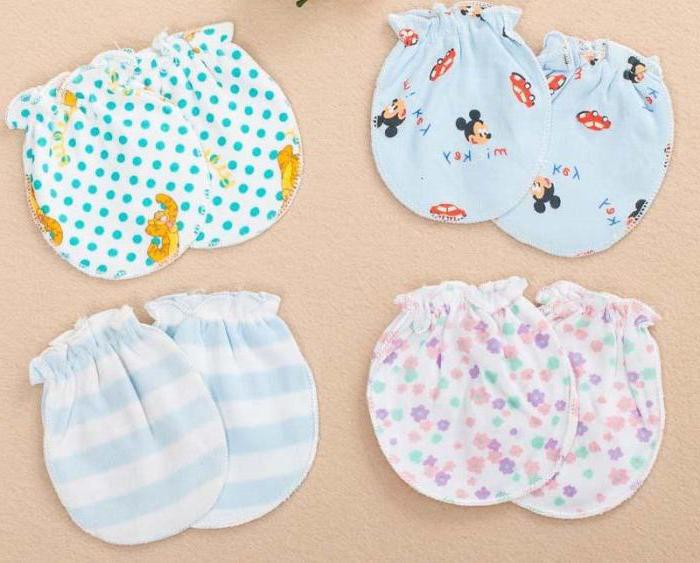
What is the difference between scratches and ordinary mittens? The fact that they do not have a compartment for the thumb. As a result, the finished product looks like a bag, which is held on hands by an elastic band or a beautiful ribbon. If desired, you can sew or tie it in the form of a regular mittens, but then there will be problems with putting on.
How old is it to use?
Each child is individual, so it’s hard to say how long it will take to use scratches. For newborns, they may not be needed at all, and some children will have to wear them almost up to six months. Most often, they wave their hands sharply for the first 3 months, but it all depends on the opinion of the mother. Experts advise using them as little as possible - after all, the baby should develop and get used to his hands. Children begin to reach for toys at about two months old, so you should give them a touch and a look.
If it became noticeable that the child is interested in surrounding objects, then it is better to remove the mittens from him. It happens that inexperienced mothers do not know what to do right. Then they should stick to the deadline of three months. In this case, the accessory can only be worn at night.
Material and tool selection
These special mittens can be bought, as well as sewn, knitted or crocheted. For newborns in this case, natural materials will be needed. For sewing, it is best to use flannel, cooler, knitwear or any other fabric that is pleasant to the touch. It should not cause irritation (possibly the appearance of prickly heat), so it is better to choose not too thick material. You will need two scratches: two pieces of fabric measuring 180x130 mm, a regular elastic band 140 mm long, a needle, threads.
To crochet them, you need to choose yarn. In this case, it is better to choose thin cotton, for example, VITA Pelican. For work you will need: yarn (you can take leftovers), hook number 2 and a beautiful ribbon measuring 5x600 mm.
The mitt also knits from natural yarn, although acrylic (for example, Jiffy Yarn Fisherman) is also suitable. In an acrylic product, your hands will be warmer if it is cool at home. The work is carried out on five stocking knitting needles No. 2-4, that is, you need to knit in a circle. You can cut a piece of ribbon or tie a string of yarn.
Sew scratches
Before you start sewing, you need to prepare a pattern. To do this, take tracing paper (sheet of paper) and draw a rectangle with dimensions of 90x130 mm. We round the upper edges of the future mittens and cut the workpiece. Immediately prepare the gum: take the desired length and cut it in half. It is necessary to determine the location of the seams, which can be internal, external or hidden (between the layers of fabric).
We take the finished pattern, impose it on the fabric and circle. Cut out the details, lean against each other and sew, leaving a hole for the pens. We attach the elastic to the lower edge of the product, twist it by 2 cm and stitch it. We decorate ready-made scratches for newborns with ribbons, bows, embroidery or lace. If desired, you can increase the length of the cuff - then the elastic is no longer needed.
Crochet
We crochet 4 loops, connect them into a ring and begin to knit in a circle. If possible, you can try on mittens for the baby or focus on the sizes indicated above. They are crocheted in columns, and at the end the rows end with a connecting loop.
We work with rows like this:
- First: 2 lifting loops and 7 posts.
- Second: 2 lifting loops, 2 columns in each column of the previous row.
- Third: 2 lifting stitches, alternately knit 2 columns into one, 1 column, etc.
- Fourth: 2 lifting stitches, alternately knit 2 columns into one, 2 columns, etc.
We continue to add loops until the width of the product reaches 80-90 mm. We continue to work without additions (approximately 7-10 rows). To go to the cuff, we decrease: we reduce each row by 2 loops. Next, we knit the cuff either with an elastic band (knitting needles) or columns with a crochet. For newborns, beautiful lace around the edge of the product is suitable. We finish the work and cut the thread. Repeat all the steps for the second scratch and decorate both with ribbons or laces.
Knitting
A glove with knitting needles will only work if the number of loops is correctly calculated. For example, if in 1 cm 3 loops, then with knitting needles No. 2 you need to dial 40 loops (we move from the wrist to the tips of the fingers). We distribute them on stocking needles: 10 pcs. on the knitting needle. We begin to knit an elastic band 1x1 (round) with a height of 50 mm. Once the elastic is ready, we knit a row with holes for the ribbon or lace. It is knitted as follows: 2 together with the front, double crochet, etc. In the next row of crochets, you should get facial loops knitted behind the back wall.
Then we knit the front surface or any pattern you like (you can even pick up the original ornament). The height of the main canvas is 80 mm (with an elastic band of 130 mm). After that, decreases will go: in each row at the end of each knitting needle we knit 2 loops together. We stop when 8 loops remain, and tighten them. We fix the end of the thread and hide it. We put a ribbon or string of air loops into the scratches for newborns.
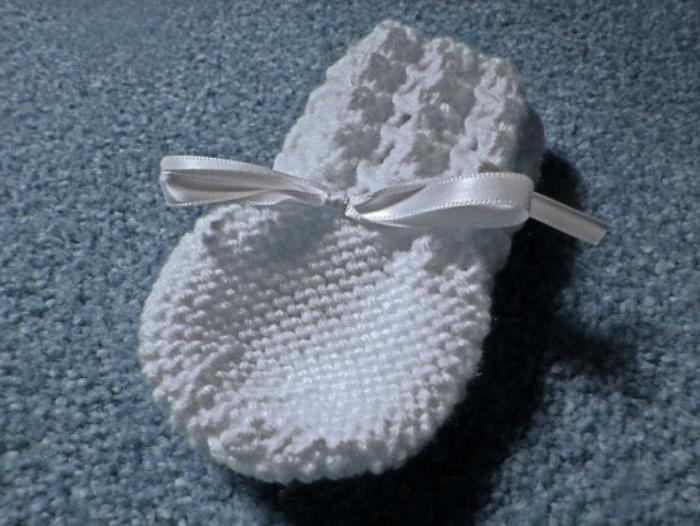
The resulting mittens will not only save the child’s health, but will also be a beautiful addition to any outfit. After all, you can experiment not only with the ornament of the product, but also with its color palette.