If in your house there are niches in the premises, then it will be correct to arrange a cabinet in your own hands in order to save useful space. Of course, this lesson is quite laborious, but real. Since the niche often has non-standard sizes, it simply will not work to buy a cabinet in a furniture store. The built-in wardrobe provides for its location in height from the floor to the ceiling, well, and the width will be determined by the width of the niche. Do-it-yourself wardrobe here will be reasonable and effective.
So, we proceed directly to the question of how to make a built-in wardrobe. First of all, you need to take the dimensions of your niche (height, width, depth). It should be noted that dimensions must be taken with maximum accuracy.
The next, important point is the design and manufacture of drawings. In fact, the internal content of this type of furniture depends only on your personal desires, but I want to say that your future cabinet should be both a place to store outer clothing and have shelves for storing it.
To make drawings, you can use specially created software for this, or do it manually by drawing your future furniture on a piece of paper. But it should be noted that the shelves of the cabinet are reduced in depth by a distance that is equal to the width of the upper guide of the sliding system. This is usually 90 mm. The advantage of the software is that you instantly get not only all the necessary dimensions of the parts, but also that the program will tell you where and how to fix the parts.
Next, we determine the material for the cabinet. Usually, laminated sheets are taken for this.
Particleboard, which have dimensions (2050 × 1830 × 16 mm). Sawing chipboard, and gluing edging material is best at enterprises specializing in this type of work. You can, of course, cut the chipboard and glue the edge yourself, but believe me, you will not be able to produce parts of such quality as special machines for gluing and sawing material will do it.
Creating a cabinet with your own hands, you should not forget about the sliding system to it, which can also be ordered at these enterprises. When ordering, some nuances should be taken into account: the width of the sliding system will be the width of the niche minus 32 mm, where 32 is the thickness in the sum of the right and left sides of the furniture being manufactured. If the cabinet will not have top and bottom, then the height of the sliding system will be equal to the height of the niche, but if there is a "bottom" and a "ceiling", then again, it is necessary to take 32 mm from the height.
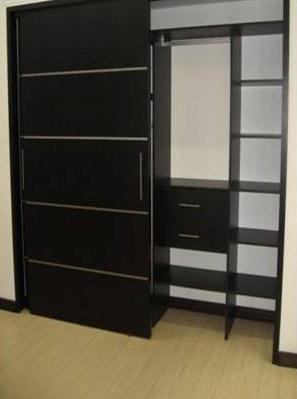
After receiving all the necessary details, you can proceed with the assembly of the cabinet. First of all, with the help of confirmations we connect the bottom, roof and sides of our design. The role of the bottom and the roof can play the upper and lower shelves of the cabinet. This is provided that you have a sliding system attached to the floor and ceiling. To make holes for confirmations, you will need a special drill, which can be purchased at any building store. After assembling the case, install it in a niche. Then we fasten the shelves in our design. This can be done in several ways: using shelf holders or metal
(plastic) corners. The end result of your work will be the installation of a sliding system. To do this, we fix the upper and lower guides and insert the compartment doors into them.
That’s all, the cabinet is made and installed with its own hands - and this does not require a lot of time and money.