How often do girls quite unreasonably acquire trendy blouses that become loved in the wardrobe, but are combined with only one pair of trousers or a skirt. And if you do not succumb to the temptation, do not buy the thing you like, but, having figured it out, bring to life a fashionable and practical blouse yourself?
Choose a style
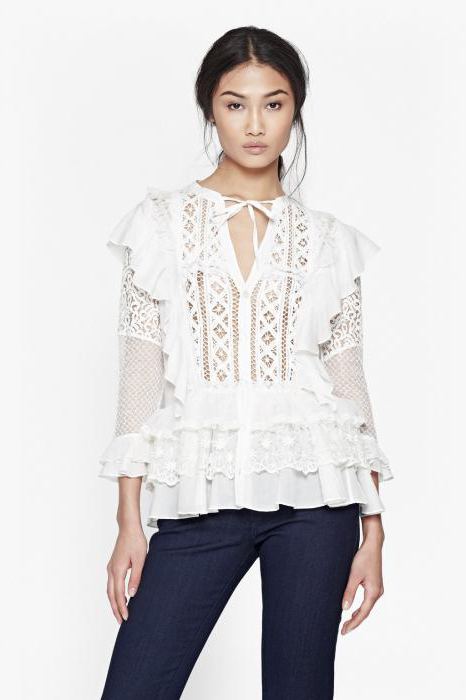
For several seasons, the peplum blouse remains popular. The pattern of such a product is not difficult: the adjacent top and frill at the waist in the form of a shuttlecock or a gathered strip of fabric. And the popularity of this model is justified, since it goes to absolutely everyone. It is only important to find your own interpretation.
Women's blouses in the style of a man’s shirt also won the recognition of fashionistas. Their versatility allows you to create ensembles in completely different styles.
Of course, silk blouses with a stand-up collar are always loved . Strict style and feminine fabric add a touch of romance to the image. However, such a thing is unlikely to be able to harmoniously combine with jeans and sneakers.
Building the foundation of the template
To build a blank for a female blouse, you will need to develop a pattern-base. It is used for modeling and designing all products. To do this, take the following measurements:
- the girths of the neck, chest, waist, hips, forearms and wrists;
- height of chest, back and front from shoulder to waist;
- width of back and shoulder;
- a solution of tucks in the chest;
- sleeve and product length.
The construction begins with the fact that a rectangle is built on paper, the sides of which are equal to the length of the product and half the circumference of the chest. Then apply the basic grid:
- on the vertical side from the upper corner they fall to the distance of the height of the chest and spend the auxiliary horizontal;
- further from the corner they descend to the height of the waist and also draw a line;
- 20 cm below the waist line of the hips;
- return to the chest height line and mark half the width of the back;
- mark the armhole zone, which begins at the extreme point of the back zone and equals ¼ half-chest + 2 cm;
- the remaining distance from the border of the armhole zone to the side of the rectangle is the chest zone;
- from all found points on the chest line, verticals are raised to the upper side of the rectangle;
- the armhole zone is divided in half and the straight line is lowered, outlining a landmark for the side seam;
- ½ of the tuck solution is noted along the chest height line from the front and the perpendicular is raised from the point.
Pattern Details
When the basic grid is ready for the pattern of a blouse with your own hands, begin to draw smaller details:
- 7 cm recede from the upper corners and raise points 1.5 cm;
- draw a neck: in the left corner from the side where half the width of the back is marked, I make a neck 3 cm deep; in the right corner the depth of the neck is 7 cm;
- from the extreme elevated point of the throat, note the length of the shoulder;
- the shoulder line is drawn at an angle: for the back 1.5-3 cm from the upper border of the rectangle; for the front, always 2 cm lower than the extreme point of the shoulder section of the back;
- on the shoulder, the backs recede 4 cm from the beginning of the cut of the shoulder and put the first point, the second after 1.6 cm is a tuck of the back, the depth of which is 6 cm;
- the line is lowered by 1.6 cm;
- the upper boundary of the armhole of the front, from which the shoulder section begins, should be located at a distance of 1/10 of the half-girth of the chest from the border of the armhole and at a height;
- connect the found point with the raised point of the neck of the front;
- on the drawing there is a shoulder line that exceeds the value of the measure "shoulder length";
- excess centimeters are closed in a tuck, the starting point of which is located at a distance of the tuck solution;
- along the shoulder section, they find the second tuck point, raise it by 1.5 cm and lower the line from it to the point ½ of the tuck solution on the chest line;
- further determine the difference between the chest and waist and divide the resulting figure by 4;
- along the waist line from the straight side cut to each side, the value obtained in the calculations recedes and raise the lines to the middle of the armhole;
- from the sides of the rectangle to the center of the drawing along the hips, they retreat along ½ of the circumference, put points and connect them with the found points on the waist.
If you need a pattern of a blouse with a basque from the waist, then you can finish the construction of the drawing on the waist line.
Sleeve pattern
In addition to the shelves of the back and front, build a sleeve template. To do this, measure the length of the armhole directly with a centimeter tape according to the finished pattern. Next, proceed to the drawing:
- draw a straight line (main) equal to the length of the sleeve;
- 1/3 of the armhole length +2 cm recede from the top and set a point;
- from the found point to the sides, at a right angle, they retreat ½ of the circumference of the forearm and from their extreme points raise the lines to the top of the main line;
- these lines are divided into four parts each and put dots;
- then the first point is lowered by 1.5 cm, the second is unchanged, the third is raised by 1.5 cm, the fourth is central on the main line without changes, the fifth is raised by 1.5 cm, the sixth is unchanged, the seventh is lowered by 1 cm;
- the points are connected by a smooth line, outlining the sleeve ridge;
- at the base of the central line on both sides at a right angle mark ½ girth of the wrist + 2 cm;
- the drawing ends up drawing side sections of the sleeve.
Decoration
Shuttlecocks and frills can be attributed to decorative details. To build an interesting model of a blouse, it is enough to develop a framework and slightly supplement it. A peplum blouse pattern can be presented in two versions: a peplum in the form of a shuttlecock and in the form of a simple frill.
The first option involves cutting the fabric in the form of a semicircle, in the second case it is a regular strip of fabric, which is collected in small folds and stitched to the bottom of the blouse at the waist. For both options, you need to measure the bottom of the product. A blouse pattern with a Basques in the form of a shuttlecock is built on four-fold fabric. A corner of the peplum is built near the corner, equal to ¼ of the bottom of the blouse, where the frill will be sewn. The length and shape of the Basques can be completely different, it depends on the imagination and the desired result.