Plastic panels for budget repairs - just perfect option. They look beautiful, but are not too complicated to install. Sheathe a room on their own is not difficult. Of course, wall decoration with plastic panels should be carried out in compliance with all the required technologies.
How to choose plastic panels
You can purchase this material in any hardware store. When choosing, first of all, you should pay attention to the manufacturer. You should not buy the cheapest option, especially Chinese-made. Most of these panels are made from low quality raw materials using poor glue and varnish. Subsequently, they will probably begin to secrete substances harmful to health. In addition, cheap material fades very quickly.
A much more successful solution would be to sheathe the kitchen, hallway, bathroom or toilet walls with plastic panels of domestic or European production. Among other things, when buying, you should pay attention to:
- The thickness of the front of the panel. The higher this parameter, the better.
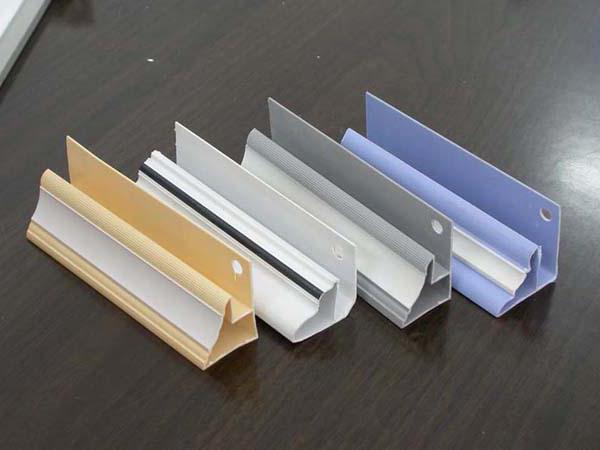
- Appearance. The color of the panel should be uniform.
- Number of stiffeners. The more of them, the stronger the material.
When buying, be sure to try inserting a shelf of one panel into the groove of the other. Mounting should be as rigid as possible. Also, several panels need to be examined by turning at an angle. Protruding tubercles from stiffeners should not be visible on the front surface.
Material calculation
The width of the standard plastic panel is 25-27 cm, the height is 2.6-2.7 m. In order to find out exactly how many elements are needed, the length of all the walls should be measured and added. The result obtained is divided by 25 (27). It’s worth buying panels with a small margin.
Mounting Features
The walls can be decorated with plastic panels according to two technologies: using a frame and without it. In the first case, a wooden beam is pre-packed on the surface being trimmed or a metal or PVC profile is attached. In the second, the panels are glued directly to the wall using liquid nails. This method is less expensive.
The frame must be used when the walls in the room are not too smooth. In this case, thin boards or pieces of plywood are placed under it in the right places. This allows you to fix the wall obstruction. Fastening by gluing is carried out only on pre-aligned surfaces.
Wood frame assembly
Most often, when performing an operation such as wall decoration with plastic panels, a lath made of wooden beams is used. It is a cheap and very easy to install material. It can be mounted on walls, for example, using self-tapping screws with plastic dowels. The beam is fixed on the surfaces perpendicular to the intended location of the panels. To install a wooden frame you will need a screwdriver, a building level, a plumb line, a tape measure and a hacksaw. The beam itself must first be thoroughly lubricated with an antiseptic. It is also advisable to treat it with a flame retardant.

First, they install battens in the corners, as well as on the top and bottom of the walls. When installing the frame, carefully monitor the horizontalness of its elements (or verticality). In order to make the crate perfectly smooth, it is worth using the building level and plumb. First, holes are drilled in the beam itself. Then it is applied to the wall and marking. After drilling holes in it and inserting plastic dowels into them, the timber is fixed with self-tapping screws.
The step between the intermediate elements of the lathing on the wall should be approximately 40-50 cm. Before assembling the frame, it is imperative to determine where the cabinets, paintings, mirrors, etc. will hang in the future, and install additional boards in these places.
Profile Mount Features
PVC strips are fixed to the wall in the same way as a bar. That is, first holes are made in them, and then fastened. The metal profile due to the high cost of plastic panels is practically not used. They usually install it only in humid rooms if the walls in them are very heavily littered. Drilling holes in the profile is not necessary. They are available in planks initially.
How to fasten panels
Well, now let's see how the walls are actually finished with plastic panels. Begin this operation with the installation of auxiliary elements. The corner (external or internal) and the final level are mounted first. Fasten them to the profile with self-tapping screws. If you plan to install panels with a height of up to the ceiling, then set the plinth rail.
The technology of wall decoration with plastic panels is extremely simple. Each PVC element has two shelves: short and wide. The first is needed to connect the panels to each other. The second - to fix them to the crate. Start installing the elements from the corner. The first panel is led into the corner profile with a short shelf, align and screw the wide shelf to each lathing with self-tapping screws. You can use brackets for this purpose. All subsequent panels are fixed in the same way. The last element usually has to be cut so that its edge does not reach the center of the final element by 5-6 mm. First, the last panel is led into it. Then it needs to be bent a little and inserted into the groove of the previous element. The padlock of the hard panel can be reinserted using a thin screwdriver. The last element of the casing does not require additional fastening.
At the locations of the outlets in the panels, holes are carefully cut before installation. For wall sheathing over doors and windows, short pieces of PVC elements will be needed. Sawing plastic is easiest with a regular hacksaw for wood.
Plaster wall alignment
Fixing plastic panels to the wall with glue can only be done after preliminary alignment. For this surface it is necessary to plaster according to the beacon method. A small amount of alabaster or cement is diluted with water and applied to the walls in narrow stripes strictly vertically. Next, a beacon profile is pressed into the plaster. After this, you need to wait a day until the solution sets. Then you can begin to align the walls.
Plastering is carried out as follows:
- Mortar is poured onto the wall with a spatula.
- The rule performs its leveling.
- After the layer has dried for several hours, it is additionally passed with a paint grater. This allows you to increase the adhesive properties of the surface.
After alignment, the beacon profile is removed and the remaining grooves are closed with the solution. After a couple of weeks, you can proceed to sticking the plastic panels. They are usually fixed on liquid nails. You can also use special glue for PVC.
Installing panels on liquid nails
Fastening plastic panels to the wall is as follows:
- Glue is applied to each of the four corners of the panel and along its entire length in a zigzag fashion.
- The element is pressed firmly against the wall surface and held for several seconds.
- Lubricate the next panel in the same way and, inserting it with a short shelf into the groove of the previous one, press it firmly against the wall.
- The last element is cut in length and snapped into the final strip.
Sometimes it’s difficult to stick plastic panels to the wall. They stick very poorly, for example, on surfaces finished with lime or water-dispersion paint. In this case, the use of self-tapping screws is allowed. Under them, holes are pre-drilled into the wall into which dowels are inserted. According to the circumstances, these two methods can be combined. That is, on very smooth surfaces, glue the panel, in the same place where there are small tubercles or pits or the wall material has not very good adhesive properties, use self-tapping screws.
The plastic lining is mounted in the same way. If the walls are uneven, it is usually installed on a PVC profile, and glued onto flat surfaces using liquid nails.
Features of installation in the bathroom
A bathroom is a room with high humidity. And therefore, it is extremely not recommended to use a bar to assemble the frame here. The tree is characterized by the ability to absorb excess moisture from the air. Therefore, the crate from it can begin to swell and deform. As a result, your new plastic panel sheathing will simply lead. Extremely unaesthetic gaps will appear between the elements.
Most often, the walls of the bathroom with plastic panels are made using a PVC profile. For heavily littered walls, it is better to take aluminum trims.
The alignment of the walls in the event that the panels are supposed to be glued is carried out using moisture-resistant plaster. Such mixtures are usually made on the basis of cement. Alabaster high humidity is not well tolerated.
Kitchen: wall decoration with plastic panels
Humidity in this room is also slightly increased. But not as much as in the bathroom. Therefore, it is possible to mount a crate of timber here.
Plastic is a combustible material. Therefore, do not paste over the wall gap between the lower and upper cabinets of the kitchen unit. Tiles are usually mounted here. A particularly unsuccessful solution would be to use a material such as plastic panels to finish walls in the immediate vicinity of the slab.
Installation of PVC panels in other rooms
Living rooms, nurseries, cabinets and bedrooms are rarely finished with this material. Usually they choose it only for covering the walls of living rooms of small brick or concrete suburban cottages. In this case, the main attention should also be paid to the choice of material for the crate. If the cottage is not heated, the use of timber is not recommended. The panels themselves are not afraid of temperature extremes or high humidity and will last for a long time in such a house. The cobblestone frame is cracked and warped much earlier. For a summer residence, PVC or an aluminum profile can also be an ideal option.
Very often, using this material, toilet walls are also finished. Plastic panels can be used to sheathe a restroom both in a city apartment and in a private house. Installation in this case is allowed to be made on any type of crate.
As you can see, installing plastic panels is quite a simple procedure. All that is needed for quality sheathing is the ability to hold a screwdriver in hand.