Knitting is a favorite pastime of many needlewomen. With this simple tool you can do a lot of useful or just beautiful things - a variety of clothes, from a warm coat to a swimsuit, rugs, pillows, toys, rugs, even tree decor in the park! And if knitting some products is really quite complicated and requires a certain technique, then there are those that can be made easily and quickly enough! One of these techniques is modular knitting. It is so simple that even a completely inexperienced master can cope with it.
Essence
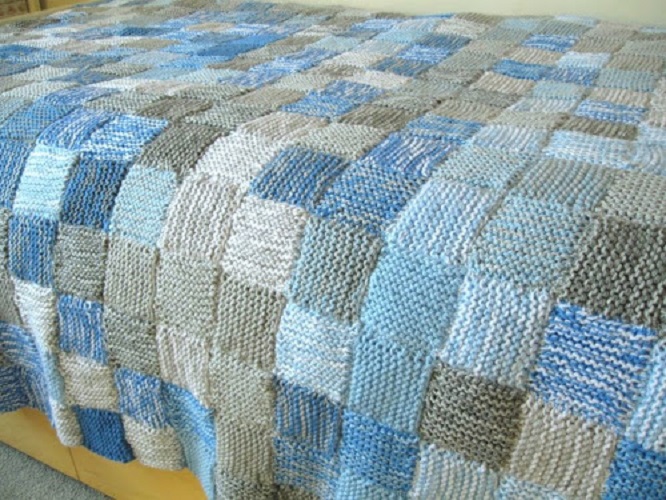
The product created in this technique consists of many small modules, as a rule, these are squares. Knitting with such knitting needles is a fairly quick process, and, most importantly, simple from a psychological point of view. Here you do not need to count a huge number of loops, make sure that they do not go down at the edges, in addition, the size of the finished product can easily be changed by changing the number of modules. Another direct advantage of this technique is that several people can knit at the same time, for example, knitting a square plaid with knitting needles can pleasantly diversify family evenings, as well as rally people who are engaged in a common business.
Kinds
This type of creativity is especially attractive because it is possible to create products from modules of the same shape in completely different ways. This applies to both the assembly process and the creation of parts directly.
Depending on the final goal of the finished product, knitting squares may be different. All of them can be classified as follows.
- By structure: Smooth. As a rule, for such modules hosiery or garter stitching is used. These are the basic squares connected with knitting needles from the front loops on both sides, or where one side is completely made up of the front ones and the reverse side is made from the inside. Fishnet. This can be quite simple weaving, for example, 2/2 chess knitting, or complex, using aran, braids, additional parts, for example, petals, or with a large number of auxiliary loops and cuts.
- Size: Small. Convenient for creating small items, or in addition to large ones for adjusting the shape. Big ones. Suitable for creating sufficiently voluminous products, it can also be used in combination with modules of other sizes.
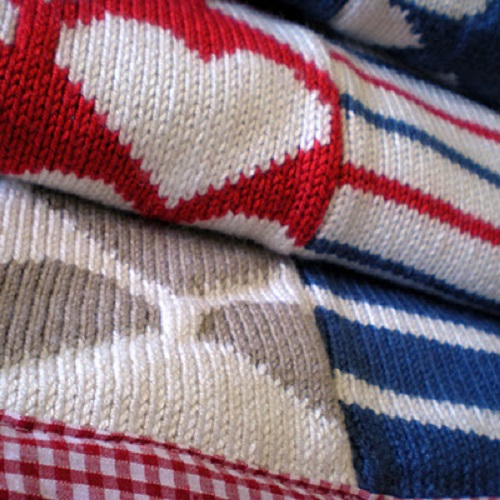
- By color: Solid. It goes well with complex lace, in addition, the product itself can consist of monophonic modules of different colors, creating the effect of a patchwork or the same color. Then the product will look solid. Multi-colored. In this case, multicolor yarn can be used, as well as yarn of several colors in one module. In this case, it is not advisable to use different color solutions in separate modules, but to make them the same, or adhere to the same color concept. With drawing. This option gives a special charm to the finished product. They can be combined with monophonic or multi-colored modules, but the main thing is that both are smooth.
All kinds of squares can be combined with each other, just remember that you can not choose too many different models, the maximum allowable is 3. Arana do not fit well with lace, both do not look very good with the picture, and are absolutely not visible when using multi-color yarn.
Execution technique
There are many ways to knit modules, they differ not only in the knitting pattern, but also in direction. They can be knitted from the bottom up, from the center, to the center, in a circle, a diagonal of 3 loops, or with a diagonal that comes to one loop. All techniques are quite simple, but at the same time very interesting for their originality. And yet, how to knit a square with knitting needles?
Simple module
Often, knitting is used in order to distract, or vice versa, to concentrate on something important. In this case, the classic options are suitable. This is hosiery or shawl knitting, as well as elementary patterns:
- Stripes - alternating rows of front and back knit 2/2, 3/3, etc.
- Cell - for every 2 loops, 3 rows of smooth surface (front or back). For example, set 14, cell 4: 1 to remove, 2, 3, 4, 5 - facial, 6, 7, 8, 9 - wrong, 10, 11, 12, 13 - facial, 14 - facial. Expand the spoke. 1 to remove, 2, 3, 4, 5 - wrong, 6, 7, 8, 9 - facial, 10, 11, 12, 13 - wrong, 14 - facial. The third and fifth knit as the first, fourth, sixth and seventh - as the second. It is in the latter that there will be a change in the surface, continue further in the same way as alternating rows in the lower part.
- Diagonal. In the first row, all are facial, the last but one is purl, the last is the hem. In the second row - the first loop - edge, second and third front, the rest purl, in the third, all but the last four - front, then 3 purl and edge. In each next row there is a shift of the surface change by 1 loop.
Not only an adult, but even a child can knit simple squares with knitting needles. This is a good way to develop the technique of knitting loops, as well as the possibility of failed copies not to be included in the final assembly of the product.
Grandma's Square
This technique is also very simple, while the dimensions of the canvas can be any size. Its essence lies in tying the initial square in a circle (spiral). For such products, you can use either one color of yarn or several, making each next step or circle in different colors. You can use this method for knitting a plaid with knitting needles from squares, and a whole knit product by this technique is also allowed.
First you need to knit a square with the chosen technique, it can be hosiery, shawl knitting, pearl or checkerboard pattern. Next, all the loops, except the last one, must be closed, turn the work 90 ° to the right (clockwise). At this point, you can change the color of the yarn. Collect loops from the side of the square (it is better not to touch the edge row, since it is quite loose, unnecessary holes in the structure may form). Next, knit a height equal to the desired thickness of the frame into which the original square was enclosed, close, leaving 1 loop, turn the work again clockwise, from the side of the rectangle, loop already. Next, knit according to the above description. The main thing to remember is 2 basic principles. Always rotate the work clockwise, and the last loop should always be on the outer corner of the square (relevant when completing the strapping circle)
Openwork
Very beautifully look products consisting of knitted openwork squares. In this case, any schemes can be used, the main thing to remember is that the parties should be straight as a result. Such patterns as a zigzag, thick braids, leaves and others will not work. Before starting work, it is worth tying a test piece to see how the canvas will behave with this openwork. The simplest option with guaranteed straight sides is a structural pattern obtained by alternating front and back loops. And if you need a very airy pattern, or vice versa, dense with complex aranes and braids, then it is better to use the technique of not classical direct knitting, but circular.
It can be performed in two ways - by moving from the center or vice versa, towards the center.
Square from the center
Knitting with such needles is easier if you use circular ones, since 4 simple ones can slip out of the initial stitches. But for a better view of lace, you should use classic knitting needles.
Such a square begins with 8 loops, where each odd loop must be marked with a marker (special or just thread). Next, knitting is carried out in a circle with the addition of yarn before and after each marked loop. Thus, in each row 8 loops will be added, and the finished module will have 2 diagonals. The main advantage of this technique is that it allows you to knit an arbitrarily large square with knitting needles without limiting the initial parameters. And also use a variety of openwork and braids, while not fearing the deformation of the region.
Square to center
This knitting option is partially similar to the previous one, but it is used in cases where the number of loops around the perimeter of the square should be fixed. In this case, you need to dial the required even, multiple of 4, the number of loops, divide it into equal parts, and make reductions on the set markers. They can be performed in the following ways:
- Track. In each circle, 2 loops are knitted together before and after the marked loop. When 12 loops remain, you need to knit 3 loops together so that the track turns out to be the second loop in each group, tighten the remaining 4 loops.
- Scythe. In this case, the reduction must be done by knitting a loop with a marker, the previous and next together in each circle. Thus, the diagonals will be in the form of quite embossed braids.
Diagonal weave
Another interesting way to create modules is to knit squares with knitting needles diagonally. This technique allows you to make not only unusual products, but also prevents their deformation during assembly and use, especially if you place them in different directions.
Such weaving begins with 3 loops, in each odd row, yarn over the edges of the product is made. If you make them immediately behind the edge loop, the canvas of the module will be smooth, and if you retreat a few loops, a beautiful edge will form. When the sides of the square have reached the desired size, knit 1 front row unchanged, and from the next odd row, it is necessary to make decreases in the same places where the crochets were, knitting 2 loops together. It is necessary to close the work when 3 loops remain on the spoke.
With diagonal
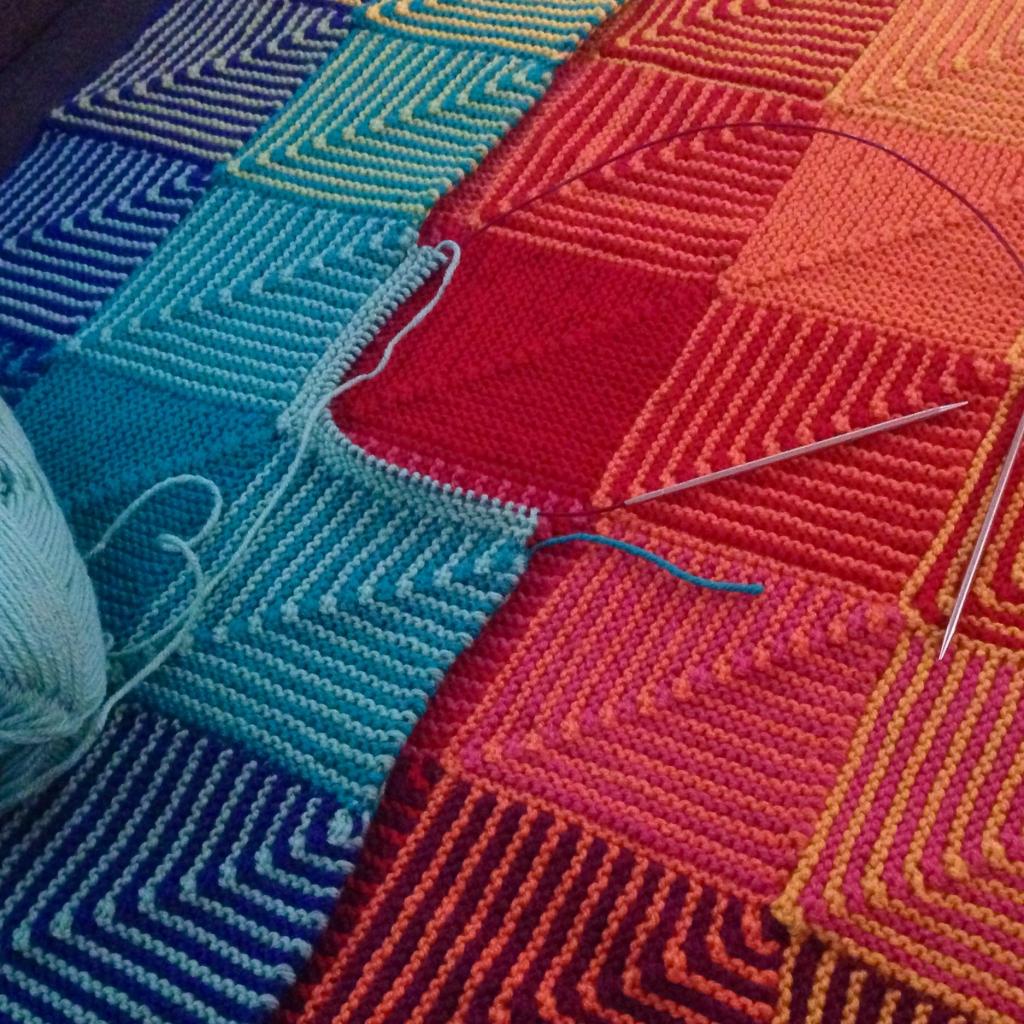
Knitting a square with knitting needles in this way is available even for beginners, it is convenient to use it when the required number of loops around the perimeter is known, as in the case of knitting the module to the center, but in this case only two standard knitting needles are needed.
First you need to dial the loops from the calculation: the number of loops 1 side of the square * 2 + 1. The loop located in the center, mark with a marker. Further knitting will be according to the following principle. We knit all the odd rows with knitting needles with the front loops, not forgetting to knit 3 loops in the center together, where the second is marked with a marker. For a beautiful path to form, the central loop must be on top, for this you need to swap the first and second loops in the group. Knit even rows with purl loops without changes. Knit the last 3 loops together, throwing the central loop to the edge. This is a simple weaving scheme. You can also use openwork weaving, for example, alternating stripes of front and back loops, as in the photo.
Assembly
After all the modules are ready, you can start assembling the finished product.
You can connect squares in several ways:
- The seam. To do this, as a rule, use a thick needle with a large eye and yarn, from which the modules were knitted. It is better to choose a neutral color, so that the connecting thread does not stand out against the background of the product.
- Strapping. 2 parts with crochet are connected with a hook, a kind of edging of each module is obtained. It looks especially impressive when using a contrasting thread.
- Escalation. This connection technique implies that each square has at least one side in common with the previous module. Typically, this technique is used when knitting squares with a diagonal. It is convenient in that the parts are immediately attached to the finished product, therefore they cannot be lost or deformed. In addition, time is significantly saved due to the fact that there is no need to perform subsequent assembly.
If the product is a garment, for example, a vest or coat, then it is necessary to pre-pattern the parts, after which the modules are fastened, repeating the contours of the pattern as much as possible, but so that they do not go beyond its borders. The missing elements are knitted already on the bonded workpiece, bringing its contours to the necessary shape.
During knitting, time flies by unnoticed, especially when the details are small and the company is pleasant. It is all the more surprising to find that in a short time enough modules have been accumulated to create the intended product. And a square blanket of friendship, knitted with needles by the whole family, will not only warm you on cool evenings, but also remind you of a pleasant time spent among people close to your heart.