Nowadays, various types of needlework and the creation of objects of art with one's own hands are very common. Beads have always been very popular among needlewomen. Today, more and more of its color variations and application methods appear, one of which is the creation of pictures with beads on glue.
Where to begin?
Creating a picture of beads on glue with your own hands is a job that requires accuracy, but the product turns out to be voluminous and surprisingly beautiful. It is done almost like an application. The only difference is that instead of cut out paper details you need to glue the beads.
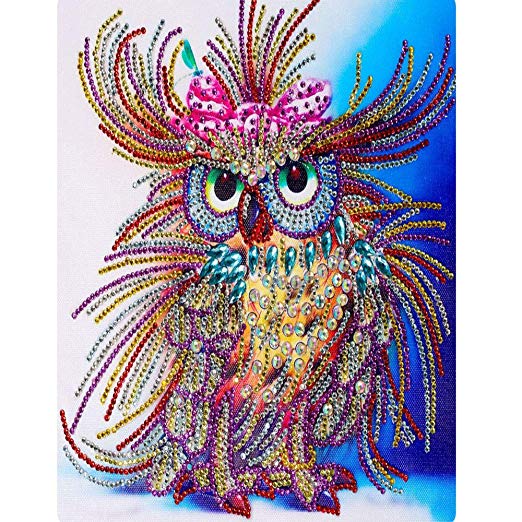
The advantage of bead paintings on glue is the simplicity of execution, and also differs in the depth of colors and unusual shine. Many master classes are held on this type of needlework, where in just a couple of hours they will tell you how to make pictures from beads with glue. In the lessons and master classes with the help of a professional, even a novice can create their own masterpiece. But pictures of beads on glue are easy to make at home, finding a diagram on the Internet or drawing it by hand. Even photographs are suitable for the basics, for example, with portraits of parents or a favorite musician. Flash photos look flatter, while with natural light they are better suited to show the volume and shape of objects. Although for the first time it’s worth choosing a picture with simple lines and smooth transitions between colors.
Photo processing
Creating a picture with beads on glue for beginners will simplify detailing, in a regular photo editor (Photoshop or Paint) on the computer, select pixels larger.
In addition, in the editor, you can slightly change the settings for brightness, contrast and color saturation of the image. After all, it is important that the color scheme is suitable for the interior and looks good as a picture. Contrast will help emphasize the contours and main lines. By increasing the grain size, you will visually make the image sharper and better, which will simplify the work.
You need to print the photo in two copies, one of which will be the basis for the future picture, beads are glued on top of it. The second photo should lie before your eyes, so that it is easier to navigate according to the drawing. After these preparatory work, you need to pick up the beads of the desired color.
The basis for the picture
You must immediately determine the size of the future picture. The paper must be glued to a thick cardboard or other base, additionally securing the edges with tape. When choosing glue, it is worthwhile to dwell on the one that remains transparent, quickly and firmly grabs the beads. The moment perfectly copes with this task. But this glue has one drawback - a pungent smell.
Special sets of bead paintings are sold, which are much easier to glue. In such kits, tubes with PVA glue are usually used, it is less harmful, and it is easier to peel it in case of an error. A great option would be a glue gun, often used for crafts.
Circuit
The bead paintings are very beautiful and look great not only on the walls of famous galleries, but also in the home interior.
Before you begin, you need to decide where it is more convenient to start from. Often, at first, glue is applied only to the contours along which beads are glued, indicating the main lines. When the circuit dries, small areas can be glued with beads. It is better to gradually fill with beads fragments inside the contour, going from it to the center. You should start with the smallest details.
Implementation Tips
Glue should be applied in small layers so that excess does not drain. In still lifes, the contours are usually done in black, sometimes silver or white can be used. If the picture is plot and requires an artistic approach, then the color of the contour is selected based on the shades of the image details. You can lay a wire between the color zones, adding brilliance and clarity to this image.
The bead picture uses significantly fewer colors than the original photograph. The primary colors and their shades are usually selected. Do not focus on the exact repetition of tones, as the image is not quite clear and crisp, it is better to resort to a light abstraction.
Bead color selection
It will be easier if you pre-distribute each color in a separate small container or bowl. Professionals often number the shades in containers, putting down the numbers in the figure so that during work they do not mix up similar shades. The areas between the contours are filled in turn. Each area has its own color, but often combines many shades. Transitions between shades are done using a gradient. Beads of one color are gradually mixed with another for a smooth transition. At first 2-5 are glued, in the next row - 10, then a row of 20 is made, and so on in increasing order.
Very small color areas (less than half the width of the beads) will not be possible to cover with beads, so just ignore these colors. Sometimes it’s worth using beads of a color slightly different from what you see in the photo. If there are two or more similar colors in the background, you can exclude one of them, thereby simplifying the background.
However, reflections and glare are best kept the same as in the original image. It is these color spots that help make the picture more realistic.
End of work
Beads that have fallen out of the right place can be carefully adjusted with a toothpick. In addition, when the entire drawing is applied, you can put baking paper on top and crush the picture with a book.
After complete drying, the picture of the beads should be placed vertically. As a result, some of the beads may come off and fall. They can be re-glued to the same places. On small areas without beads, glue should be applied with a brush, and individual beads are glued with a toothpick or needle. After gluing on the beads, you need to slightly press with your fingers so that it sticks more tightly. Sometimes an additional layer of varnish, glue or acrylic paint is applied over the beads. This helps to make the picture more durable, expressive and protect it from dust, which can easily fall into the spaces between the beads.
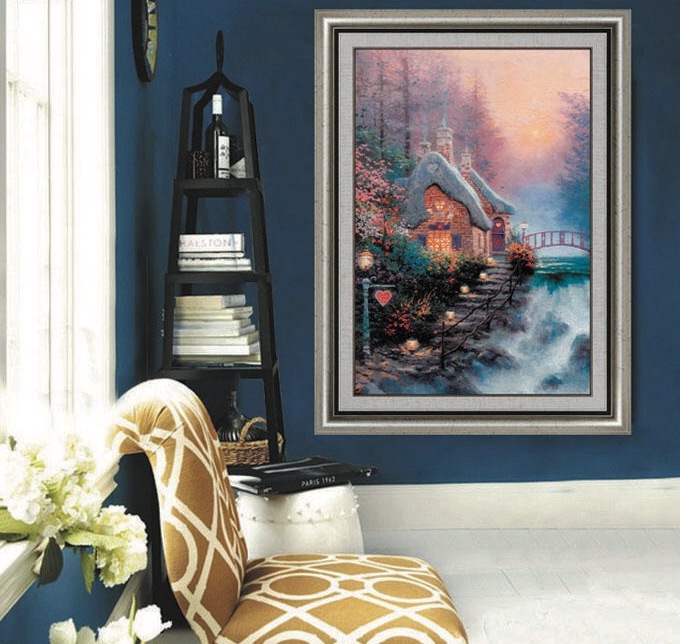
When the work is finished, the picture can be placed in a frame and hang on the wall. The panel, made by yourself, will have an original appearance and delight others. Beadwork is a pleasant hobby that can be easily taught to the whole family. Simple sketchy images can be performed with children, developing fine motor skills and a love of art. The pictures of beads on glue are very beautiful, the images look voluminous and bright. Especially interesting is abstract art, in which the emphasis is on colors.