Toddlers always like children's performances, as this is a great opportunity to prove themselves on stage. In addition, only here you can have the opportunity to try yourself in a variety of roles: starting from a good fairy and ending with evil sorcerers. And most importantly, creating a costume for any character is very simple.
The resident of the hut
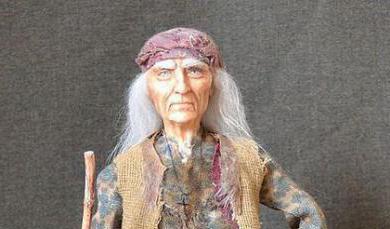
Today we will talk about an evil old woman whose image we will try to bring to life. Not a single performance is possible without her participation, since everywhere you need a good negative character, which you definitely should not follow.
But children still love the image of Baba Yaga and always dream of visiting her, flying on a broomstick, laughing loudly and doing various nasty things. After all, this is just a concert, from which only pleasant impressions will remain. So, for today, our goal is the mask of Baba Yaga with our own hands, which we will create from improvised materials.
Taking out of the closet
We will prepare the necessary materials for our idea. Since we will have a mask of Baba Yaga from paper, it means that it will be light and comfortable to wear. In addition, this indicates the main component of the product.
- Newspapers. The mask of Baba Yaga will be made using papier-mâché technique, so we need a large number of old newspapers. So you will use up the old raw materials without affecting the new ones. It is best to prepare the paper in advance by tearing it into small pieces to facilitate the design process.
- Balloon. It will serve as a dummy for the mask, on which we will impose layers of glued paper. So, we will not only save time, but also be able to independently control the shape of the product.
- Glue. Since the mask of Baba Yaga will be in contact with the face of the children, you should take the most gentle option. PVA, which contains a minimum of harmful impurities, is perfect. In addition, it smells the least, and with the addition of water, it becomes completely safe. Do not forget to take it with a margin so that you do not have to interrupt the papier-mâché production process and run to the store.
- Elastic. With it, we fix the mask on the head.
- Paints: gouache or acrylic.
Mask of Baba Yaga: the manufacturing process
To make the process of perceiving information understandable, we will write down all the steps in stages, paying sufficient attention to all the details of the work.
- Inflate the ball to a size so that it can be compared to the child’s head and tie the tip. Now gradually, layer by layer, apply pieces of sticky, glued paper, forming the silhouette of a mask, holes for the eyes and nose. You should not create a large mask that covers the entire face, as it will cause discomfort to the child. An ideal option would be a mask to the nose: it will add a twist to the image, but will not scare the little actors.
- Thus, you need to collect about 7-10 layers, which will provide the mask with density and durability. Do not forget about the distinctive features of the character: large nose, wrinkled skin. The finished form can be soaked with glue. When everything is ready, Baba Yaga's mask should dry thoroughly: it will take about a day.
- The next day, you can remove the ball by carefully puncturing it, avoiding cotton that could damage the mask. Skin the surface, remove bumps, make holes for the elastic. We measure the length of the lace in a stretched form and tie it to the base of the mask.
- Now let's do the coloring. Here you can completely go into creativity, giving the skin color a green or yellow tone. In addition, you can draw folds of skin and moles. After painting, the mask should be allowed to dry for another two hours.
Finished image
When Baba Yaga’s mask is ready, it can be safely used in scenes, adding only a dress, a wig, a scarf and a broom. With confidence we can say that with such a mask there will be even more people who want to play the role of an old woman!