Perhaps you will not surprise anyone with the assertion that almost any work seems difficult to do exactly until you start doing it. Subsequently, looking back, it remains only to laugh at their own experiences. A striking example is the electrical work of the house. So, if necessary, to install a single-key switch, many resort to the services of specialized firms and single masters, requesting payment in the amount of 250 rubles. and higher. In fact, the task is quite simple and easily solved on their own.
Types and principle of work
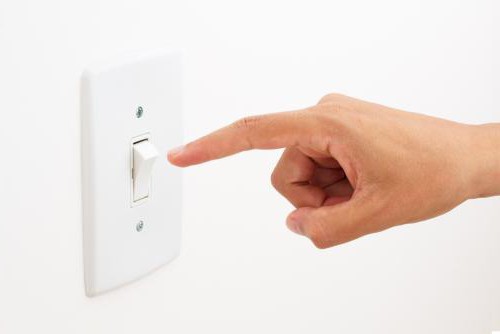
Any switch consists of a metal base, including the mechanism itself, hiding its decorative lining and keys.
Depending on the number of switched circuits, one, two and three-key solutions are distinguished. The installation of the single -key switch is performed in a standard manner, so just read about it or observe the work of a specialist once. Depending on the installation method and the degree of protection of the case, distinguish between internal and external switches. The first involves placement inside the wall, in a special box, and the second - directly on the surface of a foundation. For example, the installation of a single-key external switch is advisable where there are no special requirements for the appearance or it is not possible to install an internal box.
Implementations of electrical circuits are usually completely identical. The basis of these devices is a metal plate-rocker, capable of connecting two copper contacts with a kind of bridge, forming an electric circuit. In the on state, the switch passes current through itself, allowing the connected device to work.
Accordingly, in the off state, the internal resistance of the air gap between the contact and the plate is such that the circuit is broken. The plastic key just controls the position of the elements of the mechanism. There are modifications in which instead of the plate a copper “tongue” and a system of spring-loaded rods are used, but the principle of operation is unchanged.
An exception is electronic modifications, in which a simple circuit controls the process of current flow (response to light, sound, smooth adjustment).
Tools and installation specifics
Work begins with determining the place of future installation and preparation of materials with tools. Necessarily needed: voltage indicator / phase indicator and tester to check the integrity of the circuit; insulating tape; several small screwdrivers of different types; set of fasteners for installation; the wire.
Moreover, this is only the most necessary - a complete list can be formed immediately before installation. It is advisable to use a copper wire. Adapters are also permissible. Inside the
mounting box, behind the switch, there should be a small supply of wire.
External installation
Consider how to install a single-key outdoor switch. The instruction is often supplied with the product in a small brochure, or a sticker sticker is glued on the inside of the case. Although most often it is not needed, it is recommended that you familiarize yourself with its contents.
Connection to the power supply is carried out with voltage relief (automatic machines are turned off). This is a prerequisite, which should not be neglected.
If the wiring is not hidden in the wall, then by inspection you need to decide from which exact point it will be supplied with electricity to the switch. Otherwise, you must first localize the point of attachment, having studied the scheme, or in another way, finding the place where the line passes. Then its two wires (considered a “normal” 220 V network) are cut, their ends on both sides are stripped of insulation at a distance of about 10 mm and routed to the sides. After that, voltage is applied to the line. Using the Contact indicator (a proven indicator screwdriver is also suitable), the phase wire is detected and the circuit is de-energized again. In the place of the cut, a closing passage box is mounted, two wires are fed into it from three sides: the beginning and extension of the line, as well as an additional branch to the switch. By the way, it is at this stage that the length of the required additional section is determined. You can not use the box, but get by with insulated twists, although this is a very budget option.
On a dielectric base (brick), the device can be mounted directly. In all other cases, it is necessary to cut the base from a non-conductive material and already install a switch on the base through it. An alternative is to purchase a fully enclosed model.
The correct location (orientation)
Many sources explaining how to connect a single-key switch completely lose sight of the need to test the operation, as a result of which switching occurs “vice versa”: the lower position of the key corresponds to the on state, and the upper one to the off state. Although this does not affect the operation of the device, it can subsequently have the most sad consequences, for example, when replacing a failed lamp. The “Contact” indicator, a dial or a multimeter operating in the resistance measurement mode, checks at what position of the circuit breaker mechanism the circuit passes current. This corresponds to a keystroke up, which must be taken into account during installation.
In other words, the upper and lower terminals are detected.
Carrying out the installation of a single-key switch with your own hands, you should not trust the designations applied to manufacturers (for phase and zero) without checking, since the payment for their mistakes is human life.
Line connection
The wire through which the phase arrives grows and leads to the upper contact. The second is diverted from the bottom and laid to the lamp or any other load of permissible power. Although we use the term “wire” here, we need to understand that this may not be a single branch, but a cable core. Most often this is exactly what is being done.
Outgoing load is connected to the zero branch of the main circuit anywhere. Nevertheless, even such a simple action as mounting a single-key switch must be done in compliance with certain requirements, one of which states that the returning branch must be connected to the line in the same place where the outgoing phase is taken.
Thanks to this, you can easily carry out repairs if necessary. And if with external wiring it is still possible to trace the line by inspection, then if it is hidden in the wall, the search for a “wandering” wire is very difficult.
Line laying
Cable routes can be fixed on the wall with clips, laid in special boxes or hidden in a corrugated pipe, which gives the chain with the switch a neat and finished look, while protecting the elements from accidental damage. The only thing you should pay attention to is the corrugated pipe material.
It can be for both external and internal installation.
Mounting the internal switch. general information
In any case, the general scheme is as follows: "the phase wire of the main line - the branch to the switch - the wire to the load - the return of the wire to the zero core". Nothing complicated. The installation of a single-key switch, intended for indoor installation, is almost no different from the option with external placement.
The only difference is that first a cylinder is drilled / cut / knocked out, the diameter of which corresponds to the dimensions of a special plastic mounting box. Depending on the material of the wall, it is fixed there in one way or another, and the switch itself is already inserted into it. It is secured by tightening the two screws provided, which either part with special stops or simply screw the metal frame to the grooves of the box (option for drywall).
The cable lead for the internal switch is usually hidden. In the case of a concrete or brick wall, a stroba (groove) is made and wires from the main line are laid. If the walls are “sheathed” with something, then the cable is pulled behind the sheets. That is, only the switch itself (its key) should be visible, and everything else is hidden. Let's consider all in more detail.
Brick and concrete
A place is selected for the future switch. According to the PUE, the distance to gas pipes and doorways should be at least 0.5 m. The height is selected individually. Previously it was believed that the installation of switches should be carried out at the outstretched arm of an adult of average height. Now it is recommended not to exceed 1 m (with the exception of child care facilities). A circle is drilled with a special crown, and the resulting cylinder is knocked out. A groove with a depth of at least 10 mm “stretches” to it from the point of connection to the line.
The easiest way to do it is with a special chaser, two cutting edges of which simultaneously create parallel recesses. Although in the absence of a special tool, it is quite possible to do with the usual chisel and hammer.
Fix the box in a brick basis with cement. First, it is neatly fixed with alabaster or any other similar composition. A cable is supplied to it along the gate and is held there in the same way. After hardening, they begin to install the switch itself. First, remove the key from it and orient it on the “on / off” positions (discussed earlier). The wires are stripped and connected to the contacts. It is possible to start their full coating in the wall only after checking the operability of the entire chain. By the way, the installation of the Werkel single-key switch, as well as the products of some other manufacturers, is simplified, since in their design, self-clamping solutions are used instead of bolts fixing the wire.
Depending on the design features, a thin elastic band may be located on the inner retaining tongues. It is not necessary to remove it, because thanks to it, the tabs are pressed to the "body", making it easy to get it into the mounting box. The metal plate, which forms the basis of the switch, should fit as close as possible to the wall, since even insignificant 1-3 mm of the gap during the final assembly "pour out" into a rather noticeable curvature. So improper installation of the Schneider single-key switch, which belongs to the group of very high-quality products, can nullify all its advantages. And it will not matter how long the plastic retains its appearance.
Drywall and other similar materials
With walls lined with something, the task is simplified several times. Perhaps its implementation is no more complicated than in the case of installing an external switch.
In the sheet, a circle is cut out with a crown and a box is installed in it.
Its design is such that it allows dispensing with retaining solutions, although there are screws for additional fixation. From the distribution box (usually under the ceiling), a cable stretches behind the sheet to the installation location of the switch, and from it to the load. Installation is in progress (phase wire search, orientation, connection to terminals and case assembly). The only thing that you should pay attention to when installing the Viko single-key switch and similar manufacturers is the following: it is recommended to screw the construction plate additionally to the box with screws. Such modifications are offered by stores in large quantities.