Each fashionista’s wardrobe must have a light weightless dress, which is ideal for stuffy summer days. This season, the shirt dress is in trend. Such an outfit can be ideal both for going to the beach, and for evening friendly gatherings in a cafe. Sewing a shirt dress with your own hands will be much cheaper than buying a finished one. In addition, the likelihood of meeting someone in the same, personally sewn outfit is reduced to zero, since the dress will be made in a single copy. This article will discuss how the dress-shirt pattern is constructed and what material to choose for the product.
The choice of fabric and accessories
With today's variety of materials, there is room for a fantasy. Batiste, cotton, jeans, chintz, linen, staple, rayon are ideal options for natural canvases for hot days. A variety of colors, prints and textures will allow you to create an original, strict, long dress-shirt, a playful girlish look with an abundance of frills and lace or a sporty variation.
As for the accessories, there is also a huge selection of buttons, sewn buttons, various decorative stripes, cords, stitching threads and whole appliqués made of rhinestones and beads.
Model selection
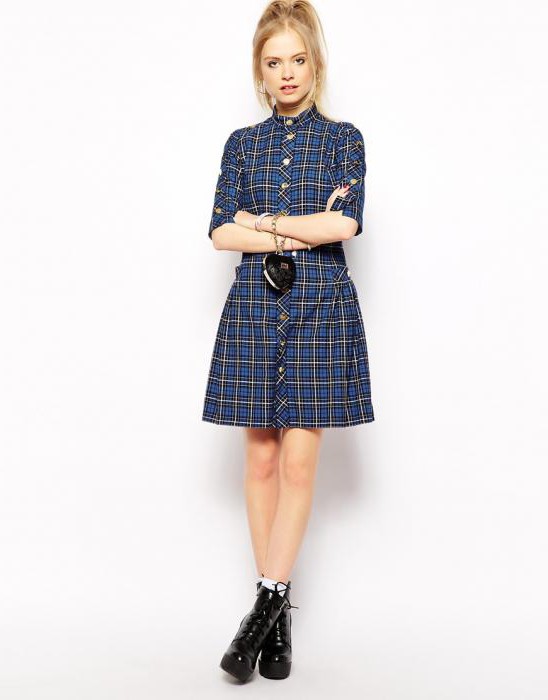
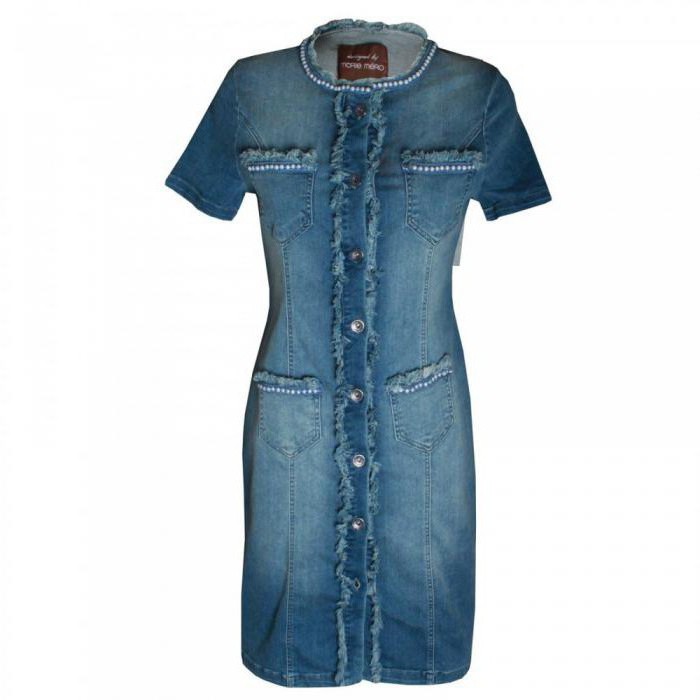
In order not to get lost in a huge variety of materials, you should decide on a model in advance. If this is a sporty option, then jeans, cotton, linen and staple with a calm print or without it at all are what you need. A denim shirt dress can be versatile. Even if it is decorated with beads and rhinestones, it will perfectly combine with moccasins, sneakers or high-heeled sandals.
Perfectly draped and flowing viscose and staple are perfect for sewing a long outfit. Open shoulders and a decorative back with crossed stripes or a sewn openwork insert will add chic.
A simple batiste or denim dress-shirt with a belt without additional decorative elements and even without tuck tucks will be no less interesting.
Building patterns
To make a template, you will need a construction film or paper, a ruler, a centimeter tape, scissors, a marker or pen. The construction of the dress pattern begins with taking measurements from the figure. The main girths will be required: chest, waist, hips. You will also need to measure the width of the back, the height of the chest, the height of the back and front to the waist and the width of the shoulder.
The construction of the dress pattern can be divided into several stages:
- Creating a basic drawing grid.
- Drawing the main lines of the front and back.
- The construction of the sleeve on the armhole.
Creating a basic grid
On paper or construction film, draw a vertical equal to the length of the product from the shoulder to the bottom of the hem. Perpendicular to her mark the line of the shoulder, chest (according to the measurement of the height of the chest), waist (according to the measurement of the height of the back and front to the waist), hips (below the waistline by 20 cm) and the bottom of the product.
Perpendiculars should equal chest girth. At the end of the horizontal lines, a second vertical line is laid. Then they move to the chest line and set aside 1/2 measurements of the "width of the back", raise the perpendicular from the point to the shoulder line. After determine the width of the armhole. For this, the half-circumference of the chest is divided into four and 2 cm is added. The obtained value is postponed after the previously marked point (1/2 the width of the back). The perpendicular is also raised from the received mark. Thus, three zones appeared on the grid: the back, armhole and shelf.
Drawing the main lines of the front and back
After you define the base grid for the template, you can refine the small details in the drawing. On the shoulder line from the left and right angles, they retreat 7-8 cm and mark the neck. For the back (at the left vertical), it is deepened by 3 cm, and for the shelf (at the right vertical) by 7-8 cm. The pattern of the shirt dress can be built without tucks on the back and chest, so you can immediately proceed to design the shoulder seam and armholes. To do this, from the point of the neck draw a line equal to the measure "shoulder width". It is underestimated from the original mark by about 1.5 cm. Next, on the chest line in the armhole zone, find the middle, and on the vertical raised from the mark “1/2 back width”, note 1/3 of the armhole height and draw through these points with a smooth line armhole from the back.
The shoulder line from the side of the chest should be 2 cm lower, therefore, before laying it, determine the border where it should fall. Also, at the 1/3 vertical level, a point is set at which an armhole for the front is drawn to the middle of the armhole zone on the chest line.
Next go to the waist line. First, a perpendicular is lowered to it from the midpoint of the armhole zone, then from the received perpendicular on the waist line they retreat 2-3 cm and draw a side cut. As a rule, the pattern of the dress-shirt is built without tucking darts, but only with small smooth bends along the side cut.
The perpendicular from the middle of the armhole zone is extended to the thigh line. Then, horizontally from the left and right verticals, ½ measures “hip circumference” + 1 cm are laid aside for loose fitting. Then modify the side cut. Usually the details of the front and backs in the drawing are facing each other, so when cutting the template from one side, you will need to glue the cut part at the level of the hips.
Arm sleeve construction
The dress-shirt pattern can be with a sleeve and without it. It is built quite simply if you know a few basic rules. Using the lower border of the armhole, draw a circle, which is raised by 1.5 cm at the top. Then, along the center line of the chest, mark the arm circumference + 4 cm and enter the sleeve ridge to the extreme points of the delayed segment. Sleeve length can be any.
The constructed pattern can be used for sewing any dress. To make it look like a shirt, you should make it with fasteners on buttons on the midline of the front. The main thing is not to forget to give an allowance for the design of loops and sewing buttons.