Every girl, girl, woman strives to make her image a little more beautiful. Little fashionistas have enough pretty bows and hairpins, respectable ladies need a more serious arsenal of all kinds of jewelry and accessories. Today in the stores for sewing and needlework a rich selection of all kinds of ribbons, beads, rhinestones and cabochons is presented, and craftsmen raise the prices of their products higher and higher. Let's see how you can make jewelry with your own hands. For beginners, this idea may seem complicated. However, in fact, in order to make a simple accessory, you do not even need special tools, although a minimum set is necessary. So, first things first.
Preparation of tools and materials
- Pens and pencils will be required to translate patterns or draw a diagram of a future product.
- Scissors, tweezers, needles of various thicknesses, rulers, and also sometimes compasses may be required.
- Materials It can be ribbons, beads, fabric, soutache, etc. It all depends on the technique in which your product will be made. Be sure to stock up with durable white threads and monofilament.
- Glue. There are also different options. It can be an ordinary stationery pencil, it can be a “Moment” (remember that the “Moment Crystal” is completely transparent after drying), it can be a PVA, or maybe a hot gun.
- The basis for DIY decoration. For beginners, it can be simple rubber bands or hair clips. All such accessories are also sold in fabric stores.
Kanzashi, or DIY jewelry for beginners from ribbons
Kanzashi is an increasingly popular type of hobby. The essence of this kind of needlework is as follows: with the help of petals made of squares of fabric or satin ribbons, very original floral arrangements are created. Mastering kanzashi is quite simple, because at the heart of this craft there are only two types of petals:
- acute;
- round.
Everything else is just a variation on the theme. From these two petals, needlewomen and craftswomen from all over the world learned to create real masterpieces. Do-it-yourself jewelry for beginners in this technique is done quickly, and, very importantly, you can almost immediately see what happens. The kanzashi technique is used both for creating hairpins and for decorating Christmas balls.
Souture embroidery
Once upon a time, this embroidery technique was used only to decorate clothes, but today soutache cords have found application in the creation of very beautiful jewelry.
The advantages of this kind of creativity include:
- A relatively small list of necessary tools (needle, scissors and glue).
- Availability of materials. Soutache cords can be purchased at any fabric store, and their cost in many regions does not exceed 8-10 rubles. per meter.
- The complete absence of any rules and standards, although if you create jewelry with your own hands, for beginners, photos are the best help to understand the essence of working with this material.
Decorating beads and cabochons with a soutache cord, experimenting with color and texture, forcing the soutache cord to bend, you will get a new decoration every time.
Fabric Accessories
What else can you make jewelry with your own hands? For beginners - from fabric. Although this is somewhat more complicated than the previous version.
However, here everything depends on the chosen technique. So, for example, you can create an elegant hairpin from a beautiful flap using the kanzashi technique. The only difficulty is slicing perfectly even squares - the base of the petal. In addition, jewelry can be made of fabric using the guilloche technique, or, as it is also called, burning through fabric. These are the easiest ways to create jewelry. Many craftsmen also use tools such as bulks in their work. They are quite expensive, but the result achieved with their help exceeds all expectations. This effect is achieved due to the special processing of the fabric. This can be done with both gelatin and PVA glue or a special composition. The treated fabric, exposed to the bitter bouillon, takes the form conceived by the master, and as a result, amazing flowers and leaves are obtained, and if the fabric is additionally dyed, you can achieve a greater similarity with fresh flowers.
The only minus of jewelry made from tools made with tools is seasonality. You cannot wear airy flowers under outer clothing.
Beadwork
Beadwork is fertile ground for beginners.
Try to make such decorations with your own hands. For beginners, many options can be selected from beads. They will not even require huge financial costs, unless, of course, you want to study on Japanese beads, which is considered to be the best in the world. Jewelry can be completely different depending on the color of the source material and weaving technique. Recently, bead tows have become very fashionable, most often they can be found in offices at a businesswoman.
Polymer clay sculpting
Another quite popular type of needlework is molding from thermoplastic. Another great idea from the category of "DIY jewelry (for beginners)." It is quite simple to make products from polymer clay, but the rich color gamut of the material, as well as the ability to combine colors and make transitions, will revive even the most unpretentious beads. And if in tone with them you will also make an exclusive pendant ?! Agree, it is tempting. At the same time, you can be sure that no one will have such a decoration, since even the same master, who performs two identical products according to the same pattern / pattern, will never make two completely identical options.
DIY jewelry for beginners: a master class
We talked a lot about techniques, now we propose to start practice.
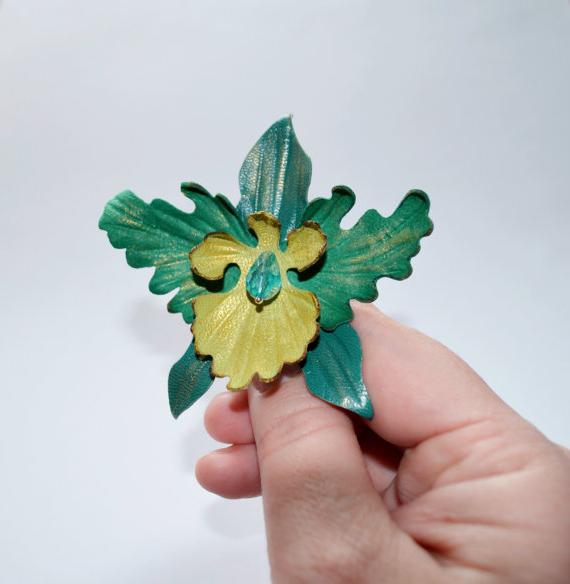
We will make a brooch / hairpin "Astra" from such material as foamiran (popularly also called faux suede or fom).
Necessary materials
- Foamiran of any color for the petals and yellow for the middle.
- Glue. You can use hot melt glue, but only if you already have some experience working with it, because the hot glue freezes very quickly, and it will be impossible to change the position of the petals. Glue "Moment" (we recommend using "Moment-crystal", as it does not leave spots and remains dry when dried).
- A ruler, scissors and - a very important tool - a toothpick. We need it in order to begin to form a flower.
Completing of the work
Cut the fom into strips. Two yellow strips with a width of 1.5 centimeters and a length of 2 centimeters for the middle. And six stripes of your choice of color from 2.5 centimeters to 5.5 centimeters wide. Step 0.5 cm. We cut the fom across, but do not cut it to the end, we make, so to speak, a fringe. The width of one fringe is about 5 mm. Point the tip of each fringe.
Next is the most interesting. Foamiran is a material that changes its shape during heat treatment. Therefore, we apply each of our fringe strips to the iron for a few seconds. You yourself will understand that the processing time has expired when you see how the stripes begin to bend. After the heat treatment is completed, turn off the iron and proceed to assembly. In order to make it convenient to collect the flower, we need a toothpick.
So, we apply a drop of glue to the toothpick and quickly, until it dries, we begin to wrap our base with the narrowest strip of yellow foamiran. In this case, the toothpick will be just a pen, for which we will hold the flower during the work, but it will not be visible in the finished product.
Make sure that the entire “fringe” is directed to the center of the future flower. After you have wound the first strip, the second is used. We wind it up, just like the first one, we make sure that the “fringe” looks to the center of the flower. Do not forget to smear a strip of foamiran as you wrap glue on a toothpick. The next strip, it will be 2.5 centimeters wide, we glue in the same way, but all the next ones are glued so that the "fringe" looks out.
Due to this, the flower will turn out lush and alive. That's all, actually. Similarly, you can make aster and fabric.
After the flower is ready, now you can cut off the unnecessary toothpick, close the base of the finished product with a circle of foamiran, either of the same color or green, if you will decorate your work with green leaves or other decorative elements. Do not forget to glue the base hairpin. By the way, in hardware stores you can buy a base that combines two types of fastening: a brooch and a hairpin.
As you can see, do-it-yourself jewelry for beginners is easy to make - there would be a desire.