Now gladioli are very popular among gardeners. However, there were times when they were considered weeds and simply removed from wheat fields. The ancient Greeks did this with these beautiful flowers, but at the same time, the Romans decorated their gardens with them. Now, more and more gardeners are acquiring planting material for themselves, but not everyone is ready to grow these wonderful flowers on their site. In the article we will consider all the features that relate to gladioli, planting and care in the open ground, as well as the features of storage of tubers.
Description
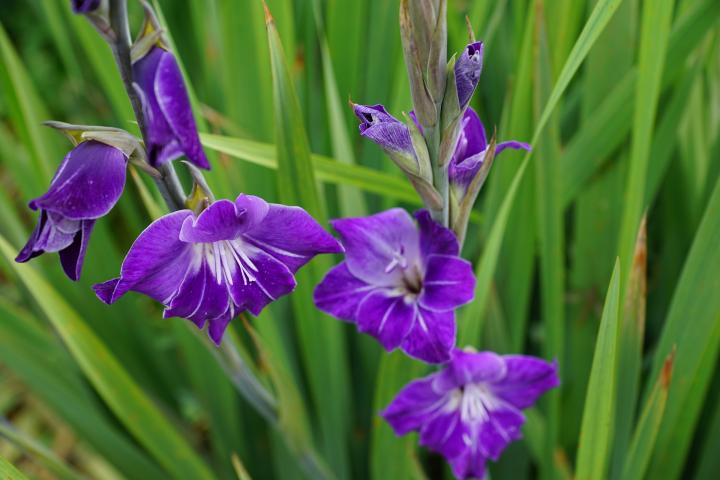
Gladiolus refers to ornamental plants. It has a straight stem on which long leaves and flowers are located. The leaves have a saturated green color, but there is nothing to say about the variety of shades of colors. In general, gladiolus numbers dozens of different colors and shapes. The leaves of this plant are somewhat reminiscent of the appearance of a sword. The root of the gladiolus is a bulb that forms children during the growth process, with the help of which these plants multiply. But all about gladioli, planting, care, storage of bulbs will be discussed later in the article.
Growing rules
There is a whole set of rules that apply to gladioli, planting and care in the open field, if you follow them, you will be able to grow beautiful and healthy flowers in your garden plot.
- Gladioli should not grow in the same place for more than two years. Every third year they need to be transplanted to another place - this is a prerequisite.
- In addition to the place where the flowers will grow, you need to change the composition of the soil. This is another condition to consider.
- Gladioli get used to a certain climate, so when buying planting material, this fact must be taken into account. Bulbs that were brought from Holland will surely delight you with flowering, but this will happen only once. This is due to the fact that a flower that previously grew in a humid climate, where it always rained, will not feel comfortable where there is a lot of sun and heat.
- If you have children and large bulbs, then you need to plant them separately. If mixed, large ones will oppress the small ones. In general, try to select the largest planting material and plant it on individual flower beds.
- Particular attention should be paid to the depth of landing. If the soil is soft, then you need to deepen by four diameters of the onion, and if the soil is heavy, then one diameter must be removed. If planted incorrectly, you will have to tie the arrow with a flower, and it is possible that the gladiolus will not bloom at all. This happens when the bulbs have been planted too deep.
- Consider in advance the day you will plant the bulbs. Three or five days before this, the bulb must be peeled. Otherwise, it may not grow. After landing, some time they will need to be watered every other day.
- Early varieties can be planted in the shade, but even in such conditions they will bloom later than usual. And late varieties planted in the shade may not please their flowering at all. Try to choose sunny places.
- The site should be well ventilated, but not form drafts. Otherwise, the appearance of various fungal diseases.
- If you planted gladioli in sandy soil, then it is better to fertilize them by spraying.
- In the summer, gladioli need only one watering per week, but quite plentiful. However, if the summer was especially hot, then you have to do it every night. Do not forget to loosen the soil after each watering or rain so that it is well ventilated.
- Particular attention from the gardener requires cleaning the bulbs and their subsequent storage. This will be a separate point in this article and should be of great interest to the gardener, especially the beginner.
Bulb preparation
As for the flowers of gladioli, planting and care (photo attached), then start the study of this item should be with the preparation of bulbs for planting.
You should consider in advance when you will plant them in open ground, since three or four weeks before this it is necessary to begin preparing the planting material. The corms are covered with dense scales, which should be removed so as not to damage the existing sprouts. Any damaged or diseased bulbs must be removed. They are not suitable for landing. Allowed only the planting of those bulbs that were affected by scab or sclerotinia. but damaged areas need to be removed and the place of cutting trimmed with green.
The peeled and processed onions must be laid out in one row so that the sprouts are at the top. Place them in a warm and dry room. In this state, they are until the shoot begins to germinate. Before planting, planting material must undergo mandatory processing. This is necessary for the prevention of various diseases. For this purpose, use a 0.3% solution of potassium permanganate, in which the bulbs are placed for no more than two hours or the 0.3% solution of Fundazole, where the corms can be no more than one hour.
Sometimes it happens that the processing has to be carried out immediately before disembarkation. In this case, use a solution of potassium permanganate. For one liter of water you will need 1/2 gram of potassium permanganate. In this solution, the bulbs are placed for half an hour and immediately after it are planted in the ground.
Kids training
Children of gladioluses also need special attention, the landing and care of which cannot begin without special treatment. But for them, the technology will be slightly different. The shell is removed from them just two weeks before planting in the soil. Try to choose a kidney whose diameter is at least eight millimeters. There are not too large varieties, then the children are taken small. After peeling, they are also laid out in a row and placed in a place where diffused sunlight will fall on them. Children who have sprouted are placed in a solution of potassium permanganate. For one gram of potassium permanganate you will need one liter of water. In such a liquid sprouted onions are no less than, but no more than nine hours.
Here such a care for gladioli before planting should provide every gardener. Attention should be paid not only to large corms, but also to children.
Site selection
Gladioli love to grow where there is a lot of light and warm enough. That is why the choice of site must be treated with special attention.
The area where you plan to plant gladioli should be well ventilated, but there should be no drafts there. There should be plenty of sunlight and well-drained soil, loved by gladioli. Landing and care in the Urals and in the more northern regions of the country requires that the light on the site is constant. Even the smallest shading leads to the fact that the flowers begin to grow more slowly and may not bloom at all. If you are a resident of the south, then you can allow some presence of shadow, but only at noon.
Try to choose a site where there will be no stagnation of groundwater. This is another problem that leads to the development of various diseases. It is better if the site will have a slight slope, along which excess water will drain.
The soil
As for the soil, for perennial gladioli planting and care require the presence of slightly acidic soil. If the acidity exceeds pH 6.8, then the tips of the leaves will begin to turn yellow and gradually fade, and the flowers will open extremely slowly. There is a risk of fusariosis.
The alkaline environment makes the iron that is present in the soil insoluble and therefore inaccessible to the plant. In this regard, the formation of chlorophyll in the leaves is greatly slowed down and this leads to their yellowing. If on your site the whole soil is acidic, then you need to add eggshell, chalk or dolomite flour to it. Any of these ingredients is taken at the rate of 200 grams per square meter. Add substances not just like that, but during digging.
Soil structure
The chernozem is considered the best structure, however, it is allowed to land in loamy soil or sandy loam. You can create a similar structure yourself. To do this, heavy loam is diluted with sand, and a little clay, as well as humus and rotted compost, can be added to the sandy soil. Any additions are made only during digging. This is usually done in advance. However, if you were able to choose a site that warms up well with sunshine, then you can do this right before the landing.
If you live in a place where rains are not spoiled too often, then it is better to dig the beds in the fall, and in the spring they are only loosened a little. It helps keep moisture. Gladioli feel good where legumes, vegetables and some perennial herbs used to grow. And you do not need to plant them where representatives of the Astrov family or root crops grew. The bed should be approximately 1.2 meters wide.
Those gardeners who already in the fall know where the corms are planted will find the information about pre-fertilizer useful. In the fall, you can make special dry fertilizers. For one square meter of beds you will need one hundred grams of dry superphosphate and about forty grams of chloride fertilizer. After complementary feeding, you can safely dig the plot. But with the onset of spring, when the soil is loosened, potassium sulfate or Kalimagnesia is added.
Planting bulbs
In general, you can plant gladioli from the end of April until the beginning of May, but you should take into account the climate in your area. And it is better for residents of northern places to postpone the landing and start it a little later.
Large bulbs should be deepened by fifteen centimeters, and small ones no more than ten. The distance from one bulb to another equals the depth of the hole. But the distance from one row to another cannot be less than twenty centimeters.
The groove for disembarkation should be prepared in advance. River sand is laid at its bottom, but it would be better if sphagnum moss is placed there instead. From above, this layer is watered with a Fitosporin solution and water, after which the onions are laid on top and dripped. Why moss? Because it is able to retain moisture for a long time, but at the same time prevent the formation of rot. It does not allow the soil to dry out even in the most intense heat.
Care
After planting the bulbs in open ground, it is necessary to provide them with proper care. When the emerged seedlings begin to reach a height of ten centimeters, the topsoil must be mulched. To do this, lay out a five-centimeter layer of humus. This is necessary so that the soil does not dry out, and humus retains moisture after irrigation.
Watering gladioli carried out once a week. About ten liters of water are required per square meter. You can not get water on the leaves, so try to water into the furrows between the rows. After each watering, loosen the soil five centimeters in depth. This is necessary so that a crust does not form on top of it, which will not allow oxygen and moisture to pass through. Once a decade, you must definitely loosen the earth, and also after every rain. If the summer turned out to be especially hot, it is better to increase watering up to two times a week. Otherwise, the flower stalks will fade and there is a risk that the last flowers will not bloom at all.
Carefully watch when the buds begin to appear on the arrows, it is possible that they will have to be tied to pegs so that they do not break. During flowering, all wilted flowers must be removed immediately. Since the gladiolus will spend a lot of effort on the formation of seeds in their place. And the propagation of gladioli by seeds, planting and care for them are of little interest to experienced gardeners.
In addition to all this, gladioli must be weeded. Enough three or four times a season. Dangerous weeds during the formation of seedlings. There is a risk that they will deprive you of flowering. And also a large number of weeds provokes the appearance on the beds of various diseases and slugs, which are very dangerous for these flowers.
Top dressing
Mineral fertilizers are added several times per season. The first time they make nitrogen fertilizers. This must be done when several real leaflets appeared on the young. Twenty-five grams of urea or ammonium sulfate can be added per square meter, and thirty-five grams of ammonium nitrate can also be used. If the plant lacks nitrogen, then its leaves will begin to dry out and turn yellow, but if there is too much of it, the leaves will grow, which will slow down the appearance of flowers.
The second top dressing is nitrogen-phosphorus. It is necessary in the presence of six leaves. This time, for one square meter, you will need to take fifteen grams of superphosphate, ten grams of ammonium sulfate, twenty grams of potassium sulfate. And the third top dressing is carried out just before the period of bud formation, it is potassium phosphorus. You need to add twenty grams of potassium chloride and thirty grams of superphosphate, all this per square meter of beds.
Organic fertilizers should also be applied, but unlike mineral fertilizers, which are added in a dry form, they are used as a liquid. You can use a solution of bird droppings. For ten days, three buckets of litter are infused on five buckets of water. After that, for ten liters of water you will need one liter of fertilizer obtained. Pour it in the aisles. After this, loosening and weeding is mandatory. Such fertilizers can be applied within three weeks. But remember that after the fifteenth of August, their use should be discontinued. You can not use horse manure to feed gladioli.
Pruning and digging
Flowers can be cut only from those plants on which there are at least four leaves. The procedure is carried out early in the morning or late in the evening. A very sharp knife is used. The remainder of the peduncle should be well hidden between the leaves.
Corms are dug up around mid-September. For accuracy, it is better to count from the end of flowering thirty-five days and boldly dig. Ripen bulbs and children should be well separated from each other and be covered with dense scales. It is better to dig out in dry weather. Start with the earliest varieties. The last thing they dig up is the kids.
Make sure that bulbs are not affected by black spotting. If you notice a similar problem, then try to immediately dig out all the available bulbs in order to prevent the appearance of other diseases. Before digging up the stems, you can mow them right away, or you can cut them off the bulbs already, the same goes for the roots. Each variety is stored in a separate box. Children must be separated from large tubers. Remember to shake off the ground and rinse the bulbs under running water.
Bulbs are placed in a one percent solution of Fundazole for twenty minutes and again washed under running water, and then in a three percent solution of manganese and then dried for three days. Bulbs are stored in boxes, the bottom of which is covered with paper. The first two weeks they are stored at a temperature of thirty degrees, and then can be reduced to twenty-two. After a month, you can start sorting.
Storage
Corms should be stored in conditions where they do not begin to sprout prematurely. The air temperature in the room should not be higher than ten degrees. For best preservation, put a few cloves of garlic in each onion box. Perform regular inspections during which remove spoiled tubers and change garlic. It is better to store gladioli in mesh boxes and in the cellar, where there is airing. Boxes can not be placed on the floor, it is better to use racks. And also a convenient way of storage - dimensionless tights.
If you are planting gladioli and leaving at home, then you can store the bulbs in the refrigerator with dry freezing on the lowest shelf in special containers. Closer to spring, the bulbs are wrapped in paper and put in the refrigerator again, but in a cooler place. Planting gladioli in pots and caring for them has no features. In some matters, they are even a little easier than in the open ground.
The features of gladioli have been described above. Photo, landing and care - all this is presented in the article. Talked about storage and digging rules. If you follow all these recommendations, then you can grow beautiful and healthy flowers on your site.