In a house built of wood, you can lay wiring in almost any way. Recently, however, designers have chosen the retro style. After all, such a method has several advantages. Firstly, this is a good way to organize the power network in the house. Secondly, wiring laid in this way maximizes the retro style throughout the interior.
What does retro wiring mean?
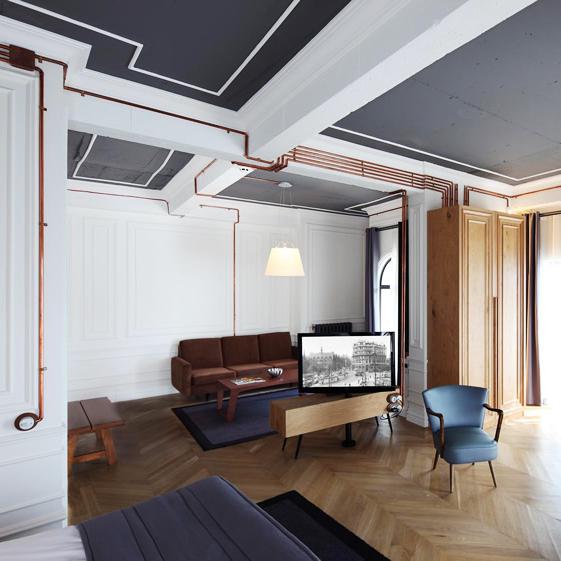
What is retro wiring? A photo will help answer the question. A similar method of installing an electric cable in the last century was considered the only one. However, after a while, the wires began to be laid in special boxes - channels, or strobes. Retro-style wiring is rarely used. Most often, this installation method is used only to emphasize the originality of the interior. Recently, many manufacturers began to produce entire series of twisted fittings.
Today, consumers have the opportunity to purchase television, telephone and electrical cables, chandeliers, sockets and junction boxes, made in the style of the last century. It is worth noting that to create them, they mainly use porcelain, electrical engineering plastic, brass and copper.
Features of retro-style wiring
Most suburban cottages that use this method of laying electric cables are saturated with lighting fixtures and a variety of energy-intensive household appliances. That is why during installation it is necessary to use copper wires (when laying to chandeliers and lamps) with an enlarged cross-section (up to 1.5 mm²), and to power outlets - up to 2.5 mm².
It is worth noting that retro wiring in a wooden house does not hide in the walls. This is strictly prohibited. This fact is due to the fire safety of the entire building. Twisted wiring in the house allows you to solve many problems. The cables practically do not contact the wall surface. In this case, all sockets, as well as switches should be overhead.
Basic rules for wiring in retro style
Retro-style wiring should be done at a distance of 10 mm from the wall surface. Fires most often occur due to the lack of normal wire contact in the junction box. That is why each cable must be well fixed. For this, it is best to use special terminal blocks. As for junction boxes, it is best to install them in an easily accessible place.
A similar wiring is installed in the house not only of wood, but also of brick. In this case, the rollers are best secured with dowels. When screwing in the screw, the sleeve wedges. This element has a fibrous structure. Therefore, during installation there are no problems.
What you need to know about cable installation
The wiring harness usually consists of two or three cores. Its choice depends on the availability of grounding. After and before the insulator, before fitting to the cable, put on pieces of heat-shrinkable tube, which will ideally suit the color. This precaution will make mounting more reliable. Retro-wiring in a wooden house must comply with all fire safety rules. As for the cable, it must be certified for laying open wiring.
The cable fastener is better fixed with wood screws. When installing the cable , porcelain insulators should be installed at each switch and socket. It is worth placing them at a distance of 5 cm from each electrical point. The rollers must be mounted along the line of the wire at intervals of 0.5 meters, and on bends - 0.45 meters, as well as at an angle of 45 °. To connect the cable in the junction box, you must use the terminal blocks for the flexible wire.
Should I use a corrugated pipe?
If the retro wiring in a wooden house is open, then the corrugated pipe can not be used. However, it is worth considering that a cable with a large cross section is not made in this style. Therefore, it is unlikely to fit into the overall interior. In this case, it can be hidden in the corrugated pipe. If in some places the wiring is to be carried out in hidden channels, then a special cable with the appropriate fire safety index should be used.
Also, wires intended for energy-intensive devices must be laid in a corrugated pipe. For these purposes, you can use a regular plastic cable channel, which is most suitable for color. Often, retro-wiring in a wooden house is laid only on areas that are noticeable to the eye. This can significantly save money.
How to install retro wiring
Installation of retro-style wiring in a wooden house is carried out in several stages.
- Determination of places where lighting and household appliances will be placed. Sockets should not be installed too low, as there is a risk of mechanical unintentional damage. When choosing a place for terminal devices, it is worth remembering not only about safety, but also about comfort.
- The next step is to determine the connection diagram of the terminal devices. The reliability of the entire system and the amount of cable depend on this. If the circuit is optimized, then wiring and all components will need a little. This will save a significant amount. After all, retro wiring and all the necessary components for its installation are not very cheap. With the right approach, the cost of energy is reduced.
- At this stage, the marking of the tracks. The most convenient and simplest method is laser level tracing. This will avoid inaccuracies.
- Mounting on the intended track of the rollers.
- The next step is the installation of mounting and junction boxes.
- Wiring and connection of terminal devices. When connecting the cable, twists should be avoided.
- Check all connections, measure resistance.
Finally
Installation of retro wiring will not cause much difficulty, if all the rules are followed. The result is a good addition to the basic style of the interior. If you use raw materials for retro wiring that meet all the requirements, then you can not be afraid of a sudden fire.