A new trend has occupied the catwalks and store shelves. Admittedly, removable collars came into fashion a couple of seasons ago. But such a peak in popularity reached only this year.
Each eminent designer has included several types of these accessories in his collection. From the attribute of business clothes, it has turned into an indispensable thing that can change the mood (of course, only for the better), attract attention (envious and admired) and give the image a bright note. Who doesn’t want to put some of these wonderful things in their wardrobe?
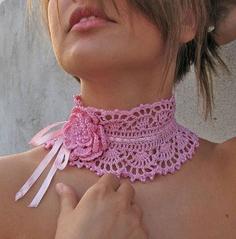
Seeing the excitement, manufacturers immediately launched the production of collars. The most popular products are: Lake & Liberty, DimePiece, Stern, Nauticoco, Gemma Lister, Eleven Objects, CeCe Toppings. Most of the fair sex defines prices for products of well-known brands as “sky-high”. In order not to stay on the sidelines of fashion, ladies are armed with needles, scissors and pistols (of course, glue) and create fashionable collars with their own hands. Follow their example and you. If it worked out for one, it means that you will definitely succeed. For decoration, you can dissolve old boring beads or beadwork and sequins from an old blouse. Or buy "hit" spikes.
Master class “DIY bead collar”
You will need:
- felt 22 cm wide by 28 cm;
- scissors;
- glue gun;
- glue;
- satin ribbon up to 60 cm long;
- beads, jewelry, precious stones, baubles, hairpins (all that you decided to decorate your collar with).
Step-by-step instruction:
- To get a neat and even collar made of beads, do it yourself with your own hands first. As a basis, you can take any shirt or dress with which you are supposed to wear a collar. Draw a neckline on the paper, and make the ends of the product (sharp or rounded) as you like.
- Cut both parts of the collar from felt. Be sure to leave the tabs on the front - they are needed to fasten the two parts of the collar.
- Apply one allowance to the other, after applying hot glue between them. Do not worry, the connection will not be visible - it will be covered with jewelry.
- Now proceed to the most important thing - decorating. A self-made bead collar will look very dignified if you work hard and think in advance (lay out on the patterns) beads, beads and other materials in a symmetrical pattern. Glue each decor element to the felt part. If you are friends with a needle and thread, you can dream up and lay multi-colored stitches both along the edge of the collar and between the beads.
- Cut the satin ribbon in half. If you don’t need a bow or its ends are too long, you can cut the ribbon when the product is completely ready.
- At the edges of the collar, backing off a couple of centimeters, make small slots, the width of which should be equal to the width of the tape. Pass the tape through the slot. The length of the short end of the tape is not more than five centimeters.
- Apply glue to the short end of the tape. Bend in the long part and press. Having securely fixed one tape, repeat the procedure with the other. All. Your self-made bead collar is ready to go out!