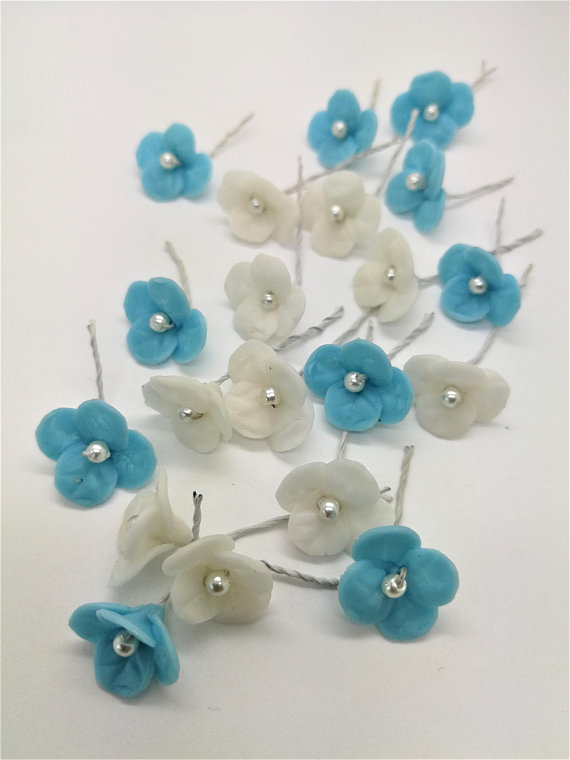
The appearance of new material in the form of polymer clay among the goods for needlework was a real event for those who like to master new techniques and embody their creative ideas in a new way. It consists of a base and a plasticizer, due to which it becomes soft and elastic and therefore easily changes shape. From polymer clay create dolls, beads, hair ornaments, brooches, pendants, earrings. She also decorates mugs and cutlery, notebooks. But the most common type of product is polymer clay flowers, photos and master classes, the manufacture of which is now very popular among beginner craftswomen.
Types of Polymer Clay
There are several types of this material, but basically two groups stand out: baked and self-hardening. Self-hardening clay freezes over time while in the air. But the best workshops on polymer clay flowers are held from the second version of the material. This type hardens after processing with high temperature - from 100 to 130 degrees. Separately, it is worth mentioning floral clays that allow you to create realistic flower buds. Work with this material is called ceramic floristry.
Flowers made of polymer clay: a master class on creating hairpins
Baked clay is the most popular material among needlewomen. With the right approach, it can be used to make realistic miniatures for doll houses, flowers, decorations from them and table compositions. It is worth getting to know this material closer and learning how to make a bright hair ornament, namely a hairpin with hydrangea inflorescence and elegant foliage. So, let's start our step-by-step master class in polymer clay colors .
Materials and Tools
For work, prepare polymer clay in blue and light green. Instead of blue, you can use pink or any other color in which you want to perform hydrangeas. White, purple or red will look beautiful. Creating jewelry for a certain outfit, feel free to choose fantasy colors that do not exist in nature. Light green will be used to make foliage. It can be obtained by combining yellow and green. For dark foliage, use plain green. You will also need a silver wire 0.4 mm thick. It is undesirable to take too thick, because then the hairpin will have a leg too thick. From additional materials for the master class in polymer clay colors, prepare:
- blank for hairpin;
- dry pastel blue and green;
- a needle with a handle;
- a brush;
- light green floral ribbon;
- thin knife;
- a toothpick;
- pliers;
- white acrylic paint;
- Super glue.
All these tools are optional, but with their help it will be much easier to create a hair ornament. Moreover, all these tools are most often already in the house and you do not need to buy anything else.
Preparing polymer clay for work
If you haven’t had to sculpt from polymer clay, just grab it in your hands and knead well to make it soft and plastic. At the first stage of the polymer clay flower modeling workshop, we will create hydrangea. Prepare a piece of blue material, and then form a sausage out of it, rolling your palm on a flat surface. Its thickness should be about 6 mm. Decide in advance what size you want to get the petals, because how you cut the workpiece will depend on this. For a flower with a diameter of 2 cm, cut the clay into pieces about 5 mm in length. The bud consists of 4 petals, so for each you need 4 pieces of polymer clay. Do not try to make the petals exactly the same, because in nature they are usually of different sizes, therefore a not too flat inflorescence will look more natural.
How to make hydrangea petals?
In this master class on flowers made of polymer clay we will make an inflorescence of 3 buds, but their number can be changed if desired. When you are finished making blanks, follow these steps:
- Form balls from the resulting pieces of clay.
- Then take one ball and slightly press on it to flatten.
- Next, you need to pinch one side a little to get the leg of the petal. It should be approximately 5 mm in length.
- Flatten the part even more and try to give a rounded shape to the upper part of the petal and bend it inward a little. Do not make the petal too thin, otherwise it will not hold its shape well.
- Flatten the edges of the workpiece, leaving the center part thicker so that the part does not deform during flower assembly.
- Pull out the top edge, slightly sharpening it in the middle.
- Similarly process the rest of the workpiece. The width of the petals should be approximately 1 cm, and the height with the tail should be 1.5 cm.

Hydrangea made of mother-of-pearl or translucent polymer clay will look beautiful. Do not worry about fingerprints on the soft surface of the material - they are easy enough to clean. You can use special fingertips or gloves for protection, but this is not necessary when creating the petals. Fingertips will be needed when creating berries and when working with molds. Instead of fingertips, cut off parts of gloves are also suitable.
Creating streaks on the petals
At the next stage of creating flowers in a polymer clay master class, we make streaks on the hydrangea petals. One of the easiest ways: use special molds, but they are convenient for large workpieces. Ideally, it is better to use mold for hydrangea petals, but a rose petal is also suitable. It is more convenient to process small flowers with a flat decoupage brush with a rigid fan-shaped bristle. The advantage of the decoupage brush is that when it is used, the streaks are not even, but going to the sides. Attach and press the brush against the petal so that the veins are vertical. Repeat on each petal. Fingerprints after such processing will disappear. You can use a needle and hold shallow strips, but this is quite difficult, because the petal is easy to spoil.
Tinted petals
The next stage of the workshop “Making Flowers from Polymer Clay” is tinting. Take dusty dry pastels in black and blue. Put the finished petals in a row, so it will be easier to process. Then, using a soft brush, apply pastel on the central part, trying not to fall on the tails, otherwise when they assemble the flower they will begin to crumble. If there is no brush, pour a little powder on the finger and gently rub on the surface of the petal. Sometimes pastel after baking can change its color or become less bright, so it is advisable to test it before working on a small piece of clay. To color the edge of the petal, press it against the work surface and apply tinting with short strokes. If white mother of pearl is used instead of pastel, then a gentle shine will appear on the entire surface of the flower. It is not necessary to varnish the surface to fix the pigment; usually it is eaten fairly well during the baking process. But much depends on the brand of pastels and on the clay itself.

Hydrangea flower assembly
After pastel treatment, all blanks will again become flat. It’s easiest to give them a natural bend with a needle. Attach it to the center of the petal and press it lightly, guiding the edges up. Pinch the top edge slightly so that it is not too wide. Now in the master class on small flowers made of polymer clay, the time has come to assemble hydrangea inflorescences. Take the wire, cut it into pieces of about 10 cm, and use a pair of pliers to make a small loop at the end. Form from blue clay a small ball with a diameter of up to 3 mm to create a center and pin this ball on the wire, pull it deep into it. Stick the top of the ball. Flatten its lower part a little, giving the ball a droplet shape. Smooth prints with a fingertip. Then grab a knife and make cross-shaped notches at the top. Attach the petal to the apex so that the apex is slightly higher. Take the second one and attach it next to it so that it goes under the previous one. Also attach the third and fourth and tightly fix their tails on the wire. Do not flatten the stem so that it does not turn out too thin. Collect the rest of the buds.
Foliage making
Take polymer clay of green color. Roll a ball out of it, sharpen the edges and slightly bend. Next, with a needle or knife, make small incisions, forming veins. Apply a deep vertical strip with a needle. Take the wire again, bend the loop at the edge and put a sheet on it. Slightly lower the clay on the bottom to make the leg. Use a toothpick to recess the edges of the sheet. Spread the finished part. Make the required amount. Tint with green pastel if desired. Finished parts must be baked in the oven at a temperature not exceeding 13 degrees. After baking, you can use white acrylic paint and a sponge to tint the petals.
Assembling a hairpin with a polymer clay flower
Take a narrow floral ribbon and connect the flowers to each other. You can lubricate it with superglue so that they stick together better. Start wrapping the ribbon around the flowers. First, take one and, wrapping it, attach another, wind it again, then the third and so on. After attach the leaves. Take the workpiece for the stud. The total length of the stems should not reach the middle of the hairpin. Carefully cut off the excess ends so that the stem tapers gently downward. Start attaching the composition to the hairpin so that the bouquet covers its entire upper part. Holding flowers, start wrapping a hairpin with floral tape. It is advisable to apply glue to the top for better fixation. On this, our master class for beginners in polymer clay colors is finished. Use this knowledge to create your own compositions and bright handmade jewelry to please yourself and your loved ones.