Modern children are more and more absorbed in technological progress, now they are interested in gadgets, computer games and cartoons. And very rarely you can hear from a girl: "Mom, I want to learn how to embroider a cross!" Where to start, so that interest does not disappear? It all depends on the age of the child and his sewing skills. If he already knows how to use the needle - you can safely proceed to embroidery, but in the absence of these skills you need to start from the very beginning.
Materials and Tools
In order to get started, you will need:
- Hoop. They are different in material and shape. The most common are round plastic and wooden. The former are comfortable with their smoothness; they do not deform the fabric and embroidery when moving, but do not hold the fabric particularly firmly. The latter retains the tension of the material better, but at the same time they can deform it, especially if there are burrs or roughnesses on them. Size is better to choose medium. Small ones will be inconvenient to use with further development of skills, while large ones are uncomfortable for beginners. It is necessary to start embroidering with a cross, as well as another type of this applied art, using the most comfortable materials and tools, so as not to discourage the child from learning only because he is not comfortable.
- Canvas. You can use absolutely any materials. However, to begin with, cross stitching, as practice has shown, is more convenient on 3 types of materials: patch canvas + base, dense canvas or waffle fabric. The most comfortable and popular of them is the second material, which is suitable for embroidering pictures. If the embroidery needs to be placed on clothes or a pillow, then the first option is used here, and you can use either a classic canvas, which must be dissolved manually later, or a more modern water-soluble one.
- Needle. It should be thin enough, but have a big eye.
- Scissors.
- Thread floss. It is better to choose natural ones, the composition of which is 100% cotton, the mercerized thread of the mouline thread is especially good. In addition, it has a smooth structure and increased strength, which avoids the separation of the thread or its rupture. The pictures embroidered with woolen threads look interesting, they are very dense and fluffy, so this material is usually used to depict animals.
If the child is still small and does not have sewing skills, then you can safely take a plastic canvas with large cells, a plastic needle for knitted knitwear and bright threads for knitting. Using these materials, you can not only teach to start with cross-stitching, but also disassemble in detail different types of seams, easily unwind unnecessary lines, and most importantly, it is almost impossible to get hurt with a plastic needle, so you can use it from two years old.
Stages
Like any other work, the cross-stitch process can be divided into several stages:
- Choice of drawing.
- Formation of the basis.
- Beginning of work.
- Embroidery.
- Completion.
If the question was “how to embroider a cross”, the beginning of work has already been laid. The main thing is not to delay the process and proceed with it as quickly as possible.
Pattern selection
Even if this is the first experience, and the child has never before held a needle in his hands, a drawing must be chosen. Light, small, but it should interest the little master so that he wants to embroider it. These can be schemes from the Internet, a magazine drawn by hand in cells, and you can also use your favorite mosaic scheme.
If it’s a school-age child, here, in order for him to start embroidering with a cross, as practice has shown, ready-made embroidery kits with a tinted base are great. It is very easy to embroider on such a canvas, there is no need to count the number of crosses according to the scheme and guess their correct location.
Base formation
In order to work easier, it is necessary to correctly fix the material in the hoop. This is done in 3 steps. On the inner hoop, you need to lay a canvas, level it over the entire area, put on the outer hoop from above. Tighten it up a bit to fix it, but the material could be corrected. Stretch the canvas as much as possible, while making sure that the cell does not deform. Finally fix the outer hoop.
Beginning of work
Since starting to embroider a cross without knots is quite difficult, the first steps of this type of creativity are best done by fixing the end of the thread with a knot. This will greatly facilitate the work, but the wrong side will not look very neat. Ideally, the work should be without knots, and the tails are hidden. There are many ways, the simplest of which is looping or under stitches. In the first method, a double folded thread is threaded into the needle so that a loop remains at the end, then the first stitch is made, after which the needle is threaded through the loop, and the thread is tightened. Thus, the thread is fixed on the basis without knots.
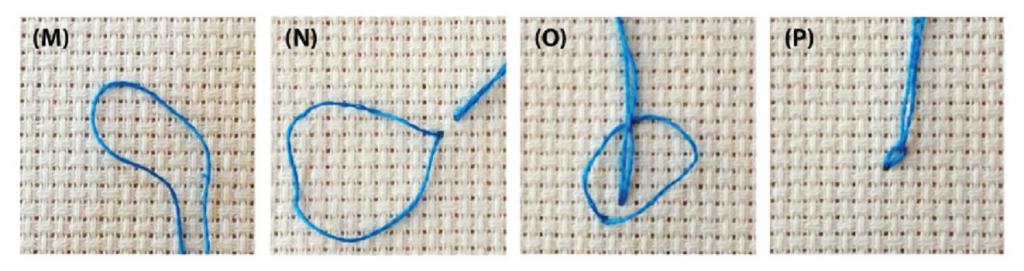
The disadvantage of this technique is that during operation, the needle can slide off the thread. In the second embodiment, this problem does not occur, since both ends of the thread are fixed under the first stitches or stitches of the previous row / color. To do this, make a long stitch (1.5-2 cm) at the level of the first row or thread under the previous one. Thus, the end located horizontally is fixed by vertical stitches of the wrong side. If the work is two-way, for example, a flat Christmas tree toy on a plastic canvas, then the beginning is fixed in the first way, and the end is fixed in the second way, on the front side (hiding under the crosses).
Cross-stitch
Where do they start to embroider with a cross? From the bottom left corner. After the end of the thread is fixed, it is necessary to make the first layer of stitches. You need to move from left to right, introducing the needle from the bottom up to the end of a row or element of the same color. Thus, a series of columns tilted to the left is formed. From the wrong side, they should be even. Then in the same row it is necessary to return to the beginning, repeating the movement of the needle from the bottom up. In this case, columns are formed, tilted already to the right, which forms a cross.
It is very important to thread the needle into the same holes so that the cross contacts the peaks with the neighboring ones. In addition, the product will be more neat if you follow the sequence of actions so that the top column of all crosses in the work is tilted to one side. From the wrong side, all the columns should be perpendicular to the bottom of the product, diagonal movements that are formed when embroidering round shapes are acceptable, but they can also be avoided by threading not diagonally, but parallel to the rows.
Shutdown
When the whole pattern is embroidered, it is necessary to hide all the ponytails, cut them off too long, after which the work can be removed from the embroidery frame, if necessary, washed (but not desirable), trim the excess edges and framed by any other means.
It is best for mom to learn in advance herself and periodically maintain her skills so that the children's question: "I want to embroider a cross, where to start?" confusion and panic no longer caused.