A soft book for children with their own hands is an excellent gift for both their own and someone else's child. The kid will be pleased with the new toy, and the parent - with the fact that his child can receive new useful skills in the game process. We invite you to learn more about what a soft book is with your own hands. Ideas for books and several workshops are included.
Why do you need soft books?
Soft books contain many details, different in texture, color and size. When playing with such textbooks, a child:
- develops motor skills of the hands ;
- gets acquainted with different shapes and colors;
- develops visual perception, attention and thinking;
- develops tactile skills.
DIY do-it-yourself soft book: ideas
The number of ideas for soft books depends on your imagination. For inspiration, you can go shopping and look at existing educational toys or watch on the Internet.
Do-it-yourself soft book (ideas):
Option | Description |
Clasps | Make a picture with several elements that are connected with buttons or buttons. Place on the page several snakes and other fasteners behind which something interesting is hidden. Do the lacing. |
Colors | Each page is a new color. That is, different elements in one tone and it is desirable to make an inscription with the name of the color. |
The form | The page contains the contours of objects and pockets with them. The child must put the item on the appropriate path. Figures can be attached to the page using Velcro or buttons. |
Collection of pictures | On the page is only the frame of something, and the child needs to collect the whole part. The principle is the same as when assembling a pyramid or puzzle. |
Pigtails | The scene on the page contains ribbons that need to be braided. |
Score | Interaction with numbers. |
General | An example of such a book: a train with trailers is sewn to the page, and the child needs to place little animals in them. |
Much more interesting are the options that combine several functions. For example, you need to open the doors of the house, which are fastened with several different fasteners. And behind the doors are the contours of the figures, inside of which the color is signed. It turns out that the child needs not only to open the doors, but also to lay out the figures in outline and color.
What do you need to create a soft book?
A do-it-yourself soft development book is created using such materials and tools:
- fabric for the page (felt, cotton, silk and so on);
- fabric for parts and objects in the book (it is better to choose felt - it is soft and pleasant to the touch);
- Velcro, buttons, snakes, lacing, latches, buttons and other possible fastenings and fasteners;
- beads;
- tapes;
- threads
- rings for connecting pages;
- filler for the cover and details of the book (for example, synthetic winterizer, holofiber and so on);
- chalk or a special marker on the fabric (needed to create patterns and notes);
- needles;
- scissors;
- sewing machine.
Making the basis of the book
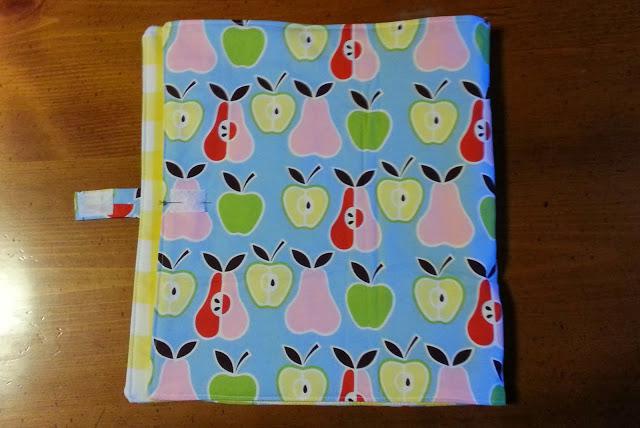
The basis of the book is its cover, to which the pages will be attached.
Master class on how to make soft books with your own hands (cover photo attached):
- Decide what size book you want.
- Draw a rectangle on the back of the fabric. Its length should be greater than the intended size by about five to ten centimeters. This stock is the front of the book. The wider it is, the more pages can be placed in the book.
- Make two such patterns. You can use two different fabrics - one is needed for the outer cover, the other for the inside.
- Cut two patterns with a margin of up to a centimeter on each side.
- Mark a tape whose width is equal to the width of the front side of the book, and the length is its height. To each side, add from five millimeters to a centimeter. Cut her out.
- Slip a few rings onto the ribbon to secure the pages. Better use three pieces.
- Decorate one of the pieces of fabric on the half of the front side - this will be the cover. You can cut out figures from felt and sew or paste them, sew on beads, clasps, buttons, embroider words or numbers. Show your imagination.
- Sew the ribbon with the rings to the front of the other piece of cloth vertically in the center. Remember to evenly place the rings.
- Sew the two sides of the cover together, leaving a small hole in the middle on the right side.
- Turn out the cover.
- Push the filler evenly into the cover. It should not be much, but you need to fill it very tightly.
- Sew the hole with a blind stitch.
- Sew ribbons for tying.
- The cover is ready!
We sew pages for the book
Pages for a book can be done in two ways:
If you make a U-turn, then the size will be the same as for the cover. If you sew each page separately, then simply reduce the size by half.
All work comes down to the following:
- cut two shreds of fabric of the required size;
- make the necessary details for the page (cut out the figures, sew them and so on);
- Sew the pages with the back, leaving a small hole;
- twist the fabric;
- fill it with a synthetic winterizer, holofiber or something else;
- sew a hole;
- insert special rings on one of the sides of the page (rings on the cover ribbon will be inserted into them);
- if there are none, then you can simply make small incisions and sheathe them so as not to fray;
- sew all the necessary details.
The page is ready.
Tip: in order to reduce time and simplify the process of work, pages can be made of colored felt or other dense fabric that keeps its shape and does not crease. Just cut two pieces and sew them together. No need to stuff.
DIY soft book: ideas with numbers
To familiarize the child with numbers and teach counting, you can make do-it-yourself books with numbers. Options for implementing ideas:
- Cut out figures or any objects from any fabric (for example, felt), it is possible different. Their number should correspond specifically to the figure. You can place everything as follows: on one spread, a number is sewn, on the other - a pocket with objects (for example, small carrots). The child should lay out as many carrots as indicated on the page.
- Cut the numbers from dark cardboard or other thick paper and stitch to the pages. Make a bag for the book in which the crayon and a rag will be stored. Let the child teach how to write numbers. He will simply draw with chalk according to the pattern, after which it can simply be erased.
- Make scores on the pages of the book (we will consider the master class below).
Numbers Page
Master class on making a page with numbers:
- On the page, mark the lines for the ribbons with pins.
- Take ribbons or thick double yarn and large beads.
- String beads on each ribbon. Their number should be from one to ten. Less possible if the number of feeds does not fit on the page.
- Embroider the numbers on a page or a separate feed. Ten tapes - ten digits.
- Sew the ribbon with beads to the page. There are two ways to do this:
- make small cuts in the fabric of the page and thread the ends of the ribbon into them, tie knots from the wrong side or sew the ends;
- sew the ribbons directly to the page, and to hide the ends of the yarn, wash the ribbons.
6. Sew a ribbon with embroidered numbers to one of the sides of the “account”, if you did this.
The page with numbers is ready!
Page with clasps
To develop motor skills and teach a child how to use buttons, snakes, hooks, and so on, pages with fasteners on which you are invited to unfasten a snake or tie shoelaces in a playful way will help.
Do-it-yourself soft developing book (master class on making a page with fasteners):
- Draw on felt all the details. In the given example, this is a jacket, mittens, a skirt, a body (a blouse can be used), a neck.
- Cut the jacket in half vertically.
- Sew a snake into the jacket.
- Button the snake.
- Sew on the page all the details in the following order: neck, body (blouse), skirt and mittens.
- Stitch down your jacket on top.
- Make a scarf.
One of the options for a page with fasteners is ready.
Another idea for such a page is shoes with laces. Let the child learn to lace up.
Page "Dress the doll"
Dress up the doll is a game that helps the child make the right decisions.
Do-it-yourself soft book - a workshop on sewing the “Dress the Doll” page:
- Cut out the necessary details from felt: a doll, hair, clothes and shoes.
- Sew Velcro to the back of the doll and to the page.
- Sew Velcro to each clothing and shoe.
- Cut the closet out of felt.
- Sew the cabinet to the page in such a way as to make a pocket.
- Sew hair onto the doll, make a face (glue the fabric, draw with markers or embroider with thread).
- Stick the doll to the page, and put all the clothes in the closet.
The page is ready!
Another option for such a page is “Seasons”. Sew a tree and a pocket. Make leaves (green and yellow) and flowers. Let the child place them on a tree, depending on what time of year you say. For example, spring - green leaves, summer - flowers, autumn - yellow leaves, and in winter the tree remains empty.
Advantages of a soft book
Soft books for kids with their own hands have several advantages over other developing things and simple books:
- there is no printing ink on the pages;
- natural fabrics and materials are used to create it;
- soft book washable;
- soft toy and educational book in one subject;
- bright;
- A single book can contain many developmental items (e.g. buttons, fasteners, zippers, lacing, hooks, and so on).
Soft Book Disadvantages
There is only one drawback in developing books - the pages contain many small details that a child can swallow.
Therefore, do not let your child play with the book in private and carefully monitor it during training.