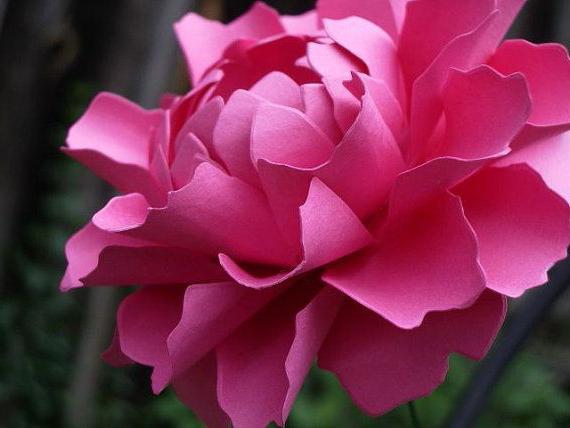
Flowers - this is one of the most beautiful creations of nature, which are glorified in the Bible and repeatedly chanted by poets of all ages. Their only drawback is too short a century. That is why artificial buds, boutonnieres and bouquets are often used to decorate the interior, clothes, accessories and hairstyles. They are made of paper, fabric, and recently, foamiran has been actively used for this. In the latter case, a rose, daffodil, aster, violet, lily, chamomile or some other garden and wild flower usually turns out to be incredibly natural and can be a great substitute for a “living” analogue. With careful execution, you can make a luxurious peony from foamiran pink, white or raspberry color. It can be either a small bouquet or a large, lush flower with many petals and bright stamens. It is not as difficult to create as it may seem. The only thing you need to get a chic bright and completely “lively” peony from foamiran - MK with photos and detailed step-by-step instructions.
What is foamiran
This modern ornamental material, also called plastic suede or ethylene vinyl acetate, is a soft sheet of a special foam product synthesized by chemists. It is very malleable and ductile, easy to cut and capable of slightly creasing and stretching. Due to these properties, foamiran is excellent for making very beautiful flowers, with petals that will look just like real ones.
To work with this material, in addition to scissors or a special cutter, you will need heating devices, such as an iron, a hairdryer for embossing and others, allowing you to give the details the desired shape.
Opening the foamiran pack may sometimes cause an unpleasant odor. However, it should not be scary, since this material is absolutely non-toxic and can not cause harm to health.
Peony from foamiran (MK): materials and tools
To make a flower you will need:
- foamiran 1 mm thick, dark green, light and dark pink;
- thick wire (1.5 mm) and thin wire for leaves;
- acrylic paints of yellow, dark green and dark pink colors;
- teip tape green, and even better dark green;
- sponge and thin brushes;
- hot glue gun and manicure scissors with bent or even tips;
- piece of foil.
Pattern
First of all, you need to make the necessary number of parts of various types. To do this, you need a pattern of peony from foamiran, presented below. For one flower should be cut:
- 10 details of type “a” made of light pink foamiran;
- 10 “b” is light and another 5 is dark pink;
- 10 details “c” from light pink foamiran;
- 5 petals of type “e” and “e” of a dark pink hue;
- 3 leaves of foamiran dark green ;
- 5 green sepals of types “k” and “l” each;
- 6 leaves “m” of dark green foamiran.
In addition, to prepare a peony from foamiran, you need a base in the form of a “sun”. To make it, from a light pink plastic suede you need to cut a circle, and then turn it into “rays” with sharp ends (part “g”).
Peony from foamiran (master class): tinting
Surely everyone noticed that the flower petals usually have a heterogeneous color. This is especially true for peonies. To give them the most natural look, you need to tint the petals on both sides. To do this, use a foam brush or a small piece of sponge to apply pink paint on the petals so that they become darker at the edges than at the base. When all the details have been processed, they need to be left to dry, and the veins themselves should be painted with dark green paint on the leaves and sepals.
Corrugation Petals
The next step that needs to be done to make a peony from foamiran is to give the pink details the desired shape. This procedure is called corrugation and requires some patience. To do this, take each petal type “b” and fold it into an accordion. Then the part should be twisted into a flagellum, carefully spread and slightly extend the edges of the petals with your fingers so that they become transparent. In the same way you need to do with the type “a” petals. Next, you need to do giving the details of type "e" and "e" concave shape, "pulling" them in turn on the thumb. As for the petals “c”, their upper edge should be corrugated, as described above. In this case, the middle part must be pulled out, forming a “boat”.
Corrugation of leaves
Next, we proceed to the processing of green parts. To corrugate them, each sheet is folded in half, the edges are stretched at the top of the leaf, and the middle (along the veins) at the bottom. It is also required to simulate lateral veins. For this purpose, the part is folded at an acute angle into small folds, rubbed and rolled up with the thumb, index and middle fingers. At the end of the procedure, the ends of the leaves twist slightly.
The foundation
From prepared parts, you can make both a peony bud from foamiran and a large blooming flower. It all depends on the size of the petals and leaves, as well as on their number. To start creating a peony, you need a base that can be made from a large bead with a hole or a piece of foil. In the latter case, a ball is formed with a diameter of about 1, 5 centimeters and a hole is made in it with an awl or a spoke. Then it is poured with glue using a heat gun, and a thick wire is inserted. They also do this if a bead is selected as the basis. And, finally, the last step - they put a blank on the wire, tie all the “rays” above the bead with a thread and dye their tips yellow to imitate the stamens.
Cup assembly
When you already have the base and all the necessary details at hand, you should connect them together in the required order so that you get a peony from foamiran. Assembly is carried out in the following sequence:
- 10 petals of type “a” are glued to the base of the stamens.
- Wait 1-2 minutes for the glue to dry;
- Glue parts “b”, having previously folded them with an accordion at the base. At the same time, 10 petals of a light shade are arranged in a circle, and then 5 dark ones.
- Glue 10 petals of type “C” in two layers, in a checkerboard pattern, and on them the largest parts “e” in the amount of 5 pieces;
- They form a cup by gluing at first 5 small leaves “l”, and then between them - another 5 sepals “k”.
Leaf assembly, cuttings production
Peony from foamiran (a master class with a photo see above) is almost ready. It remains to make leaves. To do this, glue is applied to the base of the part at a distance of 1-1.5 cm from the edge, wire is applied and, rolling a leaf, glue the edges of the base. When all leaves appear cuttings, they are fastened two or three together with a tape tape.
The final stage of flower formation
Using a green teip tape, the peony stalk is formed and twigs with leaves are twisted to it. Then the petals are straightened and slightly ruffled so that the flower looks as natural as possible.
Now you know how to make peonies from foamiran, photos of which can sometimes be taken as images of fresh flowers. They will decorate an evening dress, a rim or a festive hairstyle. And if you make several peonies of different colors and sizes, you can collect from them an elegant composition, which will be a wonderful gift.