Metal tile in our time has become a recognized leader among roofing materials. It is a reliable, durable and aesthetic solution. Quite often, installation work is trusted by professionals, but if you plan to do the installation yourself, you should familiarize yourself with its technology in detail.
Why you should choose a metal tile
If you still have not decided which roofing material to choose for your roof, then you should familiarize yourself with the advantages of metal tiles.
This material displaces all the rest (for example, slate, wood), because it has such advantages:
- light weight;
- wide selection of colors;
- high strength.
In addition, this material is quite easy to mount, it is maintainable and has no harmful components in the composition. The sheets have high strength, which is achieved due to the presence of stiffeners. An additional important quality - the material is resistant to temperature jumps, plus it has minimal thermal expansion.
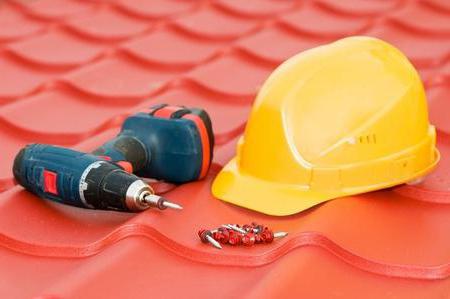
Preparation of materials and tools
If you are thinking about how to fix a metal roof tile, you should take care of the availability of all tools.
It is always important that every little thing is at hand, especially when working on the roof. Here is a list of what you need to prepare:
- scissors for metal;
- screwdriver;
- marker;
- measuring tool;
- drill;
- protective glasses;
- hammer;
- long rail;
- mounting tape;
- gloves.
You can replace scissors for metal with electric scissors. As for the materials, they are presented:
- metal tile;
- ridge and end strips;
- guide board;
- decorative overlays;
- waterproofing material.
Among other things, you will also need roofing strips, as well as self-tapping screws, which must have sealing washers. Additionally, you should also take care of the presence of the edged board, its cross section should be equal to 100 x 25 mm. You should also buy an aero roller.
How to handle sheets of metal
Before fastening a metal tile on a roof, you should familiarize yourself with the rules for handling this covering material. Despite the fact that metal is a fairly durable solution, the implementation of work with its participation requires compliance with a number of rules. For example, sheets should be taken only by the edge of the stamping line, and action must be taken with gloves.
Raise the sheets up using the guides from the boards. When moving along the roof covering, increased attention must be paid. Shoes should be on soft soles. It is strictly forbidden to step on the crest of the wave, the foot should be placed on the toe, and the foot should be directed parallel to the slope, it should be in the same notch.
Sheets cannot be cut with an angle grinder, since when using it, the polymer protective coating can be damaged. For cutting, it is recommended to use scissors for metal. Electric scissors are best suited, because they are convenient to work on the ground and the roof. It is important to remember personal safety: it is necessary to work with glasses and protective gloves.
Installation Technology
Before attaching a metal tile to the roof, you should familiarize yourself with the nuances of installation. Lathing boards are packed in increments that are equal to the width of the sheets. The standard size of the screws used is 4.8 x 28 mm. It is necessary to choose fasteners also in color that matches the color of the roof.
Together with a self-tapping screw, a rubber gasket is used. The fixture is twisted into regular places, they are between the crests of the waves, it costs 15 mm to retreat from the stamping line. The screws are twisted perpendicular to the boards of the frame system until the gasket is slightly compressed.
Work algorithm
When answering the question of how to fix a metal tile on a roof, it is necessary to warn that the sheets are joined along the waves to protect the coating from cross-wind. Docking is carried out by self-tapping screws, which are screwed into the crest of the wave of the canvas located on top. The first should be to properly tighten the longitudinal joints. Sheets are connected in rows. Docking is carried out on the crate board. It is important to secure each wave.
Installation of material on the cornice can be carried out in two ways. The first involves draining water from the canvas into the gutter. To do this, make a ledge of the sheet for the cornice by 5 cm. In this case, the cornice board should be 15 mm thicker than the planks of the frame.
If you plan to use 100 mm boards for the battens, then the first should be installed with a deviation of 250 mm from the cornice. 70 mm higher from the stamping line are regular fasteners. If the roof has a stepped cornice or the geometry of the roof is broken, then the sheets are installed in the second way. In this case, the water will first fall on the cornice strip, and then into the drainage system.
The crate board located on the edge will be the top, it represents the support of the ridge board. To provide clearance, it should be 15 mm thicker compared to the batten boards. Before attaching a skate to a roof made of metal, you must make sure that the corresponding strip is attracted to the surface of the covering material by self-tapping screws. They are installed in the crest of the wave, and should be separated by 80 cm from each other. End plates are fixed to the front board, the consumption of self-tapping screws will be about 9 pieces per square meter.
Installation of a metal tile on a rectangular roof slope
You should definitely carefully study step-by-step photos on how to fix metal roof tiles with self-tapping screws. Visual images will help you understand this process. When installing the material on a rectangular slope, it is necessary to build a crate. For this, an edged board is used, the dimensions of which will be 100x25 mm.
The cornice board is installed first, it is necessary to bring it horizontally. With a departure from it, it is necessary to fix the first board of the crate. The distance between these elements will be 250 mm. All subsequent boards are installed at a distance of 350 mm. After every five rows laid, the step of the crate is checked.
The cornice strip is mounted on the hooks of the cornice board. The laying of metal must be carried out with extreme accuracy. If you make a mistake when installing the cornice board, then, unfortunately, you have to redo the entire crate. The covering material can be laid from left to right or vice versa. If you decide to act on the right, then each subsequent sheet will have to be superimposed on the previous one. When mounting from left to right, the canvas is slipped under the previous one.
For the correct joining of paintings, it is necessary to grab them through two rows, and then fix the docking row. Four sheets are joined together according to existing rules. First, two sheets are connected in rows, and then two successive sheets are joined to them. There is another installation option, which provides for mounting on the waves. After that, the upper canvases are joined to the sheets. In the place where four sheets are joined together, a thickening forms. In order to remove it, the capillary groove located below the stamping line should be straightened. Sometimes masters just cut a part of the corner.
Setting individual items
When studying how to properly mount a metal tile on a roof, you need to take into account the installation features of individual elements. In this case, the end plates are fixed with an overlap of 2 cm. However, you can also act on the flanging. The wave sizes of the tiles are adjusted to the width of the slope so that the crest of the wave does not lie on the pediment.
The overhang of the pediment should be adjusted, but you can simply add a roofing strip. A seal is placed between it and the sheet. The metal roof fastening is accompanied by the installation of windows (dormers and / or dormers), plus pipes, which can be located below the ridge. To do this, use single-module sheets, which are consumed in two for each element.
Before installing the planks of the ridge, it is necessary to carry out ventilation work under the roof. If the roof has gentle slopes, then between the ridge plank and the canvases of the covering material it is necessary to place an aero roller, which eliminates the ingress of snow under the ridge.
Installation of the ridge is carried out on the end strips, while it is necessary to ensure the edge protrusion by 30 mm. If you have a flat skate, then the parts are fixed with an overlap. If you use a semicircular ridge, then it is fixed along the profile line. When the roof has an angle of inclination greater than 45 °, it will be necessary to determine in advance whether the angle of inclination is compatible with the model of the plank of the ridge.
Metal tile on trapezoidal and triangular slopes
The technology of fastening metal roof tiles can include work in the case of triangular or trapezoidal slopes. These works are accompanied by the installation of additional bars. They are installed on both sides of the ridge and should be directed along the so-called kink line of the roof.
Then you can proceed with the installation of the cornice board and lathing. The next stage is the eaves system. The metal tile must be mounted from the centerline. The lower canvas is aligned taking into account the position of the cornice board. The distance between the cut sheets will exceed 10 cm. Installation of a roof made of metal involves the installation of ridge units. It is necessary to act here in a certain sequence.
The straight skate needs to be cut in accordance with the corners, and the plastic plug must be installed for the semicircular skate. The axis of the ridge plank coincides with the axis of the ridge. If the neighboring slopes have equal angles, then monitoring this will be easy. If the angles are different, then the abutment of the ramps will be more difficult to provide. You can control their position with a mounting tape.
Endow construction
Installation of roof box fasteners made of metal provides for the construction of a valley. It should have an additional board. Endova slats are mounted from the bottom up, while it is necessary to ensure an overlap of 30 cm. The lower lath of this node should be cut off below the cornice line, flanging should be made on it. Under the flanging of the valley and the ridge, a seal must be installed. In this case, a gap of 10 mm or more must be ensured on both sides between the sheet of covering material and the axial line of the valley.
When studying how to fasten a metal tile on a roof with self-tapping screws, you should know that the fasteners are installed with a deviation of 1.5 cm from the stamping line if the sheet is cut. If the roof structure was assembled correctly, then in the place where the sheet is fixed, it will touch the board on which the valley is located. When the master makes a mistake, and the sheet is secured at other points, then gaps remain in the roof, where the structure subsequently leaks. This is a rather significant drawback, so you can not deviate from the installation recommendations.
Installation of decorative overlays
In order to cover the cut canvases, decorative overlays are used. Their installation is carried out from the bottom up, and the overlap should be 10 cm or more. If you, like many other home masters, have wondered how to fix metal roof tiles with self-tapping screws, then you should know that there is no sealant between the cover and the covering material.
When installing a decorative element, it is important to ensure that the screws do not damage the end plates. Quite often, a construction has endows that begin and end on a ramp. This is true when building a dormer. In this case, an additional board is needed, which is placed under the valley. The sheet of covering material must be cut so that the cutting level is 20 cm higher than the exit of the valley on the slope. Under the side and front walls of the window, a cut in the metal tile must be made. A sealant is laid on the canvas along the walls of the window, and the cornice overhang will need to be closed with a bar.
Another important nuance: while strengthening the metal tile with a self-tapping screw, you must take care of installing the endova strip, which is cut along the ledge and onto the slope.
Conclusion
Sheets of metal are a modern and fairly durable roofing material. If you perform the installation work correctly, then the coating will be ready to last up to 50 years and more. However, before you begin to learn how to fix a metal tile to the roof with self-tapping screws, you should remember that this material is not used for flat roofs. They have a minimum slope, which does not exceed 2 g., And the manufacturer recommends the use of metal on those roofs, the slope of which exceeds 11 g.
If you cannot boast of extensive experience in carrying out such work, we recommend that you thoroughly prepare and study the technology. They suggest the need to purchase the full range of tools and materials. In particular, you should not save on solid elements.