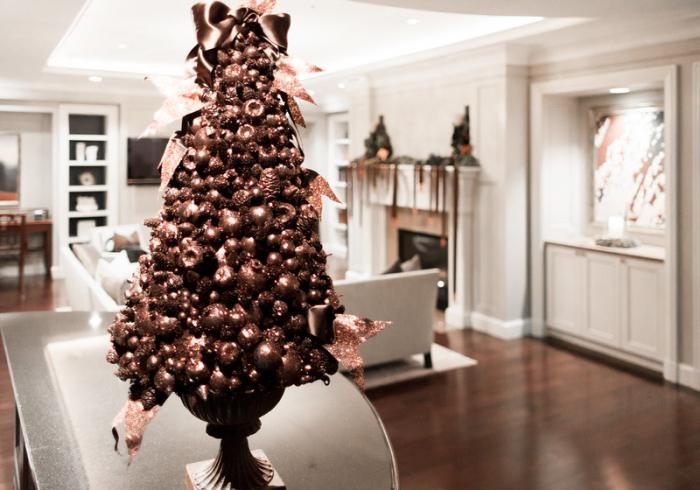
Chestnuts are a natural material that is great for creativity and the creation of unusual crafts. Currently, many people decorate their homes with decorative trees that came from Europe and are called topiary. You can make a tree of chestnuts with your own hands! How? Read this article.
Preparing chestnuts for work
The best creations come from chestnuts that have recently fallen from trees. Such fruits are easier to process, pierced with an awl. A tree of already dried chestnuts will be more difficult to make, since they are harder and can pierce when pierced. Store unused fruit in a cool place. If the air is too humid, they can become moldy, and if dry, then become hard as a stone. You can make a tree of chestnuts with your own hands if you wet the fruits in water for a while.
What is needed to create a decorative chestnut tree?
Before you start creating your chestnut tree, make sure that all the necessary materials are at your fingertips. For creativity you will need:
- many newspapers for the base of the topiary;
- reliable glue;
- strong threads;
- any shelf to create a trunk;
- a flower pot that acts as a stand;
- gypsum to strengthen the potted tree;
- twine for decoration;
- chestnuts;
- tea for decoration;
- thermal gun;
- bronze paint.
When you have collected all the necessary materials, start creating your own topiary. How to make a tree of chestnuts step by step, read below!
How to make the basis of a decorative tree?
The process of creating a chestnut tree should begin with its foundation. The base of the topiary is a ball that attaches to the trunk. Decorative elements are attached to the base itself. To create the foundation, take a large number of newspapers and crush them tightly, giving them the shape of a ball. Be sure to glue the resulting irregularities. An adhesive called “Joiner” is ideal for this purpose.
Then wrap the base with threads to give it more strength and density. If you want to make a tree of chestnuts with your own hands as soon as possible, then you can use a ready-made foam ball as a basis.
Trunk and base attachment
The trunk is an obligatory detail of any tree; chestnut topiary is no exception. What can you make a trunk of? The ideal option is a regular straight stick. If you could not find a suitable wand, then use a thick wire. You can also put together several Chinese chopsticks, which is also acceptable. An excellent trunk will have your chestnut tree! This craft can decorate your home at any time of the year. Now proceed to mount the base on the trunk. To do this, make a recess in the newspaper ball up to 5 cm deep, but do not damage the threads that bind the paper. And now just pour the glue into the groove you created and stick the barrel there. Chestnut tree, the master class of which is presented here for you, is not difficult to do!
How to make a tree stand?
You can use any capacity as a stand: a flower pot, a mug, a bucket, a casket, and so on. In this case, we suggest you use a pot. The stand must be strengthened, otherwise your tree will slope to one side or even fall under the weight of the chestnut crown, which is very heavy. You can strengthen the pot with gravel or gypsum (the second option is still better). The chestnut tree, fortified with gypsum with your own hands, you will do longer, but its stability is increased several times in comparison with gravel fastening. Take gypsum powder, purchased in advance, read the instructions for its use.
Then knead the solution according to the instructions, directly in the flower pot. Wait until the plaster sets. Now gently stick your trunk into the hardening gypsum and press down a little. Leave the structure to solidify completely for 30 minutes. You just have to decorate the topiary. How to make a tree of chestnuts you already know. But there is a very important part of the work ahead!
Decoration chestnut decorative tree
You have done most of the work, now in front of you is an almost finished, but unadorned topiary. Now turn on the imagination and act very carefully!
Proceed to the design of the tree only after the gypsum has completely hardened. You can arrange a pot-stand as you wish. To get started, take the twine and wrap it tightly around the pot. In order for it to fit snugly onto the stand, glue it every 4 cm. The twine should fit snugly against the pot. Now on the stand you can glue any materials in any order. Various sequins, sequins, elements from salt dough, decorative paper, polymer clay look especially good. You can use acrylic paints.

When the pot is fantastically decorated with you, proceed to the main part of the work - decorating the spherical base with chestnuts. Still, the goal of our workshop is a chestnut tree. This craft will please both children and adults. You will glue the chestnuts to the newspaper ball using a heat gun. It is best to use flat fruits, it is easier to work with them, and they look neater. Gently glue all the chestnuts to the base. Of course, without the appearance of gaps you can’t do this. Gaps must be closed using tea (red is best). Glue empty areas with glue and pour tea there. Press with your hands and wait. Be sure to close all the gaps, otherwise the tree will look sloppy done. Also decorate the top of the gypsum in the pot. Glue it with glue and sprinkle with red tea a dense layer.
Now take the bronze paint and paint with it the free upper edges of the pot. You can decorate the stand by placing a chestnut under the tree. Glue it directly to the cast. If you want to make the topiary more interesting, then use not only chestnuts, but also cones of coniferous trees for decoration.
I wish you creative success!