Beaded trees are a relatively new and very interesting version of needlework. Knowing the basic methods and options for creating such a craft, you can make both fairly simple and small money trees, as well as highly artistic bonsai. Compositions with bonsai from beads can be performed in various ways, creating products of various types and forms. A wide selection of decorative elements for needlework allows you to make both cozy mini-gardens and copies of rocks. It all depends on the ideas and craftsmanship of the needlewoman. When you decide to make a tree, look at the real plants to understand their shape and structure.
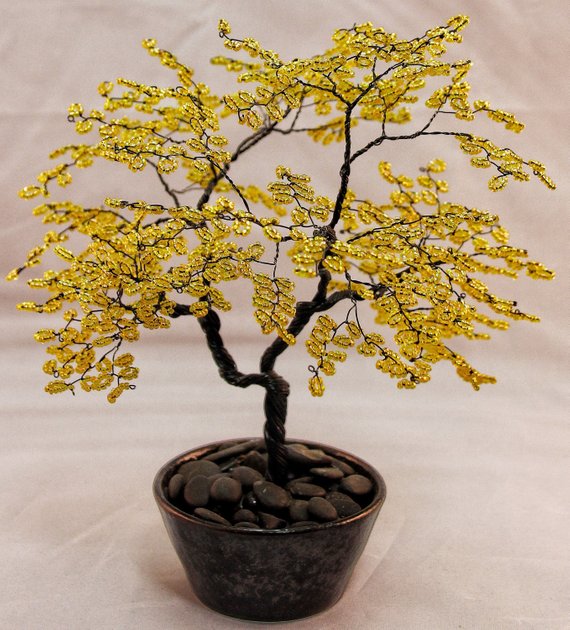
Beaded Bonsai Tree
The basis for the branches and trunk is wire, and any bend can be given to it. In this master class “Bonsai from beads”, we will consider how to make a fruit tree. As a decor, you can buy small stumps, chairs, harvested baskets and other items. But to make them is quite simple and independent. Next, you will learn how to implement a generalized scheme of bonsai from beads and a brief instruction on the manufacture of decorative wood. This is just the basis for building almost any product, but you should choose the colors, the number of beads, the length of branches and branches on a branch yourself, depending on the type of product.
Which beads to choose?
Before starting work, it is necessary to determine the shape of the crown of the tree, the length and type of branches. To create a bonsai from beads, you will not need well-calibrated beads; Chinese-made material is also suitable. The size and shape of the beads must be chosen in accordance with the type of tree that you are going to make. A medium-sized product will require approximately 200 g of beads. First, consider how to weave twigs and assemble them into a volumetric composition. When weaving, as fruits, you can use decorative beads of a suitable color and size. Another option is to make berries and fruits yourself from cold porcelain or in another convenient way.
Necessary materials
To weave a bonsai tree from beads, you will need green beads of different shades, from light green to rich grassy. You can use the mixture and type it without a special scheme, then the transitions will look more natural. For one branch, approximately 70 cm of wire will be required. The whole tree will need approximately 55 meters. For branches, you need a thin wire, approximately 0.2 mm in diameter. You can use elastic, it holds its shape better. Choose the number of fruits at your discretion, usually 20 pieces are enough. The wire must be thick, otherwise the branches will hang down, and it is more difficult for them to give the desired shape.
Brown is considered the most suitable for trees, but other shades can be used. The length of the ends of the wire that you need to leave for weaving the trunk depends on how you are going to make the base. If you use a piece of thick wire, you can leave 3-4 wires at the ends of the branches. If you do not have an additional base, you will have to leave as much wire for the branches as possible so that it is enough for the visible part of the trunk and the segment that will be fixed at the base.
Additional materials
Conventional sewing threads or floristic ribbons are used to form the base of the trunk and attach tree branches to it. Alabaster or self-hardening clay is used to form the trunk and bark, as well as to fix the product in the base. PVA glue may be needed in order to mix with its alabaster. Various pots, vessels, large stones, etc. are most often used as the basis for bead bonsai. Materials for decorating the soil around the base of the tree can be natural or artificial: decorative stones, bark, floristic moss, sisal or scattered beads are suitable.
How to make twigs?
There are several options for making bonsai from beads. But the most commonly used is weaving loops. Loops from beads are similar to leaves and with their help it is convenient to create branches of the necessary form. The number of beads in the loop will vary depending on the type of tree. Use more for longer leaves, less for trees with small foliage. The more branches there are, the more magnificent the tree will turn out. For beginners bonsai from beads, fruits can also be added in any quantity.
The looping technique is simple:
- We collect 4-5 beads on a wire and lower them to the central part.
- Scroll the leg 5 mm, forming a loop.
- Add the fruit as desired, leaving the leg.
- Scroll together.
- We retreat from the 5 mm eyelet and make another one.
- We continue to add leaves in the same way, forming a twig, working on a longer tip.
If you leave the wire about 2 cm long, then it will make 4-5 leaves. In order for the twists to be more even and accurate, the wire needs to be parted in different directions and scrolled. To help yourself when working with wire, you can use pliers. Now you have learned the basic principle of creating a branch. The other options will be just different versions of weaving this bonsai pattern from beads.
Wood weaving process
Leaves for a do-it-yourself bonsai tree made of beads can be placed opposite each other or with a shift. It depends on the type of tree branches. You can make a bead tree with leaves arranged symmetrically or asymmetrically. If your product has flexible branches, make them longer, but if the branches rise, make them shorter. When creating branches, twist the wire evenly, but do not braid one end around the other. Tighten the material carefully and tightly to prevent movement and sagging.
When you have several branches, start twisting them together, leaving a gap between the lower segments and the point where you start twisting. The gap should look like a natural branch growth. Remember that the closer the branch to the top of the tree, the thinner and shorter it becomes. Also lower branches will be thicker than at the top. Most often they are longer and more branched.
How to assemble a tree?
Having made blanks for all branches, start assembling your bonsai from beads. If you use a thick wire as the base, first fasten the branches on it in the planned order with the floral tape. Whatever the option of assembling the branches, in the end you need to combine the small branches into a few large ones, depending on the type of tree. To tie them together and form a trunk, hold the branches in your hand and decide for yourself which one should form the crown of the tree and which one will look good if it turns out to be sticking out from the side. Try to avoid thick and uneven twists. Spread the ends of the branches along the trunk.
Tree trunk decoration
In order to make the frame, a thick solution of alabaster or gypsum with PVA glue in a ratio of 1: 1 is applied to the wire. Apply several layers of a thick solution, and before applying the next layer, allow the previous one to dry well. Make thickenings in those places where you connect branches with a trunk. After you shape the trunk and branches, use a brush and mortar that is similar in texture to thick sour cream to create a bark structure. Start with the smallest branches while the mixture is still liquid. To create grooves in the cortex, you can use a toothpick or any other suitable tool. Leave the tree for several hours to allow the mixture to dry.
How to fix a bonsai in a pot?
Before planting a tree in a pot, first twist the ends of the wire so that they form a spiral from the trunk. The size of this spiral should match the bottom of the pot. Then place the DIY beaded bonsai in a pot using alabaster mortar. After the tree is installed and the base is completely dry, the trunk can be painted. Acrylic paint or any other type that you have at home is suitable for this. Start with a darker tone, and then apply a layer of golden and light brown shades. Pearlescent acrylics will help make the tree more natural.
Then decorate the earth around it with decorative materials and enjoy your creation! After the tree has been planted, spread out some branches, add twists and bends to give it a more natural look. Look at real trees for inspiration. At this, the master class “Bonsai from beads” is completed. Optionally, arrange the surrounding area around the trunk. Add shapes, benches and other items.