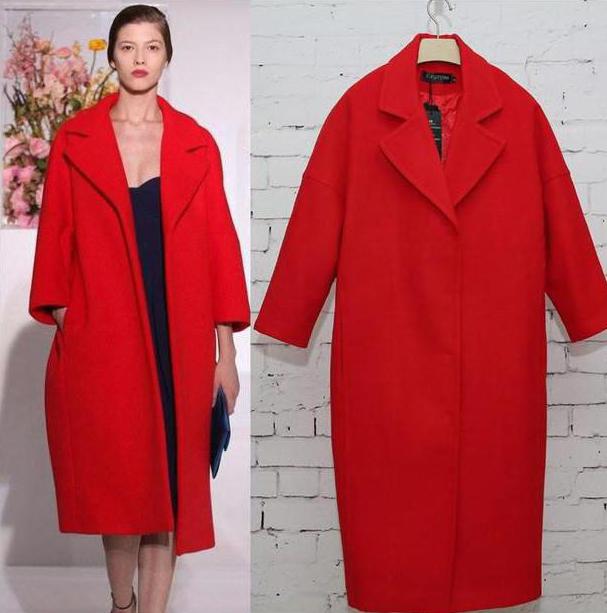
Today's variety of women's wardrobe is simply amazing. A huge number of unique styles and styles, combined with bright and delicate shades, as well as contrasts and original decor, make the modern girl simply charming. Fashion designers work tirelessly to create new looks, now and then drawing inspiration from the styles of past years. So they decided to turn the gaze of the beautiful half of humanity to such a cocoon coat that was so popular in the 50s and 70s of the last century. A photo, a pattern of this product, as well as a description of the sewing process will be discussed in this article.
Manufacturing options
The ability to sew or knit has always been a price. Not every woman has a talent from a skein of thread or a cut of fabric to create a unique thing that will take its rightful place in the wardrobe. But if there is even the slightest ability and desire to develop them, this is simply wonderful.
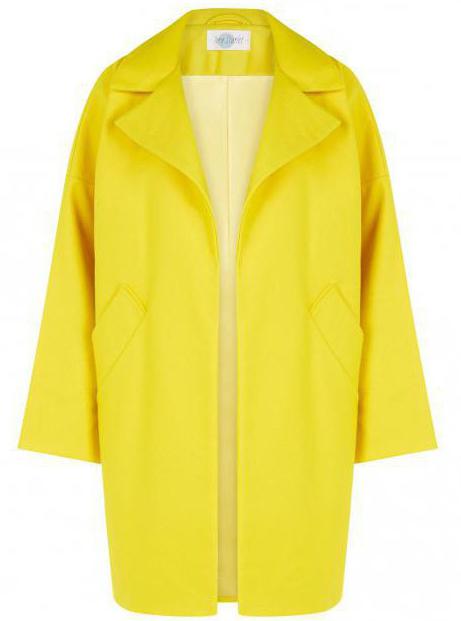
The idea to sew or tie a cocoon coat with your own hands is an excellent option for starting creativity. This piece of clothing will look perfect in any performance. It can be a large knitting of a thick thread or, conversely, openwork weaving; a coat on a satin lining or the option warmed by a synthetic winterizer. In this case, everything is in the hands of the craftswoman, and only her imagination determines the style of performance.
The choice of fabric for the coat
When sewing any product, it is very important to choose the right fabric. Naturally, in this case, you should choose the right materials. It can be soft cashmere, tweed or polar, or coarser fabrics, such as boucle or drape. The appearance of the fabric depends on the weaving of the threads. It can be satin, twill, linen or combined.
For winter, thick cloth cloths can be the best option, which can be duplicated by a lining with insulation or make a lining. For a demi-season option, cashmere with a thin lining is suitable. But for a very thin coat it is better to choose a gabardine or diagonal.
When choosing the material, you need to consider what the pattern of the cocoon coat will be. Fabrics with plain weave, which can be attributed to highly loose materials, are more suitable for models with one-piece sleeves. It should be borne in mind that the material can be moody. Do not take too soft canvases for such a model, because the coat should keep its shape. It is also undesirable to use highly stretchable fabrics that can be deformed during wear.
We get yarn
With the choice of yarn, everything is much simpler. There is only one rule: the thread must be of sufficient thickness. The composition in this case plays a secondary role. However, what prevents experimentation? The pattern of the cocoon coat, which is used when knitting a thing, is identical to the one on which the product is sewn. When knitting parts, it is only important to observe the proportions and repeat all the bends of the template. Therefore, when choosing yarn, the thickness of the future woven fabric should be taken into account. If the yarn is too thick, then you will have to slightly increase the pattern around the perimeter, if thin, reduce it.
Ideal for a warm knitted coat will be such yarns as boucle, wool, wool mixture, mohair. But, of course, no one has canceled the experiments, and therefore you can try to create an amazing knitted item from yarn with beads, sequins and lurix. Yes, such a product will come out not warm and, rather, not like a coat, but a chic sweater, but for a summer or spring evening it is quite suitable. Naturally, the pattern of the cocoon coat with this design should not be with too large allowances for loose fitting.
Measurement - the basis for work
The product template is the basis for any thing, whether it is a factory or individual production. How is the pattern built? Do-it-yourself cocoon coat is easy. First you need to take measurements from the figure, and then correctly transfer them to paper. If there are problems with the design, you can go one of the easiest ways.
What is the easiest way to make a pattern? The cocoon coat has a one-piece sleeve. And this option is perfect for beginner seamstresses. It’s not difficult to build a blank. First of all, measurements should be taken: the volume of the neck, chest and hips, shoulder width, sleeve length and product length, chest height, front length to the waist. You can also take a control measure from the wrist to the wrist through the neck to facilitate the construction process.
For a template, a dense construction film, on which you can draw with a regular ballpoint pen, is best suited. It is quite easy to store, does not tear and does not wrinkle, unlike paper. So how is the pattern done? Do-it-yourself cocoon coat is a snap.
Building patterns
Details of the front and back fabric are almost identical, the difference is only in the depth of the neck, and also in that the front should consist of two halves and have allowances for the design of the fastener. The drawing is based on a right angle constructed from two straight lines, where the vertical is equal to the length of the product, and the horizontal is half the circumference of the neck + shoulder width + sleeve length. Next, you should draw auxiliary lines: the chest line, which is laid off from the top of the vertical of the angle in accordance with the measure “chest height”, the waist line by the measure “front to waist length”, as well as the hips line (20 cm below the waist).
Next, you can begin to build a sleeve. In the place where the measurement of the length of the shoulder ends, you should step down from a straight line of about 4 cm and lay a new line, continuing it in accordance with the measure "sleeve length". After that, at a right angle, on the edge of this straight line, you need to go down by 10-15 cm, depending on the desired sleeve width and wrist thickness. Next, connect the chest line and the bottom line of the sleeve, making a rounding in the armpit. After this, it remains to determine what the narrowing of the product should be down to, and continue the existing line of the sleeve with the side seam through the line of the hips to the bottom. Everything is ready pattern. The cocoon coat with one-piece sleeve is ready. It remains to add details, and you can start sewing.
Modeling patterns
Elements such as fastener, pockets, tucks, embossed seams, collar and cuffs - details that are indicated on the main pattern in the modeling process. Without them, the products would be boring and monotonous. Using these elements, you can correctly place accents and create just the perfect look. The pattern of the cocoon coat in itself is so original that sometimes it is minimalism that gives things a special charm. However, you can experiment with a fastener, sleeve length, collar option and pockets. Modeling a cocoon coat is one of the interesting stages, because when you work, a simple template turns into a unique thing.
Cutting and assembly
After the template has been prepared from the film, you can transfer it to the fabric and proceed to cutting. Here you should remember about allowances for seams of about 1-1.5 cm, depending on the type of fabric. Also, it will be necessary to draw lines parallel to the edge of the pattern along the neck and front section at a distance of about 5-7 cm - these will be the products selected, they are cut separately from the main fabric with the same allowances for the seams as the rest of the details.
Assembling the basic elements of a coat is not difficult, but you will have to tinker with your pockets a bit. If in sewing clothes there is absolutely no experience, it is better to make pockets in the side seams. You should issue them before assembling all parts of the coat. When the preparatory work with the pockets is finished, you can start sewing. First, the parts are sewn along the shoulder seams that pass into the seams of the sleeves. After the shoulder seams are stitched on the details of the picks and connect this element with the main fabric of the coat.
With a knitted product is much easier. Details in the process of knitting are adjusted to the size of the template, and after they are ready, they are simply stitched. If the plans include a product with a lining, then it will be necessary to knit additional picks corresponding to the pattern. With pockets should do the same as when sewing. One piece should be knitted and the other cut from the lining fabric.
Clearance pockets
To make a pocket, you need to cut two parts according to the pattern of the circled arm from the wrist to the fingertips of the main fabric and lining. Next, sew the lining to the side seam at the level of the hips on the front half of the coat, and the blank from the coat fabric on the back. This is done so that at the entrance to the pocket was not visible lining. After that, the details of the coat are combined along the side seam and are connected with a straight line. The halves of the pockets are also grinded and steamed with an iron.
A crocheted cocoon coat with pockets at the seams is done on the same principle.
Work with lining
In order to make a lining, first you need to cut out the details according to the prepared templates. It is worth noting that the patterns should be without rebounds. Here you should also consider allowances for seams of about 1 cm. There is not much work with lining. First, the shoulder and sleeve seams are closed, after which they go to the side. Further, the lining is stitched to the pick. The final stage is bending the bottom of the product and attaching the details of the sleeves of the main and lining fabrics.
Knowing how to sew a cocoon coat, the pattern of which is given in this article, you can save a decent amount of money, because this thing is in trend today, and in the store you will have to pay a lot.