The weaving knot is indispensable for hand knitting, as well as in everyday life. This knot is often called invisible, because it helps to connect the two threads almost imperceptibly. It seems impossible to imagine? In this article, we will step by step look at how to tie a weaving knot.
Hand knitting
Every girl who knitted or crocheted at least once in her life was faced with the problem of tying threads. This is necessary when you use more than one color in knitting. Weaving knots help to seamlessly connect the two knitting threads for a smooth transition. And the most amazing thing is that the nodule itself will not be visible.
If you have old knitted things, then you can dissolve them and tie a new thing. But often while maintaining the integrity of the thread fails. This is where the skill to knit a weaving knot comes in handy.
When crocheting, it is very important that the place of binding of the threads is not noticeable. After all, as you know, the loops are small in size and fit snugly together. Crocheting it will be inconvenient to grab a thread with a large knot. Yes, and it will look unaesthetic. But the weaving knot will be completely invisible and at the same time all very durable. Therefore, experienced needlewomen use only it when connecting two threads.
Knitting for cars
There are times when the sewing ends on a typewriter and the product is not yet ready. What to do in such situations and get out of them? Learn how to knit a weaving knot and use this skill. This knot is so unique that it easily passes through the eye of a machine needle. It is very convenient to use it when winding the bobbin thread. Now it is not necessary to take it out completely to rewind a new layer.
origin of name
In weaving mills, workers use just such a knot. Especially often for overlock sewing machines. This is where the name "weaving knots" comes from. Processing the edges of the fabric is a very painstaking business and requires a large consumption of material.
Because of this, questions often arose about how best to tie the two threads. For the solution, they began to try various nodes and settled on one. Which are called "weaving knots." Next, we will analyze step-by-step instructions.
Classic design
- Step 1. So, let's start knitting this knot. We take in both hands the threads that need to be fastened. From the right thread we need only the tip, the main work is with the left thread. It is from it that we make a loop.
- Step 2. Next, thread the right thread through the left loop. The tail we leave behind the loop does not need to be made too long. A small length will also not work, because later on we will knit weaving knots with this tail.
- Step 3. Tightly connecting our left thread, grab it with the right tail. Therefore, we said that a small length would not work.
- Step 4. Here we come to the final stage. The right ponytail must be threaded into the loop that formed over the same right thread. It remains only to tighten our knot and cut off both tails. You can cut off under the node itself, it will not harm him.
The simplified way "On the finger"
We decided to consider another option. So you need a weaving knot? How to tie it using your finger? To do this, take the two threads that you want to connect in your left hand. Fold crosswise, and then tie the right end around the finger. The thread from this end should be on top of the other. Next, we direct the tail into the loop, which wraps around the thumb of the left hand, and thread through it. It remains only to pull both ends, tightened tight. The weaving knot is ready. If you fill your hand and use it often, you can achieve great performance.
What thread is the knot suitable for?
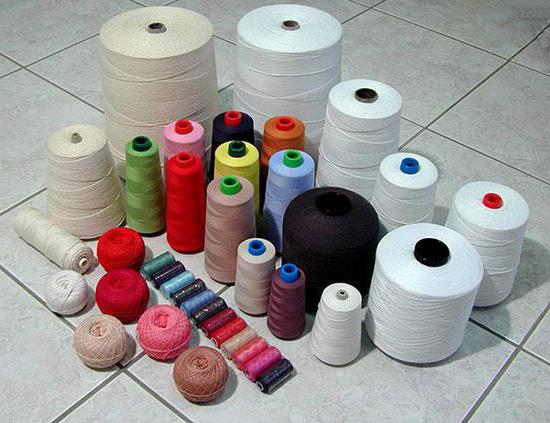
The weaving knot, the diagram of which is shown in the figure, is suitable for almost all types of threads. That is, when knitting with woolen yarn, now you do not have to rack your brains, how to connect two threads. This is especially true in connection with the new fashion in knitwear. Trend - a smooth transition from one color to another. For example, a sweater made in such a technique can have about five to six colors that seamlessly replace each other. The weaving knot will help to imperceptibly, and most importantly, reliably connect the threads of various colors. Angora, linen, wool, cashmere, bamboo, microfiber, nylon, pile yarn and many other popular types of knitting threads can now be fastened without much difficulty.
Also, the weaving knot is widely used in sewing. This is especially convenient when it is necessary for the seamstress to switch from normal sewing to overlock things. Indeed, the threads for these two types of sewing are used differently, and you need to connect them tightly. The weaving knot is one of the few that goes through the eye of the sewing needle without any problems. And this is a very significant indicator at work.
In other areas of needlework, for example, embroidery, knots occupy an important part. Acrylic threads, as well as a mouline thread, can be knitted with a weaving knot. Situations are different, and needlewomen should be prepared to bind the two threads. An important feature of this knot is that after tying it there are no "tails" left. After all, they can be cut to the very “root” and only a barely noticeable tubercle will remain, which will not bring inconvenience when embroidering.
Easy way
We bring to your attention another way that helps to tie a weaving knot. It is slightly different in performance from the above schemes, but the properties remain the same.
First, we will work with only one thread, for this, wrap the index finger around it, and then hold the loop formed. The tip of the thread should remain on the left, and thread the right into the loop. Pull a little to get a small eyelet with an open knot below.
Now take our second thread, which we need to attach to the first. Pass it through the upper loop so that it is perpendicular to the right main thread. It turns out that the tail from the first thread is on the right, and the second on the left.
Slowly pull the two main threads, a knot should appear, which will slowly move to the right. Tighten the resulting knot all the way so that both tails remain on top of the main thread. It remains to cut them off and continue to work.
Main mistakes
If you adhere to the patterns that were described above, then questions about how to tie a weaving knot should not arise. But still there are times when it fails. The main error that occurs when knitting knots is a confusion with the main and driven thread. If you mix the threads and tie the other way around, then nothing will work.
The cause of rupture of threads is often a sharp weaving. There is no need to rush in this matter, carefully study the scheme and repeat. The more often you use this node, the faster and more correctly you will succeed.