In the recent past, the requirements for interior decoration were more loyal in nature, and the visual evenness of the planes was considered nomenclature. For this reason, the acquired housing, which has not seen a major overhaul for 25 years, very rarely complies with modern standards. Indeed, today the planes of ceilings, floors and walls after repair should correspond to linear characteristics.
Of course, many rooms whose interior was designed by a professional designer, at first glance, do not meet such requirements. However, it is worth considering that most of the bulk abstractions are superimposed on a pre-aligned linear surface. First of all, this concerns the surface of the floor, which is responsible not only for visual sensations, but also for the quality of furniture. To level the surface, the technique of filling the bulk floor with beacons is often used, which consists of a series of successive steps.
Preparatory work
Before starting to fill the screed on the floor, it is very important to prepare the floor surface. This will allow the solution layer to adhere to the substrate in the best possible way, eliminating the possibility of peeling. To do this, first of all, remove the old coatings that make up the floor surface.
Dismantling the old screed
Often in old rooms you can find wooden floors. But if an old screed was found, it can be left under the following conditions:
- the cement surface has not exfoliated anywhere and holds well to the base;
- the screed is made of concrete and its dismantling is physically difficult;
- there is a sufficient margin for the height of the room, allowing you to cast a new layer of screed.
In all other cases, the old cement screed is crushed into small components and removed.
Surface treatment
After the base, consisting of floor slabs, is freed from old coatings, the surface must be cleaned of dust from sand and small stones with a broom. Then it needs to be treated with a special primer, which allows providing the maximum adhesion to the surface, necessary when filling the floor with beacons during leveling.
If wooden floors were laid on the ground floor of the old building, then significant cavities may open after they are removed. Indeed, before the beams that served as the basis for the floorboard were often exposed to the logs, which brought the floor level to the height of the basement. The recesses in this case will correspond to the height of the basement of the building. In such conditions, to level the floor of the lighthouses, you will have to add a layer to its level.
It is best to use clay or priestess for backfilling, as these materials give one-hundred-percent shrinkage when they are poured with water. Pure sand for this purpose is better not to apply. He is able to continue to press for a long time. This may cause voids to form below the surface of the screed. This procedure is best done not in the winter, otherwise it can lead to undesirable consequences. After the surface of the bed has dried and hardened, a screed can be cast on it, which will level the floor along the lighthouses.
Marking
First of all, it is necessary to determine the reference point from which all measurements will subsequently be made. For this purpose, a mark is placed on the wall. It is more convenient to do this at a height of 90 cm from the surface of the base, at the level of which a line breaks along all the walls of the room. Further, this line can be considered a horizon, it is applied using a laser or water level. The horizon is first beaten off in one room, and then transferred throughout the building to rooms that are on the same level, which can be achieved by leveling the floor with lighthouses.
Then, measurements are taken from the horizon to the floor around the entire perimeter of the room. Thus, finding the smallest size, determine the highest point of the base. A minimum layer of cement screed is recommended to do 4 centimeters. Given this condition, measuring 4 centimeters from the top point of the floor, put the next mark, which will correspond to the expected level of the screed, which ensures that the floor is aligned with the beacons. Then, using a new mark, a new floor line is beaten with a level.
In rectangular rooms, beacons are best placed across. The shorter the length of the lighthouse, the smaller the error. Along the room (across the intended location of the lighthouses), a fishing line or kapron thread is pulled in several places. Thus, it will be possible to see the estimated plane of the surface of the screed.
The hillock located in the center of the room may go unnoticed. This will open immediately after thread tension. If additional elevations of the floor are found to be closer than 4 centimeters to the thread, then the estimated floor level will have to be raised to the required level. To do this, the procedure of beating the surface level and thread tension will have to be repeated. Without knowing these rules, you can leave thoughts on how to make a bulk floor with your own hands.
Types of lighthouses used for screed
In the case when the width of the room does not exceed 3.5 meters, for the floor screed, you can use the factory plaster profile, which is made of aluminum or galvanized steel. The greater the width of the room, the thicker it is necessary to choose a profile to ensure nominal rigidity. The minimum thickness of the factory plaster profile used for screed should be 10 millimeters.
When the width of the room exceeds 3.5 meters, it is more advisable to use a UD profile for drywall as beacons to the screed. If lighthouses have to be built from improvised means, then profile pipes are best suited for this purpose, although round pipes are also applicable. In the case when there were no available means at all, you can install stucco beacons. They will require a lot of time and attention, but they will perform their function no worse, and in the end they do not need to be removed. Beacons for concrete floors are no different from those used when pouring cement mortar.
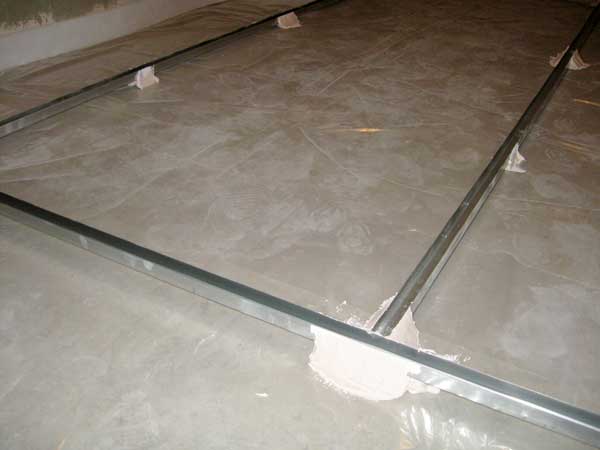
Beacon Installation Rules
They are exposed with the edges along the line of the floor marked on the wall, and the middle part is placed flush with the threads stretched across. First put the first and last lighthouses, which are located at a small distance from the walls. Then the whole row is placed sequentially. When adjusting the elements according to the level of the threads, it is important to ensure that the surface of the lighthouse is as close to the thread as possible, but does not touch it. After the second lighthouse is set in a row, the procedure is slightly simplified. This is due to the fact that if the subsequently exposed beacon touches the thread, then this can be immediately seen by its location to the previous element. It is also important to calculate their number, which can be read below.
Calculation of the number of lighthouses
Determining the number of elements needed to recreate the level of screed is quite easy. A guideline for this purpose is the rule by which the main layer will be stretched. The standard rule is 2 meters. And this means that the distance between the beacons should be 170 centimeters. 30 centimeters left in reserve for a free-wheeling rule. When the second lighthouse in the row is set, the distance is measured not from the first, but from the wall. If the rule from the penultimate lighthouse in the row of the lighthouse does not reach the wall, then there is a need to additionally establish another one. If, after installing the beacons, large dips from the screed plane were found in the base, then broken stone is used as a filler to save the volume of the solution used.
Installation of beacons using self-tapping screws
This installation method is quite effective if there is no need to remove the old layer of screed, and the surface does not have large distortions. In this case, after priming the base, holes are drilled in it on the lines of the beacons. Holes are located near the walls where the edges of the lighthouses come, as well as under each thread stretched to control the floor plane.
Screws are inserted into the drilled holes. Then, taking a scrap of the plaster profile, unscrew the screws to a predetermined length, using the trim as a template. After that, the profile is fastened to the screws using special fasteners. The exposed beacons are coated with mortar on both sides, along the entire length. After the mortar hardens, the beacons acquire the necessary stability and rigidity for the process of filling the floor.
Installation of beacons using a solution
This installation method can be applied in all cases without exception. Firstly, the solution can be used as platforms that rise above the floor surface at the locations of the screws for fasteners. In this situation, after the solution has solidified, the formed sites can be used to install beacons on the mounts, as indicated in the previous case. This method is most reliably used when leveling the floor with lighthouses with your own hands.
Secondly, the sites from the solution can be raised to the height of level lines on the walls and control threads in other cases. Thus, if you act sequentially, moving from the lighthouse to the lighthouse, they can be set to level on a fresh solution. When the solution solidifies, having lost its original elasticity, it is possible to coat the beacons with solution on both sides. This will give them extra strength. In this case, the installation of beacons on the solution will create a solid foundation for the rule.
We note one important point. This installation method allows you to use reference beacons for bulk floors. What are benchmarks? These are devices that allow you to set up beacons without control threads, but using a laser level. Such simple devices are made in the right amount with your own hands. Then they are placed on the line of each beacon in order to expose it on the platforms from the solution along the line of the laser level.
Materials for installing beacons
The question of choosing the materials from which the beacons for floor screed will be composed must be decided immediately before the work is completed. First of all, this question should be answered by the master, who got acquainted with the place and conditions of the work. Plaster beacons are most often used on a screed due to the fact that they remain after performing plastering work, for which they are often taken with a margin.
The most convenient to use for this purpose is a drywall UD profile. It has the necessary rigidity, size, and low cost. In a situation where the priority is saving, the most advantageous solution will be stucco beacons for floor screed. They do not need to buy additional items at all. But their installation will take more time.
Necessary tools
The question of choosing tools for mounting beacons directly depends on the materials that will make them up. To install, for example, a plaster profile on screws, you must have a drill with a percussion mechanism or a small hammer drill. Otherwise, drilling holes in the concrete base will not work. In addition, when working with metal components, you will need a grinder with cutting wheels or scissors for metal.
To produce the solution in limited quantities, it is enough to have a mixer suitable for a drill. You will also need a hammer, a plastering bucket, a trowel, a pair of spatulas, a knife, a tape measure, a water or laser level, a pencil, a thread with paint to accurately beat off the lines, a mowler and a smaller set of brushes. It is such a tool kit that should be prepared for a person who is thinking about how to make a bulk floor with his own hands.