Beadwork is an exciting experience, if you try to create a craft once, then you want to do something else. Big money investments for this type of needlework are not required, it is enough to buy small packages with beads of different colors, a thin needle and material for stringing. It can be a fishing line, a strong thread or wire. The needle for stringing small parts often according to the weaving pattern must go into the holes twice - in the forward and backward directions, so check its thickness already at the time of purchase.
In the article we will tell you how to make a keychain from beads to beginners, where it is better to do the work, how to connect the beads to each other so that the product looks neat. Step-by-step instructions will help beginners cope with the task faster. Knowing the technology of connecting parts, you can fantasize and bring your ideas to life.
How to get started
To make a keychain from beads, purchase materials and clean the surface of the table from all that is unnecessary. It is best to use separate containers for placing beads of different colors. It can be plastic lids for cans or small bowls.
So that the beads do not roll onto the floor, it is most convenient to cover the table with a linen napkin. Even if the bead is accidentally dropped, it will not roll far. Another tip: use a light-colored tablecloth, then small details will be clearly visible on it.
The working surface should be illuminated, otherwise with prolonged use, you can spoil your vision. Rest your eyes - keep them closed for a while or do eye exercises.
Flat figures according to the scheme
It will be easier for novice masters to understand the principle of working on a bead keychain if you work according to the scheme. To get started, use the images below. This is an owl, a snowflake and a flat pendant.
So that the keychain from beads can be hung on the keys, purchase the necessary accessories. The diagram shows how to sequentially string small beads onto a thread. The central part of the thread, wire or fishing line is attached to the keyring’s metal lock, depending on the material selected.
The figure shows its two halves in different colors. As you can see, the thread passes through a series of beads twice: in the forward and reverse directions. After each row, the thread stretches well so that there is no sagging. However, do not suppose strong compression, otherwise the finished keychain from beads will puff. Consider a similar option in the following sample.
Bead emoticon
To weave such a fun emoticon you will need beads of black, white, yellow and red. Work begins from above, with the manufacture of eyelets. To do this, string 10-12 beads on a string, depending on the desired size of the product. Bend them with a loop and tie at the base. If the work is done on wire, then simply twist it a couple of times around the base.
Looking at the photo of the trinket, you can draw a diagram of the arrangement of colors on a notebook sheet in a box. You already know the principle of operation, on the one edge of the wire the required number of beads is strung, then the other edge is inserted from the opposite side and tightened by a row with your hands.
How to make a keychain from beads to make a funny face? Just follow the pattern in rows. So, for example, it can be seen that the first row consists of 5 black beads, and on the second string is already strung differently. First 2 black, then 5 yellow and at the end again 2 black beads. Carefully follow the order of the beads, and everything will work out. At the end of the figure, the edges of the wire join and rotate a couple of times. Her ends are hiding inward. If a fishing line is used, the edges are knotted and scorched with a lighter.
Bead Heart Keychain
For beginners, it will be easier to make a flat heart of beads. The color for the frame is taken any, as desired, and the middle should be traditionally red or pink. In order not to be mistaken in the calculations, use the visual diagram. As you already know, it is easy to draw it on a sheet in a box using colored pencils.
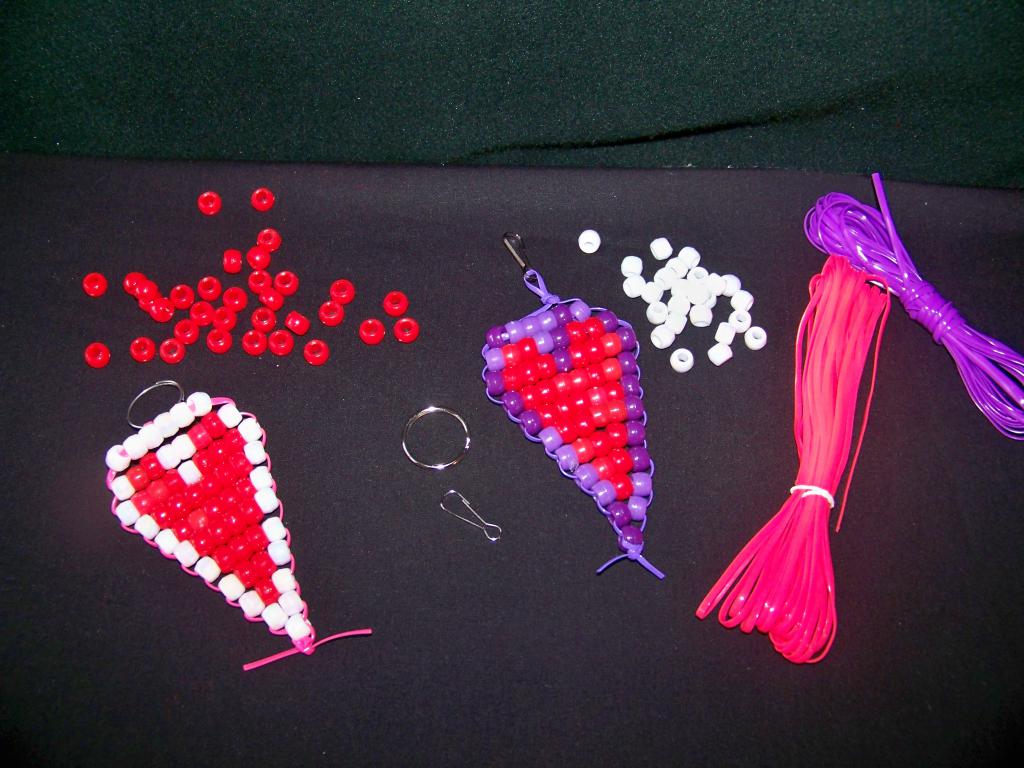
You can first make an eyelet for a little ring of keys, as in the previous version. Then begins, in fact, the weaving of the figure. The first row consists of background beads. Depending on the size of the key fob, an even number of parts is counted. In our case, these are 6 white beads. Do not forget that the thread or wire must go through all the elements on both sides. In the next row, 1 white, 2 red, 2 white, again 2 red and 1 white bead are counted. This is the design of the upper part of the heart. Next we make a little head, reducing the number of white middle parts to one. It remains in each successive row to make a reduction by one bead. After weaving, tie a strong knot and singe the edges.
Dragonfly
Further we will consider how to weave a keychain from beads in the form of a dragonfly. It used beads not only of different colors, but also of size. Larger details were selected for the body and tail of the insect. The eyes should also be large, pick up 2 identical beads for them. But for the wings you can take small beads, and you can make the front and rear wings of the same color, but you can create them different.
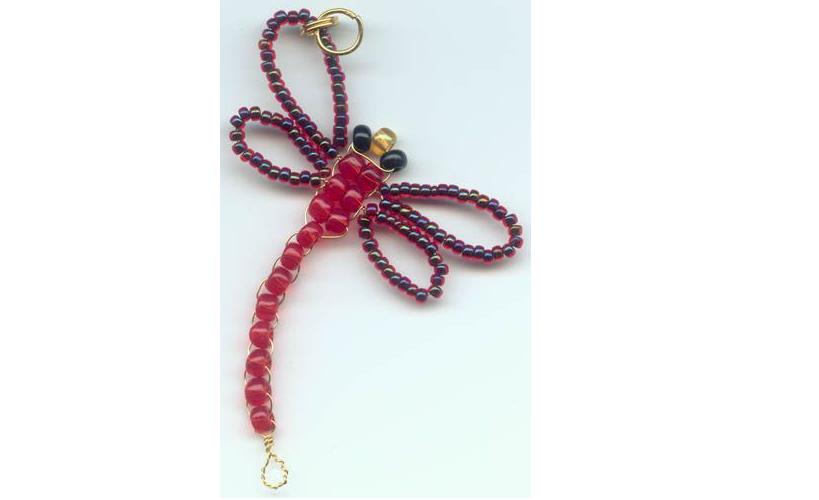
To keep the keychain in good shape, work is carried out on a thin wire. First put on the front 3 beads. This is the proboscis and the eyes of a dragonfly. In the usual way, wire is threaded from two sides. Then pass the small details of the wings. It will take about 30 pieces. The wire is wrapped in a loop and rolled a couple of times around the base. Then two large beads are strung, on the other hand they put on the same amount of elements for the opposite wing. After looping, the wire is first fixed in turns, and then threaded through the hole of two large central beads.
Similar work is being done with the next pair of wings. The body ends with 2 more large elements, and then it remains to make a long tail, composed of single parts. At the end, you need to twist the wire with a ring. The work is ready, it remains only to pass the ring through the wing and put the keys on the keychain.
Volume bead keychain
The principle of weaving volumetric figures from beads is similar to flat ones, they only collect the details immediately in a double copy - for the front and back sides. Consider a simple example of creating a crocodile figure. The front part of the work is collected from green beads, and the stomach of this reptile is white.
Start creating a keyring with a key chain. 7-10 beads are put on the center of the wire or fishing line. In our version, their colors alternate. The wire is fixed in turns. Then begins work on the crocodile figure from the tail. 2 green and 2 white beads are threaded, first creating a flat figure. The edges of the wire are threaded on both sides through all 4 parts and are joined together to form a square.
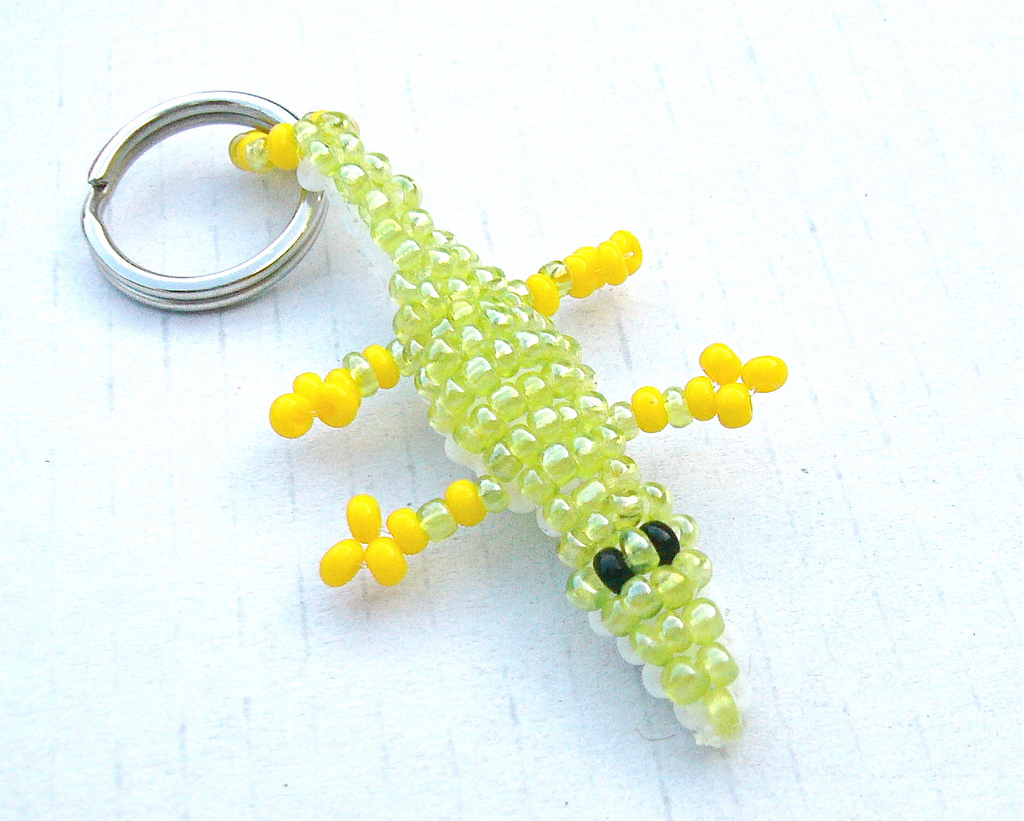
We act in this way until we reach the desired tail length, then make a gradual expansion of the body, adding in each row one green and white bead. When it comes to paws, then we put 4 beads on each edge of the wire, alternating green and yellow. Then we string 3 yellow, representing the fingers of a crocodile and bend them with a loop, stretching the edge of the wire back through 4 beads of paws. The torso continues. To make the belly more rounded, some masters fill the void between the rows of white and green beads with cotton wool or sintepon. The following paws are done in the same way, but the jaws can be created open by separately collecting first the green part of the work, and then the white.
Conclusion
Making cute gizmos from beads is quite simple, even novice masters will cope. The main thing in working with beads is diligence and attentiveness in the calculations, so as not to be mistaken with the color of the parts and their quantity. Delight your loved ones with gifts such as small beaded charms. Good luck