At all times, children, regardless of age, liked the activities that allowed them to show their creativity, as it is today. Applications, modeling from plasticine, drawing, beadwork and many other types of creativity are available to modern representatives of the younger generation. They may also like the birdie craft. With your own hands, offer your child to make this thing from plasticine, yarn, paper, natural or many other materials. At the same time, you can be sure that the baby will like both the manufacturing process of the product and the result.
Peacock made of paper
One of the birds most loved by children is the peacock, because it is he who is the prototype of bewitching babies from the TV screen or drawings in the book of the firebird. Therefore, a child will very willingly take up work if he is shown at least her image, but it is better if, for example, a ready-made handicraft “bird” is already at hand. With his own hands, a child can make a body and a magnificent tail out of paper, and then connect these parts with glue.
So, for the manufacture of poultry, we need colored and white paper, scissors, glue, a pencil. To facilitate the task in the manufacture of the body, you can pre-print the following template and hand it to the baby. In this case, it remains only to put the blank on a colored sheet, circle, cut and finish the missing details: crest, eyes, beak.
When making the body of a peacock, it is important to lengthen the lower part, since in the future it will be necessary to bend it so that the finished “bird” craft is more stable. With your own hands, in order to lengthen, you can also glue a strip of paper to the finished body, if the initial height of the sheet on which the baby drew the template was not enough.
Making a peacock's tail and connecting all the details
The tail is probably the main detail of the peacock from paper, since it is he who gives the bird splendor. Therefore, it is very important to do it properly. To make this part, you will need a sheet of bright paper (green, pink or red) measuring 9x9 cm. It must be folded diagonally and the resulting triangle folded in half again.
From the side of the base of the triangle, you need to draw the contours of the feathers and cut them out. It is important that the top of the triangle remains intact. After this, the part must be expanded to the state of the first triangle and the pen is drawn on both sides with a felt-tip pen. At the final stage of tail manufacturing, it is necessary to cut the outer line of each feather with scissors.
Now it remains to connect the torso and tail, for this the first part should be bent at the base, creating a stand, and to the rear part, glue a bright triangle, turning it base down. That’s the little bird article. With his own hands out of paper, a child will be able to create this little thing in just 10-15 minutes, and he will receive a huge amount of positive emotions.
Bird from natural material and plasticine: the preparatory phase
Each child needs to be informed that the do-it-yourself hand-made bird made of natural material and plasticine can be made quite easily, in any case, no more complicated than paper. The only difference in the creation of this souvenir is a trip for the necessary materials not only to the stationery store, but also to the forest or park. So, you will need to find a cone of spruce, several dry leaves of different shapes and sizes (you can take green ones, but they will have to be dried at home) and the rosehip. In a stationery store you will need to buy plasticine and toothpicks. For the stand, you should also pick up a small square plaque 1-1.5 cm thick.
Making birds from natural material and plasticine
So, if you already have everything you need at your fingertips, you can be sure that in a few minutes, a birdie crafts will flaunt on the table. With his own hands, the child will fold it in less than half an hour. The spruce cone should be used as the body, the rosehip, tail, wings and crest of the head will be the leaves, and the legs will be the toothpicks.
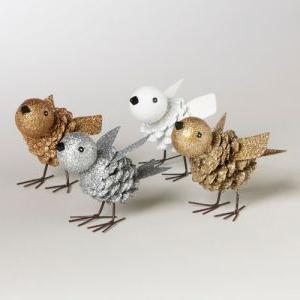
It is necessary to take a bump, turn it horizontally, and attach a rose hip to a wide side with a piece of plasticine. For the tail, you need to stick a long narrow leaf (for example, oak) into the bump on the narrow side. Attach wings to the corresponding places on the body - the halves of a wide leaf. Stick a crest in the rosehip head. In the lower side of the cone, stick the toothpicks, and then attach the finished craft to the plank. And, it would seem that the "bird" crafts are already ready. With your own hands from plasticine, however, it is still necessary to make some details, namely the eyes, and attach them to the corresponding places on the head. And after that, the bird can already be installed on the shelf as a souvenir. If desired, the finished product is covered with paint or gloss.
Thread bird: materials and blanks
Yarn is another material that can be made into a magnificent birdie craft. With your own hands you can make a magnificent sparrow out of thread, tape tape, dart, beads and a scrap of newspaper. You will also need a glue gun, scissors, a sheet of thick cardboard measuring 9x12 cm.
First you need to make blanks for the wings, breast and back. Please note that different parts of the sparrow have a different color. To make the first two parts, you need to wind the yarn across the cardboard sheet in two places. The last workpiece is done by winding threads along the pattern. From one end, the yarn must be cut, and the part that will be used as wings, knit in the middle.
Making birds from threads
Next, the threads for the breast and back should be folded crosswise so that the first part crosses the second in the upper part. Then, with a longer winding, you should grasp the short one and fasten the back with a thread, after which a similar action should be done with the breast. As a result of these actions, a head will be created, and soon the craft "bird" will be ready.
With your own hands, you will further need to grab a piece of newspaper with yarn prepared for the wings, and put this detail between the two already existing ones - as a result of this you will get a torso. Next, from the opposite end, you need to tie all the threads together and trim them. The legs can be made of wire, and wrap with teip tape on top. Then attach them with glue to the appropriate places, as well as sew the beads as eyes and make a beak from the seed by gluing it to the head. Such a bird can decorate any room in the house by installing it on a shelf or hanging it on a thread.