To diversify the gray everyday life, to dilute the daily routine, you need to have a hobby. This should be an activity that you really like, which will help you to relax in your free time and spend time to good use.
Recently, felting made of wool or, as it is also called, felting has become very popular. Using this technique, you can create souvenirs, jewelry, soft toys. There is nothing complicated in this work, and therefore it is quite easy to master dry felting for beginners .
The process consists in tangling the wool fibers with each other, which, when compacted, turn into a felt mass or felt. Felting tools are special jagged needles.
What will be needed for dry felting?
In the needlework store, you can buy spun wool and needles of different thicknesses. In addition, you need to purchase a thicker foam sponge. We take it in order not to accidentally prick the table or fingers with a needle. If your product should be voluminous, it is better to replace part of the wool with a synthetic winterizer, as it is much cheaper. The basis of the product itself can be made of synthetic winterizer, and the shell can be made of wool. Please note that with dry felting, about a third of the shrinkage of the coat occurs, so the source material will be larger than the planned size of your product.
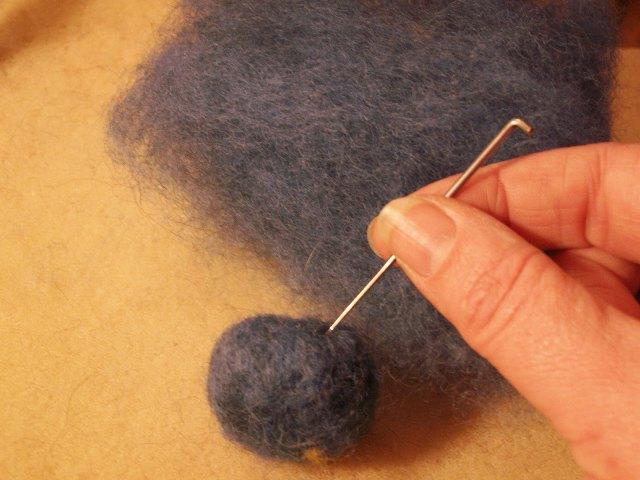
So, let's get to work. To do this, take a sufficient amount of wool, form an approximate outline of the future product from it (for example, if you have a bead, then we roll a ball out of wool), put it on a foam sponge and proceed to felting. This is done quite simply: poke the needle into the ball of wool and turn it slightly. The needle, clinging to the fibers of the wool with notches, tangles and condenses the wool.
Be careful, because
felting needles are quite sharp. Make punctures carefully so as not to get hurt. No need to beat in a big way - so you can break the needle. In no case should you keep the workpiece on weight. Start felting with large needles, and as the product is compacted, replace them with thinner ones. The needle must be kept strictly perpendicular to the plane of the product, otherwise it may become tangled in the coat and break.
If the product does not consist of one, but of several parts, then first pile each part separately, and only then, using a small piece of wool, you can roll them together. If you are making a children's toy, then for greater durability of the finished product, the details can be sewn and the threads hidden, rolled down with wool on top.
It may happen that in the process of felting an unevenness is formed. This is easily fixable! You just need to roll some wool on top. This is a dry felting and it’s good - if you make a mistake, you don’t need to redo the product again, everything is fixed quite quickly and simply.
Dry felting is best to start with the simplest products, for example, with beads. When you master the technique well, you can move on to the manufacture of more complex items.
Dry felting is convenient because it does not need a lot of space. It can also be combined with another occupation, for example, chatting with friends or watching movies. And this lesson allows you to realize almost any creative venture, you just need to get colored wool and allocate time. In addition, felting is a wonderful stress therapy. This process is very calming, and the joy of a hand-made product raises the mood for a long time.