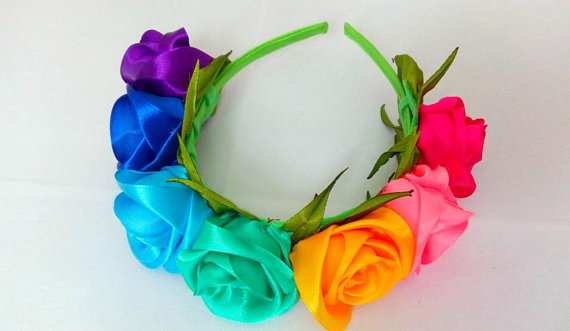
Kanzashi roses can be used to create topiary, interior compositions, jewelry and hair accessories. Most often, these flowers are made of satin ribbon, which is processed in a special way.
In the Kanzashi rose master class, we will create a beautiful hair band with a large bud and artificial berries.
Tools and materials for work
Before starting work, we will prepare everything you need:
- satin ribbon 5 cm wide in three colors;
- satin ribbon 0.5 cm wide in tone to rose petals;
- a candle or a lighter;
- tweezers;
- large beads;
- blank for the rim;
- instant glue;
- glitter;
- medium thickness wire;
- glue gun;
- artificial berries.
We cut the tape into 10 segments 3.5 cm wide, 14 pieces 4 cm wide and 8 pieces 4.5 cm wide. To do this, take a ruler, measure the desired width, put a mark and cut it off. The segment must be scorched under the flame of a candle or lighter so that the edges do not crumble. We draw the tape through the central part of the flame - this way you can avoid scorching and soot. Now you need to attach the rectangle to the tape and, using it as a piece, cut the desired number of blanks.
How to make rose petals from satin ribbon
At the next stage of our master class on kanzashi roses from ribbons, we will make petals from these segments. The blanks are not yet scorched at the edges. First, you need to fold each rectangle in half and round them from one side and from the top, starting from the lower right corner, to get a shape close to a heart shape. A rose of kanzashi from a 5 cm tape will turn out to be quite large.
We process the smallest petals as follows: we take a candle or a lighter and, gradually searing the edges, each time we slightly pull the edge to make it corrugated. Then we form two folds below, wrapping the edges to the central part, and holding them with tweezers, we fix in this position above the flame. The second group of petals is processed a little differently: we hold a lighter or a candle under its wrong side, so that the edge is turned outward from all sides. Then we form a crease at the base, clamp it with tweezers and singe it over the flame. Large petals are treated in the same way.
Assembling satin ribbon roses
Now we begin to assemble our kanzashi rose from satin ribbons. Before starting work, we warm up the glue gun. We will use wire as the base for the bud: make a loop at one end and apply a drop of glue. Then we take the first small petal, tightly wrap it around the wire and glue the edges and the middle so that the loop is not noticeable. Glue the next petal opposite to the previous one, well coating it with glue. Repeat the steps until we attach all the small details. If glue threads form from the gun, remove them.
We take 14 medium blanks and continue to attach them in the same way, but slightly higher, along the very edge of the first row. They should not lie on the base of the flower. We straighten all the petals and start gluing the last batch of blanks, slightly higher than the previous row. When finished, cut off the excess wire. As a result, we get a very magnificent kanzashi roses from satin ribbons.
How to make rose leaves
Now make the foliage. To do this, take a satin ribbon 5 cm wide in two colors different from the color of the bud, and cut it into squares. In total, 5 squares of both colors will be needed. It is not necessary to use green material, you can take the same color, but one shade is a few tones paler, and the other is darker. Trim the edges of each square, rounding it on both sides and forming a sheet. Having prepared all the segments, we take the lighter and begin to singe the edges, pulling them in the same way as the smallest petals - part in one, part in the other direction. We should get a wavy edge. Then we bend it in the middle and draw a flame under it, fixing the shape. Now the leaf has a central vein. We take the wire and cut off about 15 cm. We will glue the leaves on it to make a twig. On each branch there will be 5 leaves. Apply glue to the very edge of the first workpiece, insert the wire and clamp it. We hold until the glue hardens, we bring the lighter and slightly change the shape of the sheet, making it more curved. Glue the rest of the workpiece to the wire, and then twist the leaves with each other, forming a twig. First we take three blanks and fasten them.
Additional bezel decor
Now prepare the beads. We pass the wire through them, stretch it, make a loop and fix it. We cook in this way 5 beads. If desired, the leaves can be additionally coated with glitter to match the ribbon. The glue gun is not suitable for this purpose, but you can use any instant glue. We put a drop on the edge of the sheet and dip it into the glitter scattered on the sheet. Repeat on a few leaves, but not much carried away. Add two or three beads to a twig of three leaves and twist the wire. Separate the berries and add to the composition.
Add another leaf and begin to close the stem with a floral ribbon. We take two more berries and fasten them to the leaves. Step back a little, attach the last sheet and fix the tape with glue. Shades of leaves in one branch can be different. It is advisable to coat the composition with instant glue for better fixing. We prepare another same twig and set it aside. You can glue the leaves on the back of the kanzashi rose to make it even more magnificent.
Getting started composing the composition
At the next stage of making jewelry with a kanzashi rose from satin ribbons, we proceed to the design of the rim. We take a blank for it and cut off about 1 m of a thin tape. Using a glue gun, we fix the end of the tape at the edge of the rim and begin to wrap it in tight turns. Periodically, you need to apply glue for better attachment to the surface. Try on the surface of the twigs and a rose, choosing the best location. Having decided, measure the distance to the end of the rim with a ruler and mark it. Then apply a little glue and attach the first branch with leaves. It must be wrapped in a narrow tape to fix and hide the edge. It is desirable to cut the excess wire - it should not interfere with the rest of the composition.
The final design of the rim
We put glue on the tape and fix it on the rim. Trim the excess on both sides and scorch the edges with a lighter. We apply our kanzashi rose to check whether the first branch is correctly fixed and mark a place for another. Now you can attach the second or add a few more leaves as a substrate for the flower. We fix the second bunch of leaves, orienting them to the other side in the same way as the first. We apply a sufficient amount of glue to fix the bud in the center, put it in place and press it to the rim. At this step, you can stop or make a few more leaves and stick them on the back of the rim to hide the inside of the kanzashi rose. But this is not necessary. The rim is ready, it can already be used.