Beret is the most popular hat. From the time of the Middle Ages to the present, it has been part of the military uniform. In Spain, the beret is considered the national headdress of the Basque.
Nowadays, beret is also a favorite headdress for representatives of creative professions, as well as a fashion accessory for connoisseurs of style. She takes it perfectly with any clothes - with jeans and a dress. It is universal for any time of the year - it naturally looks both in winter and in summer.
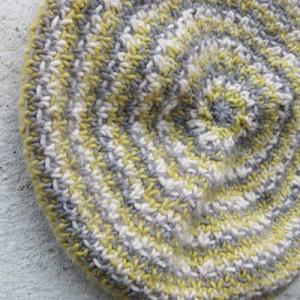
Knitting berets
This headdress is easy to make with your own hands. An interesting topic is knitted berets. There are various knitting methods. You can create individual wedges and then stitch them, you can knit on several knitting needles in a circle, you can make berets with knitting needles on a fishing line. Consider the options for knitting on two knitting needles on a fishing line.
Knitted berets from top to bottom
We collect 5-7 loops. First row - repeat 1 yarn, 1 front. The second row and all are even - the loops are simply knitted according to the pattern. The third row is like the first. Fourth row - divide all the loops into 6 wedges, separating them with a red thread. We begin the expansion of the wedges. We make a yarn on both sides of the red thread 3 times in the front rows, then 6 times in every third front row. When the bottom becomes the desired diameter, we begin to reduce the loop. In the front row, we evenly reduce the loops to an amount equal to the circumference of the head. Then it is knitted with an elastic band about 5 cm.
Berets knitted from the bottom upThis is the most convenient way to knit a hat. Usually they knit hats that way . It’s easier to knit berets in this way, since you can try on an unprepared product and fix all the flaws. In order not to make a mistake in size, you need to tie a knitting density sample, 5-7 cm in length. Calculate how many loops fit 1 cm. After measuring the volume of the head, subtract 2 cm by stretching, multiply by the number of knitting density. We get the obtained number of loops on the knitting needles and knit the beret rim. The optimal pattern is a 1x1 elastic band. But other options are also possible - wide elastic, garter stitch. The height of the side is at least 3 cm.
Now we begin to add loops. Determine the desired circumference of the beret in cm, count the number of loops. From this value we subtract the number of loops already typed on the knitting needles. The result means that exactly so many loops you need to add evenly when knitting. This can be done in a crochet or knit a loop a second time on another wall without removing it from the knitting needle. If you are going to continue knitting with an English elastic band, adding loops is not required. We knit the chosen beret height (10-12 cm). Then we begin the descent for the bottom of the beret. First we cut the loops through 20 loops, knitting together every 20 and 21 loops. The back row is knitted without abbreviations. In the next front row, the loop obtained earlier from 2 loops is knitted together with the next one. We knit so until there are so many loops so that they can be pulled together with a thread threaded into them. Tighten the thread and tie. Sew the product on the back. Knitted berets are traditionally decorated with a tassel or pompom on top.