In the modern world, where most things are monotonous, I want to have something individual and unique. Today, there are many diverse techniques and types of needlework that can transform any type and standard thing into a unique piece of handicraft.
Many people like such an old and fairly simple decorating technique as decoupage. This is a special way of decorating the surface of objects made from almost any material, allowing you to simulate art painting.
Ornamentation or art?
The word “decoupage” (découpage) itself is French and translated into Russian means “cut out”. Thus, this is one of the varieties of application, performed on almost any surface: plastic, wood, glass, fabric or metal. The works performed in this technique, you most likely saw, but just did not realize that the delicately painted photo frames, decorative figures or furniture were decorated with clippings or napkin paintings, that all this splendor allowed us to create a decoupage.
This is an almost universal way of decorating, allowing anyone who does not even know how to draw a person to create unique objects. Having chosen the drawing you like from special
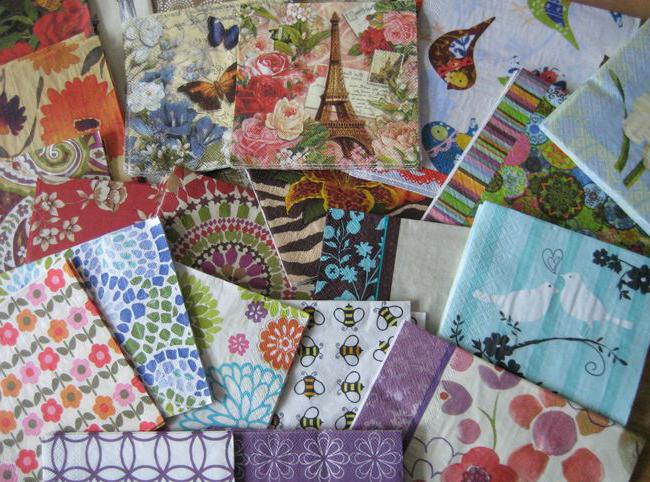
decoupage cards, paper napkins or from magazines, as well as finalizing it with special tricks, such as craquelure, coloring and tinting, patinating and others, you can finally get a thing decorated with a very plausible imitation of inlay or art painting.
A bit of history
The Chinese peasants used the technique of decorating with paper applications of household items and their homes in the 12th century. But a similar way of decorating reached the peak of popularity in European countries in the XVII-XVIII centuries, when lacquered furniture and household items made in Japan and China came into fashion. Due to the rarity and complexity of transportation, it was very expensive, but local craftsmen were able to arrange the production of cheaper furniture. To do this, they used oriental motifs and patterns, as well as works of art, sticking them on the surface of an object.
To make everything look like a real Japanese or Chinese thing, its surface has been varnished many times. A similar technique quickly spread throughout Europe, and decoupage masters appeared in the UK, decorating the walls of ordinary rooms with images of architectural elements, various landscapes and others. This phenomenon even came up with a special name - print rooms.
In Victorian England , the decoupage technique is changing - instead of images of European cities and architectural masterpieces, chaotically combined drawings of flowers, figures of cupids and angels come into fashion. For the first time, the industrial production of special collections of pictures for printing, printed on inexpensive paper, begins, thanks to which decoupage is becoming popular in various social sectors of society. This hobby pretty soon becomes fashionable in other European countries.
What can be decorated?
If in the old days such an appliqué technique was used in most cases for decorating wooden caskets, albums, gift boxes and various things lovely to the female heart, today you can decorate almost any thing using the decoupage technique. Life itself throws up ideas for creativity: boring furniture in a nursery or in a country house; plain cutting boards and trays, plates and vases without zest, a variety of plastic items.
In this technique, you can also decorate a lampshade for a night lamp, your favorite shoes or bag. You can use the decoupage technique for the home, creating unique objects and things that not only make the interior unique, but also serve as a
source of good mood :
- mirrors, combs, jewelry boxes, dressers for trinkets;
- albums, covers for documents, diaries, purses and banknotes, notebooks and pencils, writing instruments themselves and coasters for them;
- flasks, wine glasses and bottles;
- vases, decorative frames, figures and coasters, watches, lampshades;
- various kitchen items: teapots and samovars, candy cans, cutting boards and trays, tea houses, containers for spices, coasters for hot dishes, bread bins.
- jewelry - earrings, pendants, rings and bracelets;
- a variety of textiles, from curtains and tablecloths to bedspreads and decorative pillows;
- clothes, bags and shoes.
Thus, almost any item can be decorated using decoupage technique. Ideas will come up on their own, you just get carried away by this type of decorative art.
Types of tissue painting
In modern applied art, it is customary to distinguish the following main types of decoupage equipment:
- Classic (direct).
- Back.
- Volume.
- Art.
- Dekopatch.
Despite the fact that all the listed types of decoupage are based on a common basic technique, they differ greatly among themselves. Briefly consider the features of each.
Classic or direct decoupage
When performing such decoration, a picture cut out or torn out of a napkin for decoupage or a special card is glued evenly and smoothly to a previously prepared surface of the object.
After gluing, the surface of the product is varnished and ground until a smooth and uniform texture is obtained. Depending on the creative intent, the motive can be further refined, for example, tinted, tinted or aged.
Reverse technique
Reverse decoupage is a way of decorating any transparent surfaces, usually glass ones. When performing this technique, the motive is not glued to the external, but to the internal surface of the product, so the sequence of all actions is the reverse of those performed in the classical.
Volumetric decoupage
This technique combines elements of imitation of murals and creation of volumetric elements on the surface, it is close to a sculptural bas-relief. Fabrics, structural pastes and other materials allow you to create volume on a plane.
Artistic (smoky) technique
Due to the fact that in this type of decoupage various techniques and methods are used to completely combine the applied motive and background, they get a full and high-quality imitation of real art painting.
Decopatch
This type of napkin painting is also called patchwork or patchwork decoupage. This is due to the fact that the decorated surface is completely filled with various paper fragments, using napkins for decoupage. The result is an imitation of a quilt.
You can use special paper for decopatch, but from ordinary napkins it will turn out no less interesting.
If you are interested in this simple, but undoubtedly fascinating technique, let's figure out what materials you need to prepare in order to make your first decoupage. Step by step how it is performed, we will also consider.
Necessary materials
First of all, you will need:
- Items or blanks for decoration.
- Images with which we plan to decorate the thing. It can be special cards for decoupage, photographs, clippings from magazines and newspapers, beautiful motifs from paper napkins.
- Scissors, brushes and sponges of several sizes, sandpaper of different grain sizes.
- Adhesive for fixing images. Suitable as a regular building PVA, and more expensive decoupage.
- Acrylic primers, adhesives and paints.
How is he done?
Despite the fact that the technique is quite simple, we will tell you in detail how to perform decoupage. For beginners, step by step, everything will be described below.
- It is necessary to clean the surface on which the motive is planned to be applied. If the surface is wooden or metal, then it is better to prime it.
- The picture you like needs to be carefully cut or torn out of a napkin or card.
- When a motif breaks out, its edges are less clear, making it easier to merge with the background. It should be remembered that it is easier to tear out the napkin, which is separated from the other layers of paint, after moistening water around the desired fragment.
- If you plan to use several plots, then before proceeding with gluing, you should prepare them all and lay them out on the surface. Having received the desired pattern of placement, proceed to gluing.
- It is better to dilute PVA glue with water a little, and then grease them with the place where we will stick, and the motive from the wrong side.
- Very carefully transfer the picture to the surface, and then, gently pressing it, glue it. In order to remove the formed folds and air bubbles, gently iron the image with a slightly damp cloth or fingers, from the middle to the edges.
- We remove excess glue with a napkin and leave the picture to dry.
- If the borders between the background and the applied motif are very distinguished, then use the thinnest, the so-called zero sandpaper, and very carefully go around the edge.
- In the event that you want to additionally decorate the image with paints or add shine, cover it with one coat of varnish. After it dries, you can apply other decorative elements.
- Then it is necessary to cover the subject with several layers of varnish, waiting for each of them to dry completely.