Kanzashi is part of a traditional Japanese costume, a floral hair accessory created from scraps of fabric. Now this technique is used for various jewelry: brooches, rims, hairpins. But it can also be used to decorate topiaries, bouquets of satin ribbons and various panels. Most often, satin ribbons are used in this type of needlework, but sometimes flowers are created from cotton fabric.
History of Kanzashi in Japan
Kanzashi art appeared in the Jomon period, when Japanese women wore silk jewelry on a long stem in their hair. It was believed that such accessories possessed magical powers and could drive away evil spirits. During the Nara period, this type of needlework was influenced by Chinese cultural values. During the Heian period, it became fashionable for women to wear hair with their hair gathered from the back, not from the top, as before. Kanzashi has become a generic term for any type of hair ornament. From the Azuchi-Momoyama period, further changes in the traditional hairstyle began and nihongami (traditional Japanese hair styling) and taregami (long and straight hair) appeared. In both cases, hairstyle accessories were used.
Kanzashi development during the Edo period
During the Edo period, the kanzashi technique became even more popular, as hairstyles became more thoughtful and complex. Masters at this time began to create sophisticated accessories to emphasize their kimonos and various hairstyles. In addition to the usual function of decoration, products from ribbons were created as a weapon for protection against encroachments and often indicated the status of a woman.
To become a master of this art in Japan, it was necessary to learn from professionals working with the tsumami technique (the art of folding petals) for 5-10 years. Kanzashi Tsumami is the official name for this type of traditional Japanese handicraft in the Tokyo region since 1982.
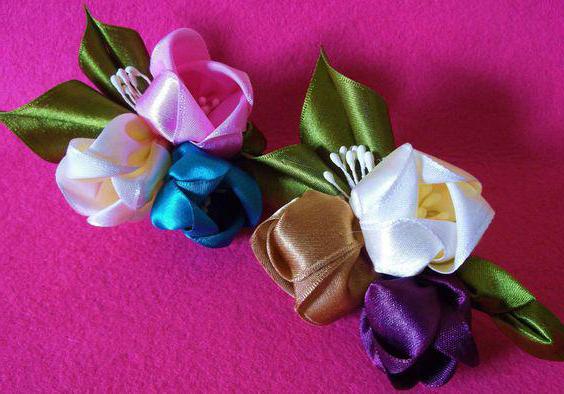
Satin ribbon kanzashi tulips: master class
Consider the technique of working with satin ribbons on the example of tulips. Let's make a basket with these flowers to decorate the interior or as a gift to loved ones.
For work you will need:
- 2.5 cm wide ribbon of different colors for buds;
- green ribbon 0.6 mm wide, 4 or 5 cm;
- organza or other tissue;
- paper;
- decorative elements of kanzashi from ribbons - beads, beads, rhinestones;
- artificial berries and insects;
- stamens;
- PVA glue;
- black semolina;
- basket;
- scissors;
- tweezers;
- glue gun;
- green sisal;
- candle or lighter.
At the first stage of the workshop "Kanzashi tulips from satin ribbons" we prepare flower petals. To do this, cut a 2.5 cm tape into segments 4 cm wide. We round them on one side to get leaves of a natural shape. One kanzashi tulip will need 9 petals. Singe the edges above the candle, bending them with the wrong side inward. Turn over the other side, make two folds, and holding the edge with tweezers, we also fix it over the fire. We process all shreds in this way.
Making stamens and leaves for tulips
Finished artificial stamens need a little refinement. We take PVA glue and semolina painted in black, dip the blanks first in glue, and then in the grits. We knead with fingers, giving an oblong shape, and dry. Now you need to make the leaves. For them we take a green ribbon 4 or 5 cm wide. We cut them into pieces about 8 cm long. We cut each segment diagonally.
It is easier and faster to fold the tape several times. For each kanzashi tulip, you need two leaves. The straight edge is cut a little diagonally, we round off the lower right corner to make the shape of the sheet more natural. At the resulting blanks we singe the edges, slightly bending the tip. Take a thin green ribbon, tie a knot and cut it with a small tail. One flower will need one bundle.
Before making a kanzashi tulip, we distribute all the elements into separate heaps. We collect the flower: we glue the edges of the knot with a gun and attach 3 stamens to it, spreading them in different directions. We connect the petals, applying a drop of glue to the lower edge and connecting with the knot. The middle is formed of 3 petals. The remaining layers are glued in a checkerboard pattern. We make the required number of colors. Glue two leaves on the sides of each bud. We cut the bottom edge. Then we prepare the basis for the bouquet: we place a ball of crumpled paper in a basket, cover it with a cloth and fix it with a glue gun. We attach sisal along the edge of the basket. We place the kanzashi tulips on the surface and fix with glue. The basket with flowers is ready!