A hat is a unique accessory. It will not only protect against bad weather, but will also give your image a romantic or playful mood. A hat made by yourself will look very appropriate at the carnival. This article will tell you how to sew a hat for yourself or your children and thereby prepare for the holiday and complement your carnival costume.
DIY hats: photo and manufacture of product No. 1
To create a masterpiece you will need:
- simple threads;
- ruler;
- a pencil;
- pins;
- PVA glue;
- centimeter;
- sheet A4 (seven pieces);
- scissors.
Working process
This workshop will show you how to sew a cowboy hat for a boy. First we make a pattern. We take four sheets, glue one centimeter overlap. Fold in half. We draw lines along the folds. We measure the volume of the head with a centimeter. According to your size, draw a circle. Cut it out. Now we draw the fields of our future hat. Measure twelve centimeters at the top, ten at the bottom, and eleven left and right. Then we model the fields. If you want them to be slightly raised, cut the paper left and right. Overlap the edges (about two centimeters) and pin them with pins. Using scissors, adjust the length and width of the fields to your liking. Next, proceed to the Tula. Divide your head circumference in half. Take two sheets. Glue them together. Divide in half and again. We will continue to put dots. In the middle, set aside a width of 10 centimeters, to the left of it - 8 and to the right - 9.5. Draw a line at the points. Lock with pins the fields.
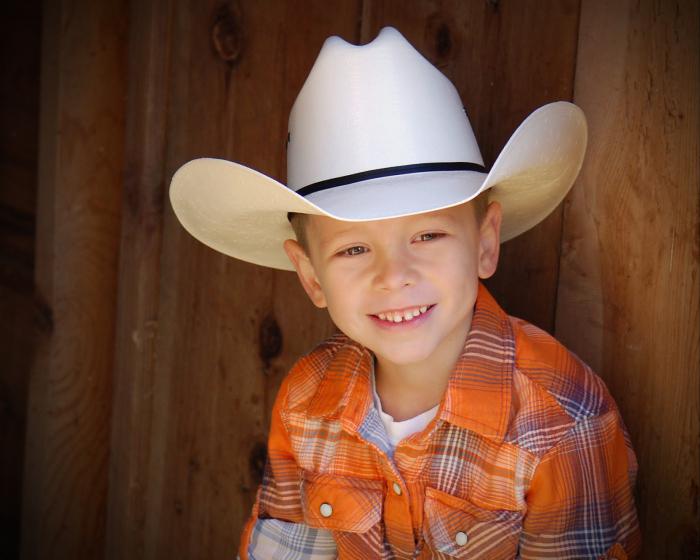
If the intended line suits you, then cut off the top. Remove and glue the pins. Take a sheet, we will make the top of the tulle. Fold in half and again the sheet. Draw lines. Measure ten centimeters horizontally and seventeen vertically. Connect all the dots. Leave an allowance of one centimeter. Cut out. Take the tape, use it to glue the bottom. Put on Tula on the fields of the hat. Secure with tape. Next, glue the craft with a cloth or leather jersey. The hat for the boy, made with his own hands, is ready. You can decorate it with large stitches. Pass a needle and thread along the edges of the fields.
DIY hat: item number 2
We will need:
- paper cup;
- plastic sudochka;
- glue;
- scissors;
- threads;
- awl;
- a pencil;
- two wooden balls with a hole;
- white cardboard;
- colored papyrus paper.
Making a hat for a carnival
Take a round dish, put on a cardboard and circle with a pencil. Cut the resulting shape. Cut along the edges. In the cup, outline the center. Do the same in the cut circle. At the designated points, make a hole with an awl. Pass the thread and put on the ends of the balls. For reliability, glue parts. Take papyrus of different colors and cut strips. Cut their edges. A self- made hat is almost ready. Decorate it. We process the multi-colored strips with glue and apply them to our craft. Start from the top of the head, and then proceed to the sides. To make the hat look unusual, cut flowers from paper, glue to the sides. You can attach an elastic band so that the hat does not fall off.
A self-made hat is original. And most importantly, no one has this.