Picture frame? Do it yourself Of course, it is possible and necessary. If you don’t do needlework at all, and you really want to decorate your paintings with your own hands, place them in a frame and make them exclusive, then this article is for you. A handmade frame for a picture looks great in the interior of a room.
Solar picture frame
For this fun sunny frame you will need:
- thick cardboard;
- PVA glue;
- stationery knife;
- ruler, 2 round (large and smaller) plates or compasses;
- metal loop suspension ;
- old multicolored glossy magazines;
- plastic transparent slide (A4) instead of glass;
- and, of course, good mood, pleasant music and a little patience.
- On thick cardboard, draw a circle through which the picture will be visible. Step away from it by 10 cm and draw a second circle around it. Get a big flat bagel. First cut the second circle, then the inside with sharp scissors or a clerical knife. Do it well on a flat hard surface (you can take a plastic or wooden kitchen board). The basis of the picture frame is ready. You can make a few more of the same sizes. Put them aside for now.
- And now a little patience! From the glossy colored sheets of the magazine, wind tight tubes in an oblique (from the corner of the journal sheet), or in a straight line (from the edge of the journal sheet). You can cut the glossy papyrus into strips and wind on a pencil or knitting needle. The length and density of the tubes depends on your desire. Glue the ends so that the tubes do not unwind and are like colored sticks.
- Fix the finished tubes with PVA glue to the base so that the edge of the inner circle is flat and the edge of the second circle is not flat, i.e. one tube is shorter, the other is longer (in the photo they are not glued to the base, but are fastened together by a metal wire). Let the glue dry and lightly tint with a colorless varnish.
- Turn the frame over, glue it to the circle through which the picture will be visible, cut off the excess. Glue the canvas with the image to it, fix the square of cardboard on top so that it holds the structure and does not go beyond the edges of the outer circle.
- Glue a metal loop-pendant onto the second layer of cardboard. One frame for a picture with your own hands is ready.
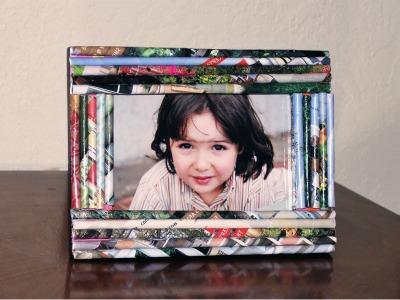
Another option is a square frame, which is done by the same method. Several round and square rims together look very beautiful and fun in the interior of the children's room, in the corridor, in the hallway, on the veranda. This frame for a picture (or for a photo) will cheer you up. It is bright, like the sun and the rainbow, decorates the room, pleasing to the eye.
Marine Theme
Here is a made picture frame with your own hands, but on a marine theme. It can be used for photos and mirrors. Production thereof
same as in the previous description. The base is made, and
shells, starfish , small corals are applied to it. Such frames for paintings with their own hands are made in two ways and at the same time look beautiful in the bathroom, on the veranda, on the balcony. They can be designed both round and square, oval, triangular.
There is a similar version of the frame, but with small stones. Such a product may be natural and artificial. In the first case, it must be coated with colorless varnish. This will allow the material to retain its natural qualities for as long as possible.
If you have an old frame, and you do not want to grind and paint it, then you can simply wrap it with fabric or leather, suede, the rest of the wallpaper to match the color of the furniture, etc. You’ll get a frame for a picture, made by yourself and
suitable for your furniture, wallpaper and carpets.
Twig Frames
Now souvenirs from branches are very popular. Only such raw materials must be harvested in a "raw" form, and then thoroughly dried. Give all the shoots a uniform size, soak them in water for a day, then separate the peel. They will become smooth. The round frame should be assembled like a wreath. First you need to prepare the base, using metal or thick cardboard, and on it with finished fishing line or soft wire to fix the finished green twigs. They are still obedient and flexible at this time. For a round frame, choose thin branches. After they dry, they need to be painted with a clear varnish for wood. On the back, fasten a loop or rope for a souvenir. Square frames from branches are much easier to do. It is only necessary to clearly measure all the angles and make sure that the overall composition is smooth and holistic.
As you can see, making frames for pictures with your own hands is not so difficult. They have your warmth, good energy and memory. Do it, it's so nice.