Children are very fond of working with natural materials. Therefore, after a walk in a pine forest, you can get a wonderful squirrel from cones. This craft is made in various ways. Some of them will be considered here.
Instructions for the preparation of natural material for crafts
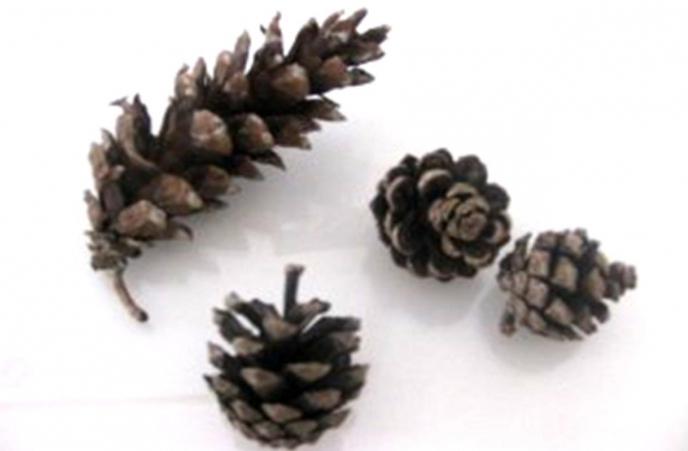
To pick up cones for making a squirrel is a simple process, but it requires a careful look. It would seem that it’s easier: walk through the forest, enjoy communication with nature and, in the meantime, collect material for needlework.
However, it should be remembered that not all cones are equally suitable for creativity. From rotten and damaged, for example, it is unlikely that something good will turn out.
It is not necessary to reject cones with irregular shape, for example, curved, too short, fused. On the contrary, such "freaks" can be very useful! Curved cones successfully turn into the back of the animal and its tail. Such material is the best suited for labor. In general, cones should be collected in different sizes and shapes. And how they can be used, tells the fantasy.
Instructions for the preparation of natural material for crafts
And upon returning home, the work on preparing the material is not always completed. Even, so to speak, the most crucial moment arrives.
In order to subsequently turn out to be a good protein from cones - a hack, the instructions for preparing natural material read as follows.
- Sometimes an animal figure is needed urgently and for a short time, for example, for an exhibition. Then you can simply choose the driest and cleanest cones and get to work.
- If you want to keep the composition in its original form for a long time, the material is pre-processed. Cones should be lowered into a transparent mounting glue before work, and then dried. Then they are not threatened by time and heat, from which the flakes open and the craft is deformed. You can use warm wood glue for this purpose .
Squirrel made of cones and velvet cardboard
The first very simple way is to make squirrels from a single cone. It is mounted on a stand with plasticine with a thick end down.
Two parts are cut out of cardboard: a tail and a head with ears. Eyes are glued to the head. They can be bought ready-made in special stores for needlework or made from beads, buttons, white paper. Teeth are also attached to the head - white rectangles.
The tail and head must be glued to the bump. So we got a cool squirrel. From cones, the craft can change its volume under the influence of heat. However, in this case, this fact does not spoil the thing.
Squirrel from cones and plasticine
This is the second fairly simple option for making the figures of a forest animal. In addition, you will need another orange plasticine in order to make a wonderful squirrel from cones - a craft made by the baby with his own hand. A cardboard square is suitable as a stand.
For work, you should choose a couple of curved cones. They will serve as the body and tail of the animal. They should be connected with the curved sides using plasticine. If there is only one lump in stock, then the tail can be molded from plasticine. It will be a thick sausage with pointed ends, curved with the letter “S”.
For the head, an oval of orange color should be fashioned . From one end it is pointed - it will be the muzzle of a squirrel. The ears are formed from the same material, making small pinches in the upper part of the head. A small black ball is attached to the tip of the spout. Also in the form of balls make eyes. But you can use purchased ones with pupils rolling inside.
The lower legs are made in the form of two halves of an oval. They are attached to the stand with their slices, and a protein from cones is already installed on them. The craft will be considered fully finished when the front legs of the animal are attached from plasticine sausages. They need to be attached to the upper body.
Squirrel - an article made of cones and chenille wire
Today, for hand labor, special fluffy wire is sold in stores. In another way it is also called chenille. An excellent protein from cones can be obtained if the legs, tail and ears of the animal are made of fleecy wire.
Well, if you can get special fleecy balls for the head. Then eyes and a nose made of beads or beads are glued to it. Sometimes these parts are cut out of paper or cardboard. The use of small buttons is allowed.
Squirrel with a chenille muzzle
Some sets for manual labor include round fleecy balls. They make heads for animals. Otherwise, when it is impossible to get the workpiece, use the same chenille wire from which the paws of the animal are made.
First you need to roll a "snail" circle for one eye. Then a loop imitating the nose of the squirrel is made from the wire. Then the master begins to perform the second eye. It is also made a "snail." Below, under the tip of the muzzle, you can fix a short piece of white wire, bent in half. These will be the teeth of a rodent animal.
It will be a wonderful squirrel made of cones. The craft, the photo of which is presented here, is made just in this way.
Master class "Squirrels from cones"
Sometimes they make a whole composition in which several animals are present. One animal will, for example, sit behind its hind legs. And next to it is a protein from cones standing on all four limbs. A craft whose master class can be viewed here will decorate a shelf or chest of drawers. You can give it to a loved one as a gift.
Since it is best to make a squirrel from cones with the help of chenille wire, then this material must be selected suitable for color. For each animal, fleecy balls should also be prepared. Of these, heads will be performed. Small balls — eyes, are molded out of black plasticine, and larger details — nose tips. You can use ready-made "eyes" that are sold in needlework stores.
- So, first, on the thin end of the cone, they fix the head with glue or plasticine. If the squirrel sits on its hind legs, then the bump is placed vertically with its thick end down. For the little animal, which stands on all four limbs, the body is mounted on a stand horizontally.
- The front legs are made of chenille wire. A cone is wrapped around it between the opened flakes.
- Eyes are glued to the head.
- Now, with the help of plasticine, eyes are set.
- Hind legs can be made from halves of the acorn.
- The tail is made either from the same wire, or from a pine twig painted brown. Sometimes it is made from a bundle of grass by tying it from the bottom with threads.
Now that everyone understands how to make a squirrel from cones, you can make a composition. For this, plasticine mushrooms are used, trees are built from twigs. And it’s possible to build a wonderful little house for squirrels by adding them from “logs” - broken branches.
Squirrel pyramid of cones
More experienced craftsmen make the animal, making it the body of several cones. The figure is assembled like a pyramid: at the bottom there is a round, wide detail, then it is installed more authentic and narrower. The third is attached the smallest round bump - the head. It turns out more like a protein from cones, more like a real living animal. Crafting step by step is performed in this sequence.
- They make out the head on which the eyes and nose are glued.
- Ears are made from scales of another cone or from maple seeds - “wind turbines”.
- On a plasticine slide, a bump is installed that simulates the lower part of the trunk. She, as mentioned above, is wide and short, almost round.
- The front legs are attached to the second bump. They can be molded from clay or plasticine. Some craftsmen make these limbs from scales of another cone. But chenille wire here would be appropriate.
- The upper part is attached to the lower base of the body. This bump is narrower and longer. It is set with a thickened end down.
- The finished head is mounted horizontally on the second bump.
- The last to set tail. For him, you need the biggest cone and, if possible, well revealed.
Tips from experienced craftsmen
You can use half of the cone for the tail, which you need to cut along. Giving the "tail" the desired bend, it is fixed with a glue mass.
In order for the craft to be more durable, the adhesion of parts in it can be done not with plasticine, but with pieces of metal rigid wire. First, in the joints, drill holes into which the rods are driven. If, in addition, the recesses are filled with glue in advance, then the parts are connected very firmly.