Knitting as a way of making clothes exists, as historians say, for the third millennium. Many knitwear went into the category of national clothing, and some methods of knitting are still called by the name of the country or area where they first appeared. For example, Irish, Hungarian, Pomeranian knitting. It is characteristic that for centuries this type of craft was mainly occupied by men.
With the advent of the Internet for needlewomen, an era of universal exchange of ideas has begun. It has become very easy to exchange experiences, a huge selection of solutions, patterns, methods and techniques has appeared. All this provides fertile ground for the further development of creative thoughts for everyone who is interested in this type of creativity. It would be time.
One of the most popular types of knitwear has always been mittens. They can be quickly knitted, and quite a few threads are enough. If there are only a few hanks leftovers, you can make beautiful knitted mittens. They are knitted or crocheted, no matter. Sometimes only 50-70 grams of wool is enough to get a warm and solid product. Knitted children's mittens are especially easy and quick. On the one hand, this is a huge scope for imagination, and on the other, a good reason to use small pieces of yarn for good.
1000 and 1 method
Let us dwell on the methods of knitting mittens with knitting needles. The thicker the thread, the faster they can be knitted, but such mittens will not always be comfortable and warm. You can knit double mittens or choose a pattern that not only decorates, but also makes them warmer.
In recent years, this type of knitted female mittens, such as mitts, has become popular. They are comfortable, stylish and very easy to manufacture. They can be quickly knitted on two knitting needles.
Therefore, before starting work, the main thing is to decide what exactly you want to knit, choose the threads and the method of manufacturing knitted mittens. A description of how to create such an accessory is presented below.
1. Mittens tied on four needles from the wrist
This is perhaps the most traditional way, but it requires some skill. Therefore, those who are only learning to hold knitting needles in their hands are likely to be discouraged from hunting in the future.
If we take as a basis a standard sample of such mittens, then their knitting can be divided into the following stages.
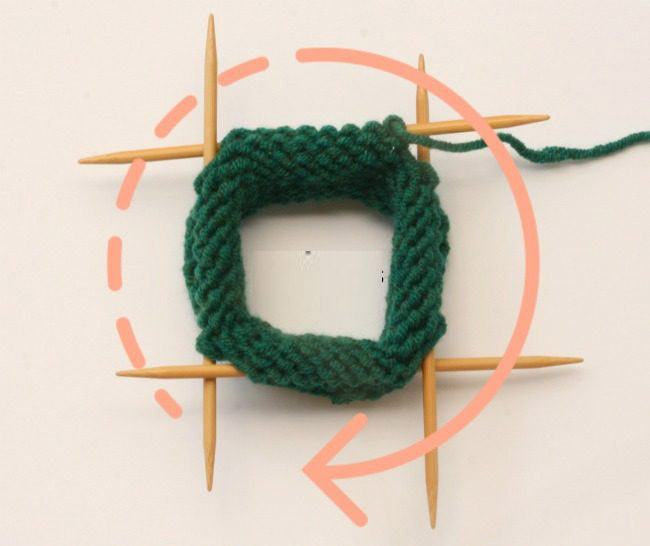
- Knitting gum. As a rule, it knits more tightly, for which needles are taken 1-2 numbers less than what the main knitting requires.
- Knit from the wrist to the base of the thumb. Having knitted 5-7 cm, it will be necessary to remove several loops on a pin or spare needle. They will become the basis for tying the thumb.
- Knitting from thumb to little finger. In the place where the loops were removed, we collect air loops, by the number of them there should be as many as those left on the pin. Sometimes they make 1-2 loops less.
- Reduce the number of loops. As a rule, mittens are completed by knitting in each row two loops together in four places. Thus, each row becomes four loops smaller. When there are few stitches, it is better to continue knitting on two knitting needles.
- When 4-5 loops remain on the knitting needles, cut the thread and thread it through the remaining loops.
- Tying the thumb. We remove the loops from the pin, we collect the same number of loops on the other side and knit the height of the thumb on three knitting needles. We complete it by knitting two loops together in three places of each row.
2. Knit on two knitting needles
This is perhaps the easiest way. Beginners who have just begun to learn knitting can safely try it. The number of loops necessary for grasping the wrist is gained, and a rubber band 5-7 cm long is knitted. After that, knitting the main fabric of the mittens begins with any selected pattern. Having tied to the place where the thumb begins, remove 8-12 loops. In the next wrong side, we collect the same number of loops (or one or two less) over the loops that remained on the pin.
Continue to knit the mittens to the tip of the little finger. Then we begin to reduce the loops, it is possible evenly in a circle, 4 in each row - both in the front and in the back. And it is possible from two sides and in the middle. Some people prefer to reduce the loop through one row, for example in each front row. In order not to have to dissolve and bandage, it is best to do the fitting from time to time. When 4-5 loops remain on the knitting needles, we finish the work by breaking the thread and pulling it through the remaining loops.
It remains only to tie the thumb. And then gently sew the edges of the mittens from the inside of the palm edge.
3. Making mittens on two knitting needles from the wrist to the tips of the fingers and back
This is one of the most interesting and fairly new techniques for knitting mittens with knitting needles. In addition, the peculiarity of this method is its unlimited possibilities, where it is easy to implement any ideas, the implementation of which in other methods of knitting would be rather laborious.
If it is problematic to use even 2-3 threads of different colors when knitting mittens on four knitting needles, then in this case knitting using even 3-5 threads will not be difficult. In addition, here you can easily tie, for example, the top of the mittens with one color, and the inside with another.
Suppose you select a pattern for this knitting method. The number of loops should be half less than necessary to cover the entire arm. That is, first we knit the front half of the mittens.
Knitting Mittens: Description
The algorithm is as follows.
- Knitting also starts from the wrist, with an ordinary elastic band 1 x 1 or 2 x 2. Then we turn to the main pattern.
- Having tied to the index finger, we decrease one loop on each side of the row, knitting two loops together after the edge. We follow the pattern.
- The same thing is repeated in the wrong row.
- Tied up to the end of the upper part of the mittens.
- Now we knit the inside. We add as many loops around the edges as we reduced.
- Attention! Then you need to very carefully, controlling the tension of the thread, at the end of each row, knit the edge loop with a loop on the edge of the front.
- Thus, gradually connect the front and back of the mittens.
- Having tied up to the thumb, we lower a few loops to the spare pin.
- Tied up to the elastic, knit it and complete the mittens, close the loops.
- We tie the thumb.
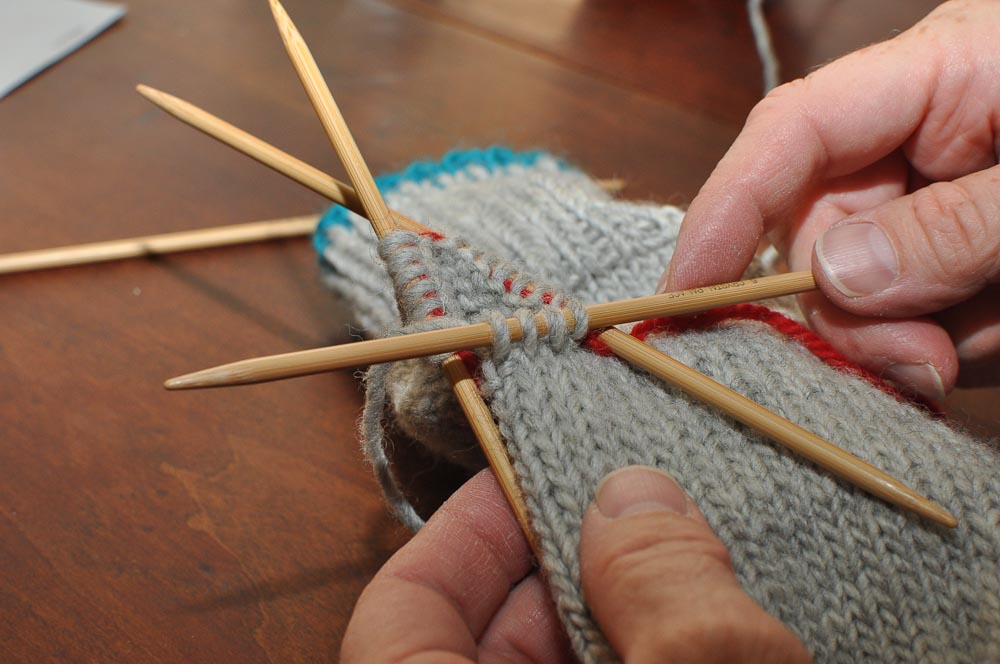
4. Knitting on circular knitting needles
This method of making knitted mittens is also relatively simple and is suitable even for beginners. Only in this case it is necessary to pull the fishing line twice in each row. In all other respects, this knitting is no different from knitting mittens on four knitting needles.
5. Knit from your fingertips
This method makes it quite simple to knit a smooth and beautiful upper edge of the mittens. They can be knitted both on 4 knitting needles, and on two. Here's the main difference in the original set of loops. To master it having even initial knitting skills will not be difficult.
The peculiarity is that you need to dial loops simultaneously on both knitting needles. It is better to use circular ones. Having collected the required number of loops, about 8-12 for each knitting needle, we knit in a circle. In each row we add four loops, two for the little finger and two on the opposite side, where the index finger is. In one row we make a crochet, and in the next we knit it, twisting it so that there are no holes.
Further knitting from the tips of the fingers to the wrist is no different from the traditional method, only now in the reverse order. If usually knitting mittens began with an elastic band, now it ends with it. The upper edge of the mittens, connected in this way, look very neat.
6. Knitting mittens spokes across
This is another of the “exotic” methods of knitted mittens, which does not require almost any special skills. Here it is only necessary to draw the correct scheme, which would exactly match the size of the hand. You can start knitting from anywhere. For example, from the edge of the palm, but it is best that the seam is not visible, from the middle of the inner side of the mittens, as shown in the photo.
In the future, we knit everything clearly according to the scheme, reducing or adding the necessary loops in the right places. In conclusion, it remains only to carefully stitch or knit both edges. All. Lovely knitted women's mittens are ready. This way you can easily knit not only mittens, but also gloves.
Knitted Mittens Ideas: Photos
A great idea is to make a hole for the index finger. Convenience is undoubted.
Mitts can be a good alternative to regular mittens.
For knitted children's mittens, you can tie a rope that will protect their loss.
Another option: knit the upper part of the mittens separately.
Whichever method you choose, no matter which pattern you choose, the main thing is that the knitting process itself is a pleasure for you, and those who are interested in mittens would wear them with joy and a guarantee to keep their pens warm.