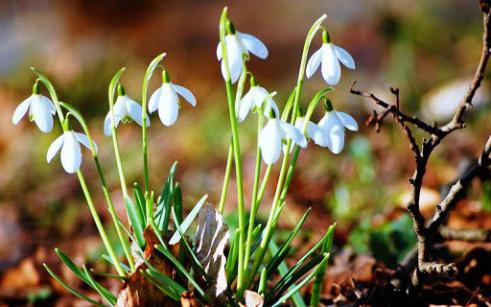
The period of early childhood is the most favorable for the development of all kinds of makings and abilities. And nothing develops a child’s creative thinking so well as making all kinds of crafts with his own hands. This can be coloring, working with plasticine, drawing, making various products from improvised materials, such as flowers from feathers, origami, or applications. There are also crafts combining different materials and types of work. For example, applications with origami or drawing elements. However, it is important to pay enough attention to the choice of a subject for children's creativity, since good work is possible only if the child is interested. So, all the children are delighted with the first spring flowers, so the application “Snowdrop” will certainly interest them. Especially if the kindergarten teacher brings them several colorful pictures that depict these flowers and tells about the features of their growth, an interesting fairy tale, legend or riddles associated with them.
Preparation of materials
The application "Snowdrop" in kindergarten, like any other work, should begin with the preparation of materials. It is necessary for the day, or better for a few, before the production of this craft is planned, to ask the kids to bring the following tools and materials: scissors, glue, colored paper, standard white sheets and cardboard. The attention of children is important to ensure that the scissors are convenient for them to work - not too large and not too small. As for glue, it is most convenient for kids to work with a "pencil", and for this activity it will be quite enough.
If it is planned that the application “Snowdrop” should turn out to be more original, then additional items may also be needed. Among them are white paper napkins, colored pencils, felt-tip pens or paints, cotton pads, oilcloth, stapler, as well as corrugated paper.
Paper snowdrops: making a flower and a stalk
Since this is an application, it is first of all necessary to choose a basis to which all elements will be attached. To do this, you need cardboard blue or blue. It is to him that the stems, leaves and flowers of a snowdrop, as well as snow and clouds, will be glued alternately.
The application “Snowdrops” from paper begins with the manufacture of stems that need to be cut from green paper and glued to the base. Next, cut out a 5x5 cm square from white paper and fold it diagonally. It will turn out a triangle, which must be cut with the help of scissors in two in height. As a result, three petals will come out - large and two small. Each of them must be rounded. Next, two small petals should be glued to the stem so that the corners are together, and the rounded sides are at some distance from each other, and the third should be glued on top. It is worth noting that fixing the details is only necessary for the upper corner, then the application “Snowdrop” will look voluminous.
Making sepals and leaves
Now the sepal, because only with it the application “Snowdrop” will look realistic. To make it, you will need to cut a square from green paper with a side of 1.5 cm, fold it diagonally and cut a triangular recess on one of the open sides of the resulting figure. Glue the resulting part at the junction of the flower with the stem.
There were leaves. It is necessary to cut three strips of green paper 10-12 cm long and 1-1.5 cm wide, which are sharpened on one side. Glue the finished leaves to the bottom of the stem. The application “Snowdrops” made of paper will turn out to be more original if the upper part of the leaves is twisted a little using the sharp side of the scissors and only glued to the lower part.
At the final stage, it is necessary to make snow. To do this, take two rectangles, 5x10 cm in size, cut out of white and blue paper. Putting them together, with the help of scissors, you should give the upper edge wavy. Then stick on the base, slightly covering the stem, the blue part, and 1-2 cm lower - white.
Napkins and paper snowdrops
On the back side of green colored paper with a simple pencil you need to draw leaves, stems and cut them along the contour. It is with this step that the application “Snowdrops” from napkins and paper should begin. Next, you can go to the leaves. To do this, fold the white napkin four times, cut it into even squares and, holding them all together, use scissors to shape the petals, which in the lower part are fastened to each other using a stapler. Next, it is necessary to bend the lower edges so that the bracket is not visible, and lay out the upper edges in the form of a fan, giving the flower the shape of a snowdrop. Instead of napkins, white corrugated paper can also be used.
When all the elements of the application are ready, it remains only to stick them on cardboard in blue or blue. The composition may consist of either one flower or several. To get a more realistic picture, you can cut trees and bushes from gray or black paper and stick them in the background, and attach a rectangle of white paper to the bottom of the base, which will simulate lying snow.
Paper application with origami elements.
No less interesting for children can be the application “Snowdrops” made of paper with origami elements. Do not be afraid of this technique, since folding the first spring flower in it is quite simple. To make a snowdrop, you need to take a square sheet of white paper about 10x10 cm in size, which you need to fold diagonally, and then bend the top of the resulting triangle back. Then, in turn, bend the sides down. This will be a flower, without which the application “Snowdrop” in kindergarten is unthinkable.
Next, from green paper according to the scheme described above, it is necessary to cut leaves, stems and sepals. Then stick all the details to the base, for which it is best to choose blue cardboard. It is also worth noting that the flowers must be glued with bent triangles to the outside.
Snowdrops in a basket
When your children will be familiar with all the variations of making snowdrops, you can offer them to supplement their application with a basket. To do this, you first need to stick a lot of flowers with leaves and stems on the base, and on top of them is a basket previously cut from brown cardboard. To get the effect of volume, the handle can be left out.
The application “Snowdrops in a basket” can also be made as follows: cut out a basket with a pen from brown cardboard, draw large cells with a black or gray felt-tip pen on it, and then make cuts on some lines into which to insert flowers. To prevent snowdrops from falling out, you can cut another template of the same color and stick it on the back of the product.