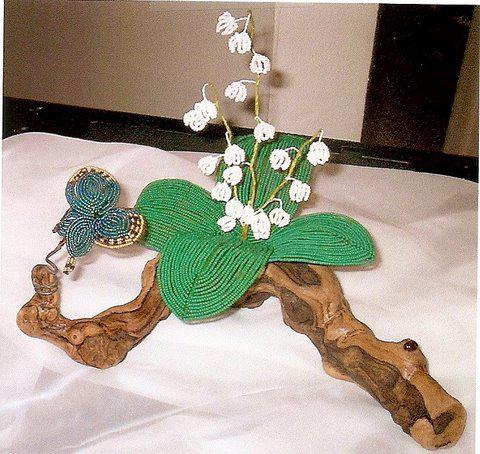
Only spring flowers alone have become a true symbol of love and tenderness. What is it about? Of course, about lilies of the valley. True, they can only be found in early spring. And the rest of the time you can admire their photo or make lilies of the valley made of beads to decorate your home with your own hands. The weaving pattern of this flower is not as complicated as it seems at first glance. The main thing is to find a couple of free evenings and a good mood for work.
What do you need for work?
In order to weave lily of the valley with your own hands, you will need the following:
- small beads No. 11 of three colors: white, yellow and green;
- thin wire for weaving with a diameter of 0.2 mm;
- the wire is thicker for the stem (it should be 2 times thicker);
- green thread or floral tape to mask wire segments;
- pliers and a special organizer for beads (this will simplify the work).
And, of course, a reserve of time, patience and a good mood so that the lilies of the valley turn out to be as beautiful as real flowers.
Flower Technique
The scheme of weaving lily of the valley from beads begins with the implementation of flowers. There are many options for how to do this. But the most beautiful they are obtained using the technique of volumetric parallel weaving. That is what it is proposed to use.
- Prepare for each flower 6 pieces of thin wire, each with a length of at least 30 cm. In total, it is planned to make 7 pieces.
- Take one segment and collect 13 white beads on it, placing them closer to the center. Then twist them into a loop so that the ends of the wire are at the bottom.
- Pass the next segment through 5 extreme beads, and then put another 8 pieces on the other end. Twist the loop again. And so all the actions are repeated until 1 piece of wire remains.
- Also pass it through 5 extreme beads, but already collect 3 beads on it. And then thread the remaining end through 5 beads on the other side. Connect everything together so that the whisk comes out.
- To get lily of the valley from beads, like a real one, you still need to weave the middle. On a wire 20 cm long, type 2 yellow beads. Then run the wire in the opposite direction through one of them. Get 1 needle.
- In the same way, make 2 more needles. Twist all the ends together. Stamens for the flower are ready. They also need at least 7 pieces. Now you just need to thread each center into a lily of the valley flower.
Leaf execution
Of course, no lily of the valley can do without its luxurious large leaves. There are many techniques for their implementation. Most often use parallel weaving or French (arches). Which technique to choose depends on the capabilities and experience of the needlewoman. The parallel weaving technique is considered simpler, and therefore the pattern of weaving lily of the valley from beads more often suggests that the leaves will be made that way.
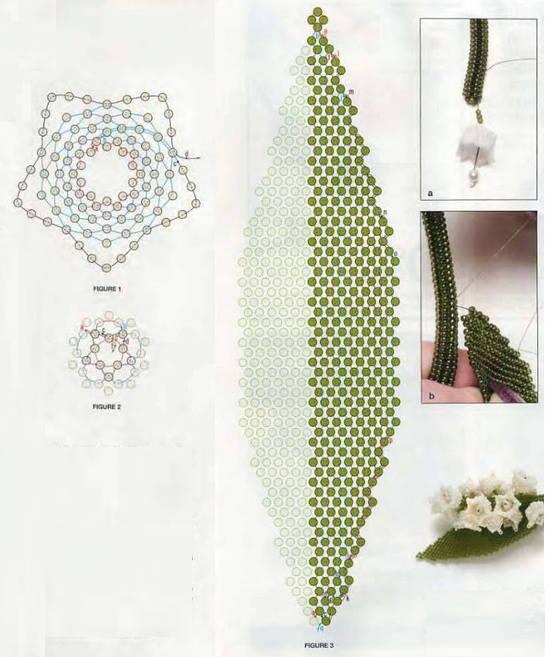
- For each sheet you will need 2 meters of wire. For such a number of buds, no more than two leaves are needed, or even one. Collect one bead and place it in the middle.
- Further, up to the 21st row, add one bead in each row and weave the sheet in the same way - using the parallel weaving technique.
- In the 21st, 22nd and 23rd rows will be the same as in the 20th, - 20 pieces of beads. From the 24th to the 27th row there will be 19 beads, and from the 28th to the 30th - 18 beads.
- From the 31st to the 46th row, each decreases the amount of beads per 1 piece until only 2 beads remain. In the 47th row, you also need to dial 2 beads. Fasten the wire.
- The sheet is very large and flexible. To fix it, you need to additionally flash it with wire. To do this, another piece of wire should be passed through the middle of the sheet, wrapping around each row.
Assembly parts
Now that all parts of the flower are ready, you can assemble the lily of the valley from beads together. Only need to cook the thread or floral tape. The main thing is that they match the color of the leaves.
- Each flower is wrapped with threads to a length of about 3 cm. Then, where the winding ends, attach another flower. Both should look one way.
- To strengthen the stem, wind another thick wire. So you need to do with all 7 flowers. With the help of a thread, it is good to mask the entire wire.
- After all the flowers have been collected, you need to wind 1 or 2 leaves to the very bottom of the stem, and fix the flowers at the very top with a thread. This is necessary so that the entire structure holds its shape.
Support for flowers
After you make lily of the valley from the beads, you need to place it somewhere. Usually such a flower is placed in a small vase. But you can make a flower stand yourself. For it, PVA glue, alabaster and water, as well as paints, transparent varnish and any plastic form, will be needed in equal parts.
Mix glue and alabaster, dilute with water until soft. Pour this mixture into the prepared plastic mold, place the lily of the valley and leave to dry completely. Now paint the thaw or green meadow with paints, varnish to fix on top. Allow to dry well. Gently release from plastic mold.
And the last thing that remains to be done is to find a place where to put flowers from beads. Lilies of the valley can decorate not only an apartment, but also a table at work. And such a handmade gift always looks original.