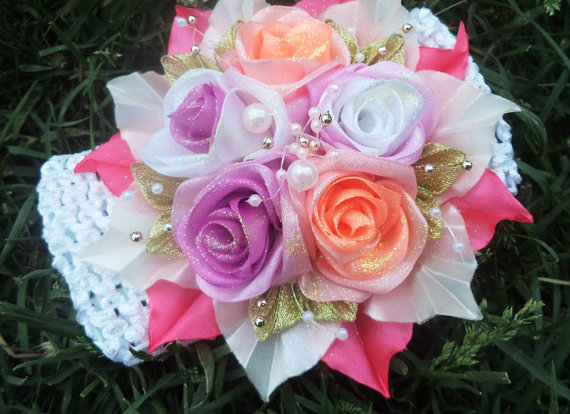
You can make a flower from a satin ribbon with your own hands in several ways. Consider several techniques that are suitable for both beginners and skilled workers already familiar with this material. Let's try to create a beautiful interior rose, which will be difficult to distinguish from natural. How to make a flower from a satin ribbon step by step, we will consider in our master class.
A branch of a rose with three buds
On the branch, we will make three options for the flower - open, half-open and closed. All three roses are collected according to one principle, with only a different number of petals. Before making flowers from satin ribbons, we will prepare the following tools and materials:
- A dense high-quality satin ribbon with a width of 5 cm. The color of the buds can be chosen independently, and for foliage and stem it is advisable to choose a shade of green, close to natural.
- Candle to scorch the edges of the tape.
- Awl or thin knitting needle.
- Paper towel.
- Toilet paper.
- Glue gun.
- Sheet of foil.
- Scissors.
- Floral ribbon in color green satin ribbon.
- Thin and thick floristic or plain wire wrapped in floristic ribbon.
Blanks for small rose petals
All materials are fairly accessible, and most of them are easy to find in needlework stores. Now we begin to make roses. Before making flowers from satin ribbons, we will prepare blanks for the petals. We will need them in three sizes: small, medium and large. We start with the smallest. To do this, cut the tape into segments 4 cm long. For one bud they will need 7 pieces. The petal itself will be 4 cm wide. The blanks need to be made square in shape, but since the ribbon still has an edge, cut off about 7 mm, leaving a small margin. Then cut off the extra corners, forming a petal. We round the workpiece from three sides. To make flowers from satin ribbons for beginners in this way is not difficult.
Create Medium and Large Petals
Now proceed to the production of medium sized petals. They will need 10 pieces for one flower, 3 of them - for tightening the bud. Roses have shirt petals, which are located in the lowest row. This is a way to make a beautiful satin ribbon flower more natural. You can prepare an additional three blanks for them, this will give the rose a natural shape. We cut the tape into segments 4.5 cm long and wide. We also leave an additional 2 mm. We form a petal. Then proceed to create 10 large petals. We cut the tape into segments with a width of 5 cm and round off from three ends. If the edging canvas falls on the upper part of the petal, it needs to be cut off, since during heat treatment it will strongly compress and deform the canvas. This is optional on the bottom.
Edging workpieces
We continue to make a flower of a satin ribbon with our own hands. Now for work we need a candle or a lighter. When all the petals are cut out, their edges need to be scorched, otherwise the tape will begin to crumble. Also, with the help of fire, you can change the shape of the petals, bending them in different directions. We put a candle on a plate to protect the working surface from wax, and light it. This is a way to make flowers quickly from a satin ribbon. We begin to process the edges with the smallest petals: we quickly draw them through the center of the flame so that soot does not form. Gently burn the edges of all the petals. You do not need to bend them. The material is quite malleable, therefore it does not require additional processing. The same processing option is used before making a kanzashi flower from a satin ribbon. If there is a desire to give the petals a curved shape, it is enough to put them on a sponge for dishes and squeeze a heated teaspoon on top.
The middle parts are treated in the same way. But three blanks for the last row will need to be bent around the edges, holding above the candle. Under the influence of temperature, the petal will begin to bend inward. It is not necessary to bring it strongly to the fire, otherwise tan marks will appear. Just twist the edges a little. Then we turn the workpiece over and slightly melt the tail so that it bends the other way. Now the middle and shirt petals are ready. The largest workpieces can be slightly twisted to the edge, holding them longer over the flame. The sharp tip also needs to be bent so that during assembly the petal rests more accurately. After that, remove the candle.
Blank for bud
Now we proceed to the assembly of the bud. Before you make a simple flower from a satin ribbon, you need to make a blank for its central part. At the same time, it is advisable to plug the glue gun into a power outlet so that it can heat up. We roll up a ball with a diameter of about 2.5 cm from foil. You can change the size - it determines which flowers can be made from a satin ribbon. For one such ball, you need a sheet of hard and dense foil 30 cm wide. It is advisable to purchase a floral ribbon for processing stems. It is convenient to work with it because of the sticky side. You can use corrugated paper, but you will have to apply glue on it. Floral ribbon is chosen to match the color of the leaves. It is better not to focus on the name of the flowers - they may differ from different manufacturers.
Petal bud
When the glue gun heats up, proceed to the assembly of the flower:
- Take a foil ball and two medium sized petals to fit the bud.
- Having taken the petal, we glue the edge with glue and form a cone.
- We put it on the ball and apply the right amount of glue.
- Press the edges of the cone without touching the top so that the top of the ball closes. It is not necessary to sting the glue, since the tape does not adhere well to the foil.
- Now, as if with the first petal, we cover the middle, smear the edge with glue and press it to the workpiece.
- We glue the remaining parts.
You should have a cone-shaped rose bud.
We continue to form a flower
Now we take the first 7 petals and begin to stick them on the blank one after another. Try not to close the bud completely and fix the petals on the same level.
The process consists of the following steps:
- Press the petal to the place where it should be and, holding your fingers, bend the upper part back.
- Apply glue and press again.
- Glue it firmly to the workpiece, smearing the edges on all sides to get a tight bud.
- The second petal adheres with some offset to the side. The glue is applied below and on the left side, this will facilitate further work. The top edge should remain free.
- The next one also overlaps, but glues on the bottom and on both sides.
- At the sixth, leave one edge free and bring one side of the seventh under it and glue them with an overlap.
- Try to distribute all 7 petals evenly across the bud. If desired, the edge can be sealed so that it remains closed, but this is not necessary.
One rose is ready - we made a flower at the bud stage. For the other two, you will need the same blanks. We will produce sepals at the final stage.
Create a Half-Opened Bud
Now we learn how to make flowers from satin ribbons half-open, using the example of a rose. Take the middle petals and follow these steps:
- Just continue the row of petals so that the next follows the previous one. You can raise it 2 mm higher than the rest.
- We put glue on the lower part and in the middle along the right edge of the first petal, apply it so that it is bent from the bud.
- The left side is left open. Apply glue from below and press the edges to the center.
- The next petal is slightly shifted to the side, bent and apply glue to the center.
Thus, paste the first five petals. The distance between them should be slightly larger than in the front row. It is undesirable to make the middle completely closed - it does not look very beautiful. We fill the fifth petal under the fourth and glue it on all sides. Now you need to collect five more petals on the workpiece. They are attached at the same height, but glued differently: we glue the middle, lower part and center of one of the edges. The other edge should remain open. It is important that the petal is at the same level as the others.
The larger the bud becomes, the wider the petals are. You must try to control this process in order to get a beautiful and even rose. We glue four petals with an overlap, and the last one we fill under the previous one. Now take five large petals with a curved edge. Glue the first one where we finished the previous row, slightly lower than the central part. We distribute all five petals so that they all fit. We attach the first four laps, and the last one we fill for the previous one. We got a second half-open bud.
Creating an Opened Bud
For the opened rose, you need to repeat all the steps again, and then take the remaining five large petals and begin to glue them only from below, moving in a spiral. If you make a flower from satin ribbons, in the photo it will look like a real one. The last three shirt petals adhere in random order. The rose will look more natural and complete. If some petal falls out of the bud, it can be glued, but the petals should deviate slightly to the side, creating the effect of disheveled.
Making sepals
At the next stage, we begin to manufacture sepals. Each bud has 5 pieces. To do this, cut a green ribbon into squares 5 cm long. Each of them is folded 3 times - from one piece you get 3 sepals. We take scissors and round off the tips. We open the tape and cut it into three parts. Now take a candle and slightly melt the workpieces so that they spin out. In total, they will need 15 pieces. Glue the sepals on the bud so that they fit it, that is, the convex side out, and vice versa in the opened bud.
Leaf making
Now let's get to the leaflets. Each rose will have one three-leafed leaf, and on the bottom of the branch - one five-leafed leaf. That is, we need 14 leaves. For them, we also take a square of 5x5 cm ribbon. Rose leaves of different sizes. On a five-leaf branch is one large leaf, two medium and two small. On the three-leafed - one large and two medium. From a 5x5 cm square 1 large leaf is obtained.
First round off the edges on both sides. The sheet has a round base, so the lower part is also cut to bring it closer to its natural appearance. Medium will be the same shape, but smaller. To facilitate the work, it is desirable to make a pattern for yourself, for example, removing it from a real rose leaf. You can make streaks on the leaves with a spoon or any other object with a rounded tip. We heat it on a candle and on a soft surface with the sharp side we draw veins. Now you need to make the cloves: take the scissors and apply small notches along the edge of the sheet. Take a candle and scorch the edges. The leaf is ready.
Twig assembly
To form the leaves, you need a wire with a diameter of 0.7 mm, covered with floristic ribbon, or ready-made stems. The wire can be of any color, but the tape needs to be selected according to the color of the foliage. For the central leaf of a five-leafed branch, a wire 15 cm long is needed, and for the extreme - 10 cm. For a three-leafed branch - 10 cm and 5 cm, respectively. We prepare all the leaves, glue them to the wire and begin to collect the branches. For a large leaf, take a large, two medium and two small leaves, cut a piece of 17 cm from the floral ribbon and cut it in half. We position the blanks opposite, bend the wire and begin to assemble the branch with the help of a ribbon, pulling it well together. Give the desired shape to the twig. We collect all the branches in the same way.
Preparing for the assembly of roses
Now we know how to make flowers from satin ribbons, it remains to collect them into a single composition. We begin to create an interior rose. For fastening you will need the thickest floristic wire 40 cm long. For buds, divide it in half, and for the main rose we take the whole size. We take the flower and pierce it with an awl or knitting needle from the back so that it is convenient to insert the wire. We begin to fasten the sepals with a glue gun, distributing them evenly throughout the bud without closing the holes. Inside, fill in the glue and insert the wire.
Stalk compaction
Central roses do not have a thin stalk, therefore it needs to be condensed. This can be done with an ordinary kitchen towel. We cut it into 4 parts - 3 strips are needed per stalk. We put them in 2 times, without gluing. Then we coat the stem with glue and begin to wind the paper, starting from the base, periodically adding glue. We fix the tip, take the next strip, apply glue to the edge, wrap it and thicken the stem along the entire length. To thicken the buds, take a two-layer toilet paper and wind it in the same way, trying to create a smooth transition.
We collect buds on a branch
Set the open rose aside and begin to collect the buds. When they are ready, we take the floral ribbon and begin to wrap it around the stem, moving from the flower down. Around the center, add leaves, attach them too and continue to move down to the end. Now collect the bush. An open rose is always slightly lower than a half-opened bud. Above all, there will be a closed bud - this is a feature of roses. Therefore, we attach it first, and then a half-opened flower.
The floristic ribbon itself is translucent, so you need to wind it tightly, in several layers, stretching a little. To attach the bud, first we move down to the place of attachment, and then we go back and down again, then it will lie flat. We bend the wire a little to the side and wind the buds so that the leaves look out. At the level of the second bud we attach a three-leafed branch. We wind the tape down and about 8 cm from the attached leaflets we attach a five-leaf branch. It should be directed in the opposite direction from the three-leafed branch.
We wind the floral tape in the same way, going down and up to get an even stem. Close the tail and go up. In addition, you can use a glue gun. It remains only to bend the leaves, give them a shape and slightly bend the buds from the central rose so that they do not fit too tightly. Rose is ready. You can create a bouquet by making a twig only from buds, open and half-opened roses and choosing the color of the petals to your taste, make a bouquet or any other floral arrangement.