Odin will be a very useful tool that will allow Samsung brand owners to flash their devices. Next, detailed instructions on firmware via Odin will be given. It is worth noting that the program was developed by professionals, so you can not worry about the quality of the final result. Firmware via Odin is very simple and does not require users to have deep knowledge in one or another aspect of Android devices.
Similar to Odin
The application was developed for Windows. After downloading the program, you get the opportunity to flash your phone or tablet from Samsung. Once the Koreans used the utility only as professional software, introducing updates for their devices. Fortunately, his files leaked to the Internet, which allowed every fan of Samsung to use it. You can download the application on many fan sites dedicated to the Korean manufacturer or Android devices in general. Custom firmware has long ceased to be dangerous for your devices. However, not all users dare to take such drastic measures, getting rid of stock and going into free navigation of pirated programs. It is worth noting that the Samsung firmware via Odin will open up new features of your device that are not available in stock solutions.
Here a dilemma arises, because many people establish an identity that looks like this: flashing = high risk = loss of warranty on the device. But all these are just myths based on old stereotypes. Today in the world there is simply an insane number of owners of Samsung devices, so a measure was taken to create software that would be suitable only for these devices and only in high-quality form. It was Odin that became such an application, having “flown” from the world of Scandinavian mythology. And here you can be 100% sure that you definitely won’t harm your phone or tablet using this program.
Program versions
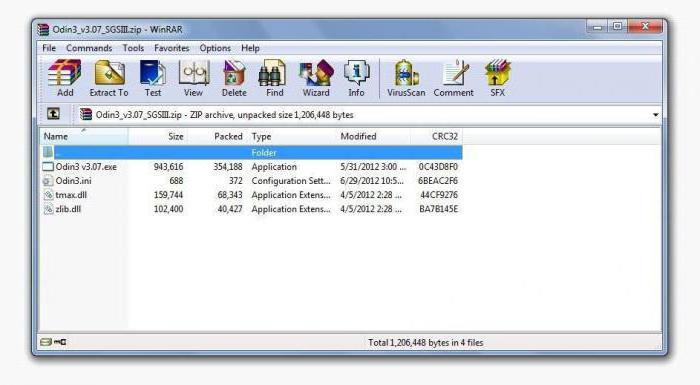
So that the firmware through Odin is successful, there are a number of various versions of the program, each of which is designed for a particular device from Samsung. The main file extensions are: .bin, .tar and .md5. By the way, the most stable versions are 1.85, 3.07 and 3.10.6. Next, we indicate how Samsung firmware should go through Odin, and also tell about the main options of the program.
Program options
So that you don’t “get lost” in the Odin program, we will give you a brief tour of the main options:
- Auto Reboot - if this option is checked, your device will automatically reboot after successful completion of the firmware;
- Re-Partition - allows you to redistribute the file system according to the factory presets (RFS);
- F. Reset Time - the function allows you to reset the counter of previous firmware;
- PIT - if the Re-Partition function was marked in the second, you will need to specify the path to the .pit file, which will make it possible to redistribute the file system of the device;
- CSC - designed to open a file that contains data specific to certain states and operators;
- PDA - an option is required to select the necessary files with firmware;
- Phone - allows you to select the modem file that is needed for the firmware process.
You must be extremely careful when using the Odin program. This is especially true for the Re-Partition function, because if you do not have a .pit file, then it is better not to tick this option. Finally, it is worth remembering that the software is intended only for Samsung devices. Flashing other brands of phones through Odin can lead to unpleasant consequences. Alternatively, you can use FlashTools or KDZ Updater.
Preparing for the firmware process
In order for Samsung firmware to run through Odin successfully, several preparatory steps must be completed. The algorithm of actions will be as follows:
- First of all, you need to download and install USB drivers for your device. If you wish, you can use Samsung Kies, during the installation of which the drivers will be installed automatically.
- Then you need to make sure that the device contains backup copies of important files that will be lost after the firmware. It is advisable to create backups on an external memory card or computer.
- Next, we charge the phone / tablet to 100% (or at least 80%) so that the power does not disappear during the firmware process.
- In the settings, enable the "USB Debugging" option, which is available in the "For Developers" section. We make sure that the Samsung Keis application is not running. Otherwise, disable it through the "Device Manager".
It is worth noting that when installing official firmware through Odin, the chance of damage to the device is extremely low. Of course, if you follow all the instructions. Nevertheless, all actions are performed at your own peril and risk, so if you are not sure about the final result, it is better to take your device to a service center. Next, let's move on to the firmware process.
Firmware process
As an example, we will describe how the Samsung Galaxy firmware should go through Odin. The algorithm is as follows:
- First of all, download the official firmware for your device on your computer.
- Next, enable boot mode on the device. As a rule, in Samsung devices it starts up by pressing the following key combination: Power (Turn on / off the device) + Volume Down (volume down key). After confirming the action by pressing the Volume Up button (increase volume). Be sure to press the keys at the same time.
- Next, run the Odin program on the PC and make sure that the Auto Reboot and Reset Time options are checked. This is extremely important.
- We connect the phone or tablet to the PC via the USB cable. After detecting your device, the program will change the color of one of the ID: COM windows.
- Next, click the PDA button, located in the Odin program interface, and select the .tar or .md5 file.
- Click on START, after which the firmware process starts. Disconnecting your device from the PC during installation is strictly prohibited.
- As soon as your device successfully passes the firmware process, an automatic reboot will occur. At this point, you can remove the cable from the PC and start using the device. As you can see, everything is very simple.
This manual for firmware via Odin is the most common. If you adhere to all points, you will succeed!
Creating Root Access to Samsung Galaxy Note 2 Phones
If you need to open the "superuser" mode, then Odin and SF-Autoroot programs can help. So, we follow this algorithm of actions:
- Download SF-Autoroot for a specific phone model, which can be found in the "About Phone" settings menu item. The files themselves can be easily found on the Internet. If you can’t find the file for a particular model, it’s better to leave everything in stock mode, because other actions can harm the device.
- Download Odin and install USB drivers for the phone.
- Turn off the Galaxy Note 2 and put it into boot mode. It turns on by simultaneously pressing 3 buttons: Volume Down + Home + Power. Then, to confirm the actions, press Volume Up and connect the device to the PC.
- In Odin, click on the PDA button, where we select the necessary file with the extension tar.md5. After we tick off the Auto Reboot and F. Reset Time options. We make sure that no other functions are checked.
- Click "Start" and wait for the end of the installation.

As you can see, firmware via Odin is not the only advantage of this program. If you do everything wisely and according to the instructions, the application will be a great help for device owners from Samsung.